For those of you that follow this blog regularly, I am sure you are not surprised to see this post. Every Halloween my daughter comes up with costumes that are from some under ground, cult character from books, video games or shows. Most of these characters’ costumess you cannot buy at your local store, you have to get pretty creative to make them. This year we are in the middle of making a costume from a very underground video game called “OFF”. This post was our project last year. If you have a quirky creative kid who perhaps wants to be GIR for Halloween, you have come to the right place.
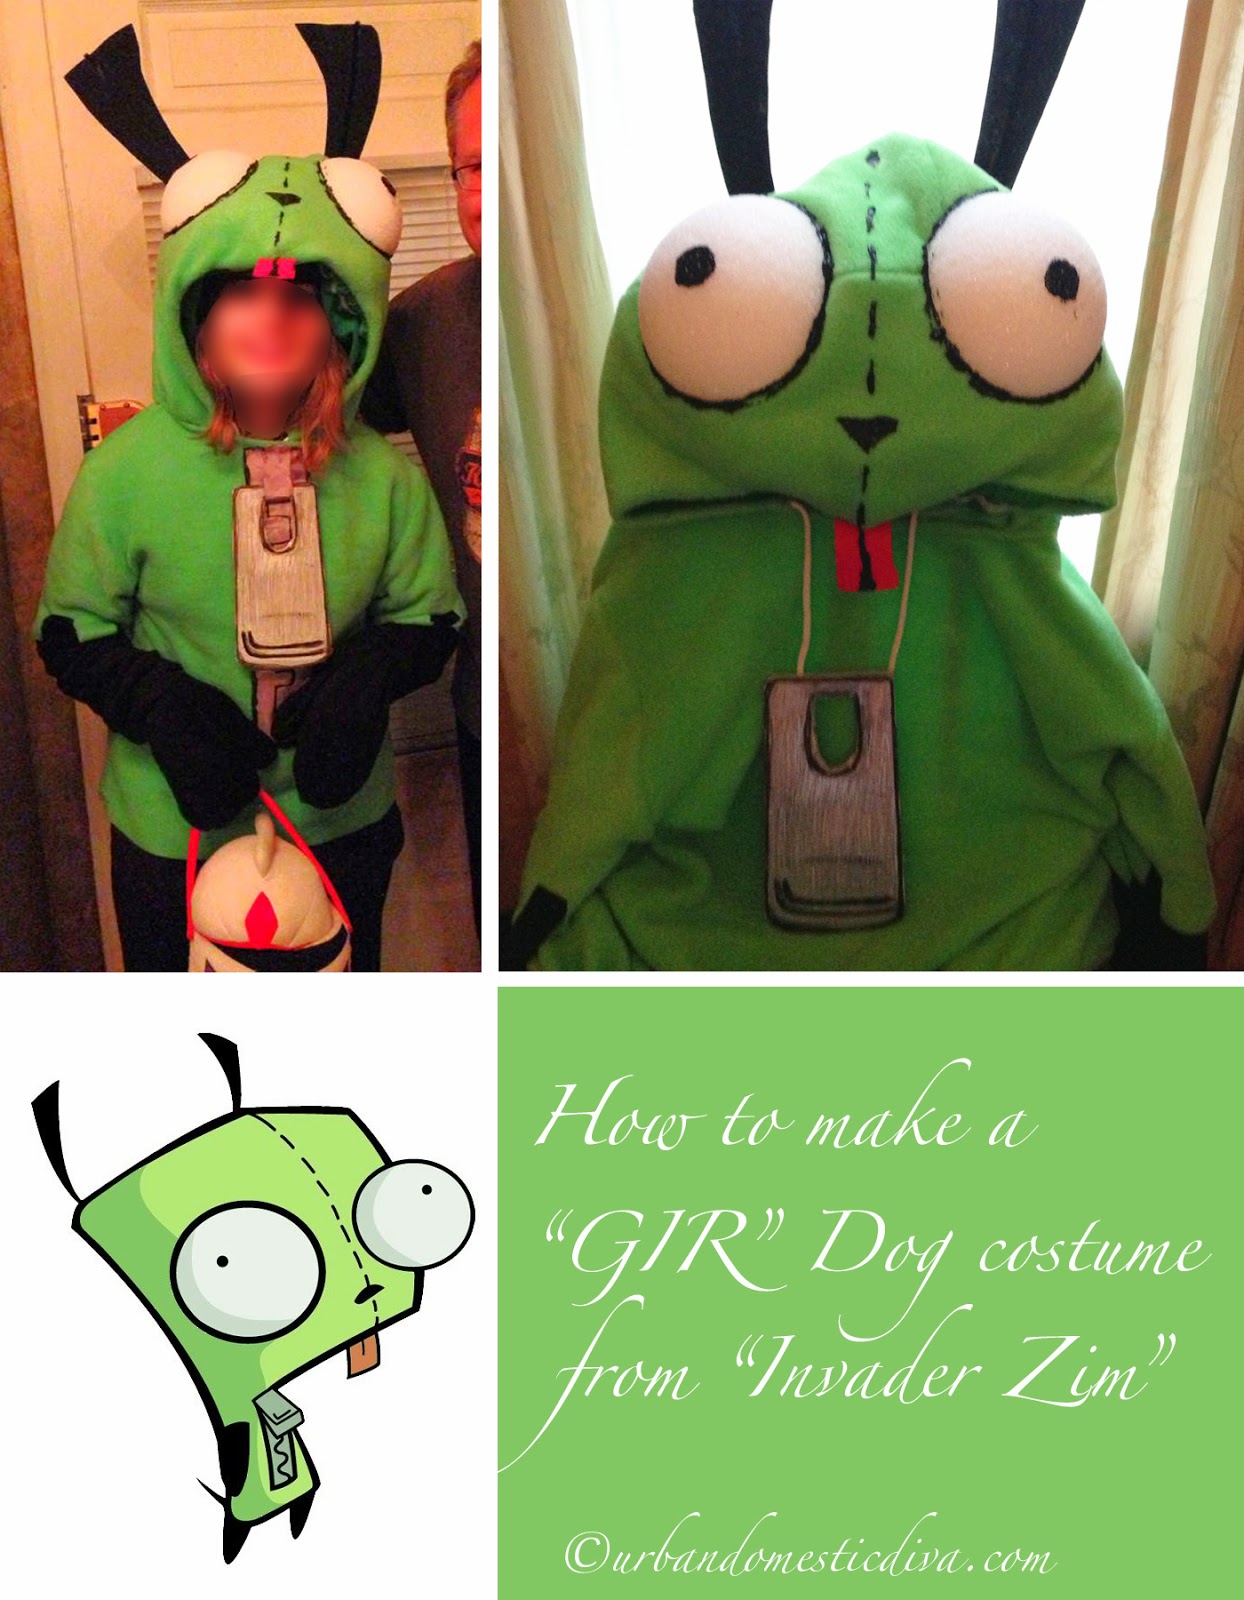
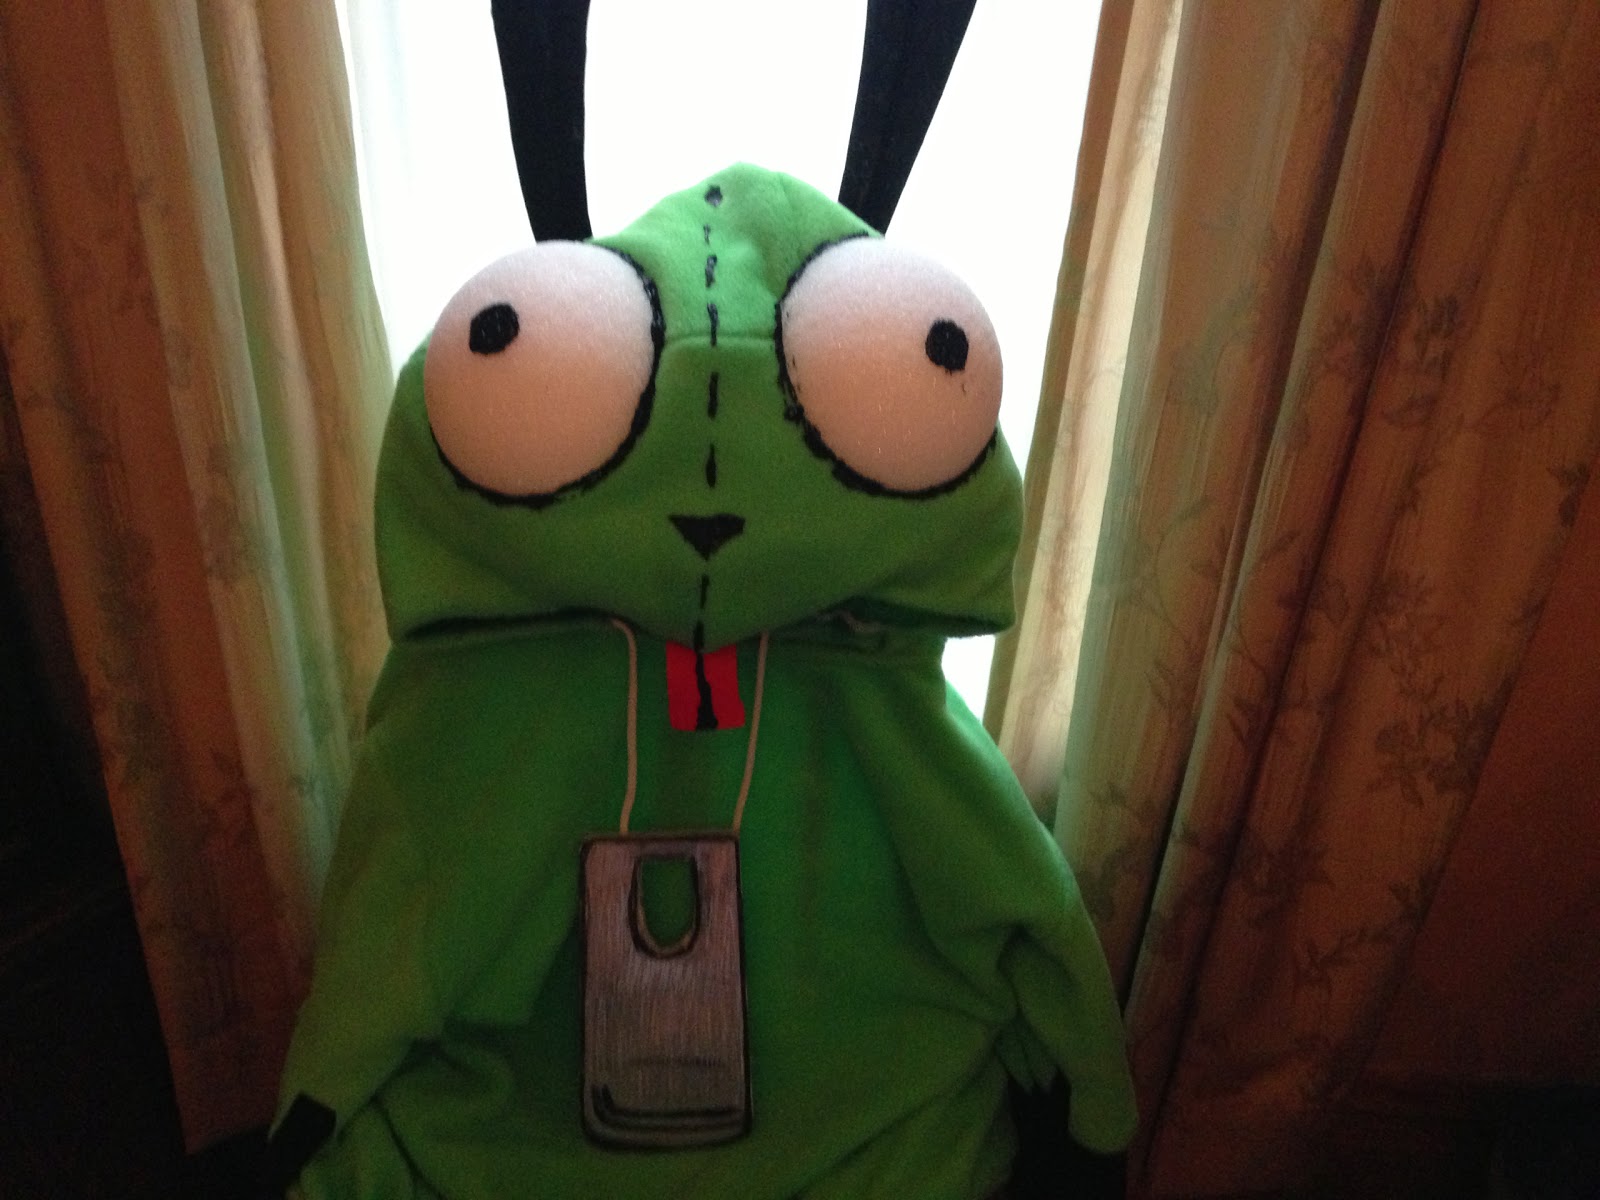
GIR from Invader Zim is about as cult-y as you can get. This weird little character is pretty cute and silly (he is a robot who disguises himself as a dog among humans, so making a costume of a costume is pretty meta). His costume consists of big bulging eyes, a pink tongue, a giant zipper and black arms and legs. As there is no pattern out there for this, I had to use a giant sweater dress to use as a pattern, and used images from the show as reference. I also had an old pattern kit for a giant rabbit costume that I used for the hood, the mittens and the spats. So if you aren’t confident to do those by eye, grab a cheap pattern from the sewing shop that contains those pieces, and the rest you can use a big sweater of sweatshirt as a pattern. I originally had planned to make the green top be as long as GIR wears it, but my daughter thought it was too long and made her look like a barge. So we hemmed it up a few nights before Halloween. You can make yours as long or as short as your little GIR wants, but it does seem that the original GIR wears it almost to just above his knee. But who can say? I mean, he’s a robot dressing up as a dog. SO your guess is as good as mine.
What else will you need?
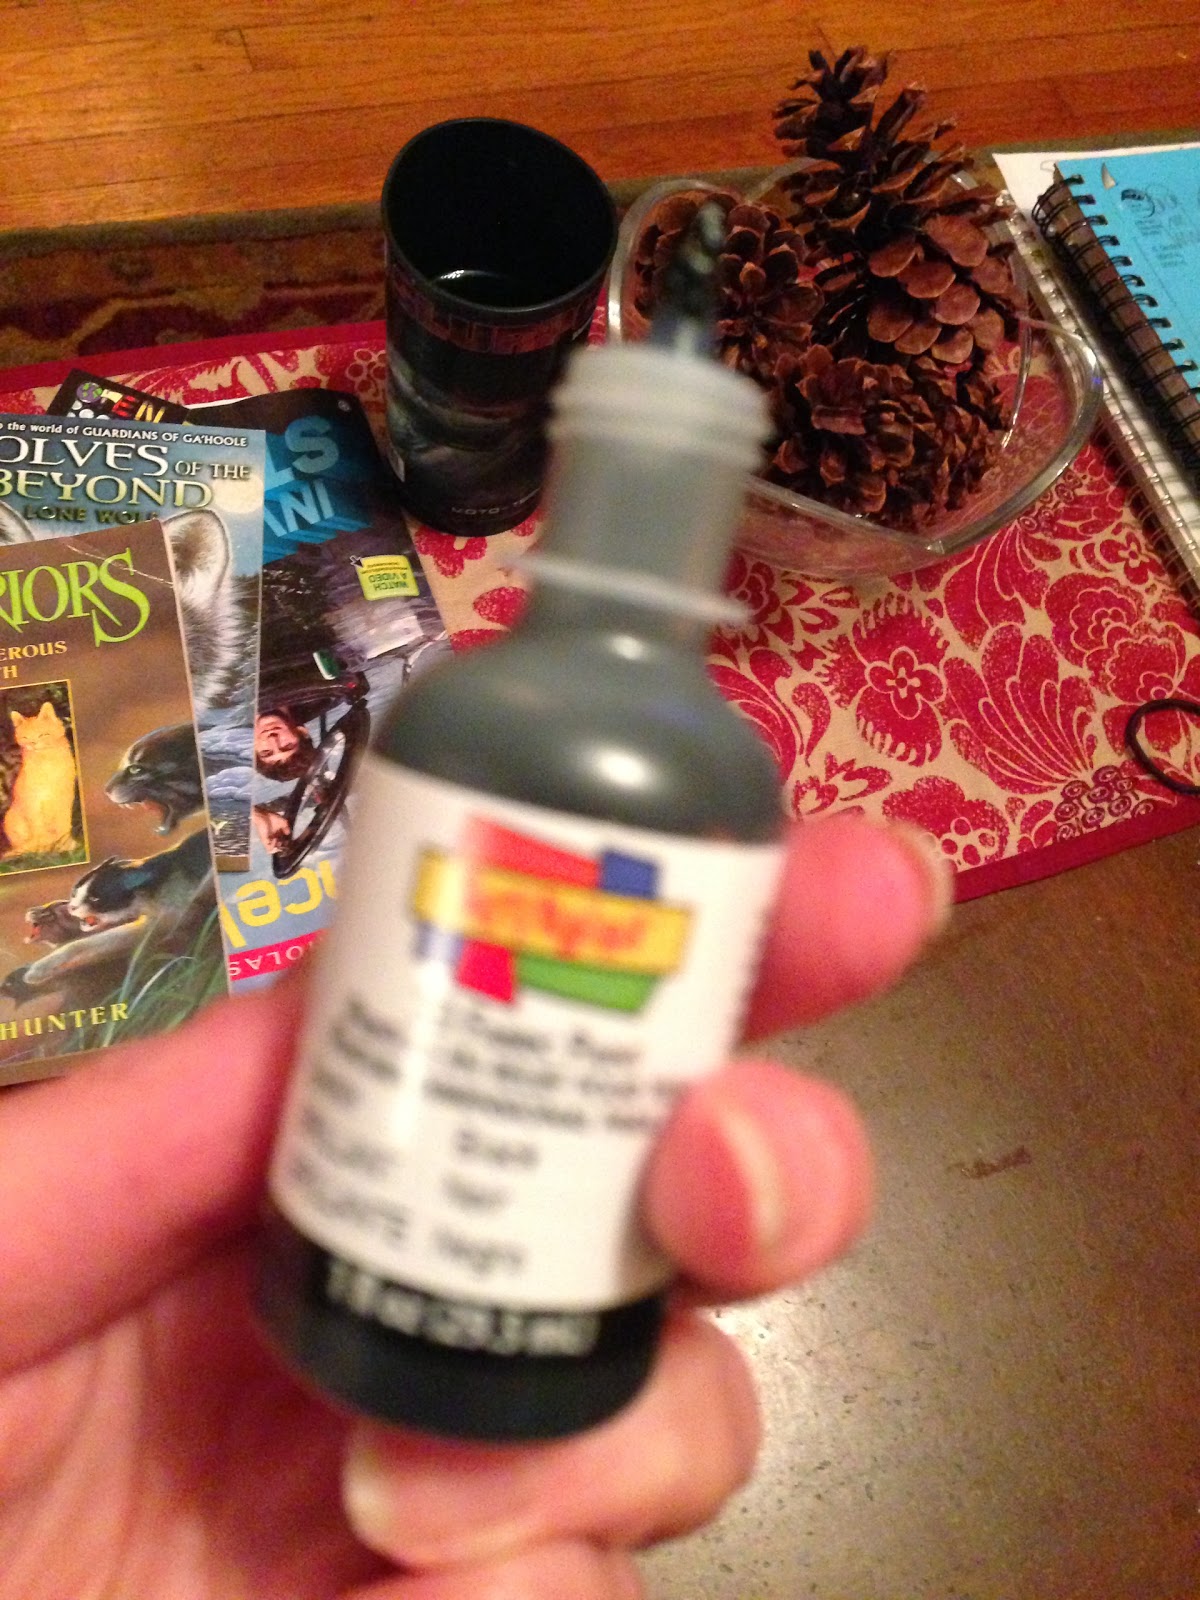
Black fabric puffy paint
2-3 yards of green fleece
1-2 yards of black fleece
thread and sewing tools (pins, green and black thread, needle or a sewing machine, scissors)
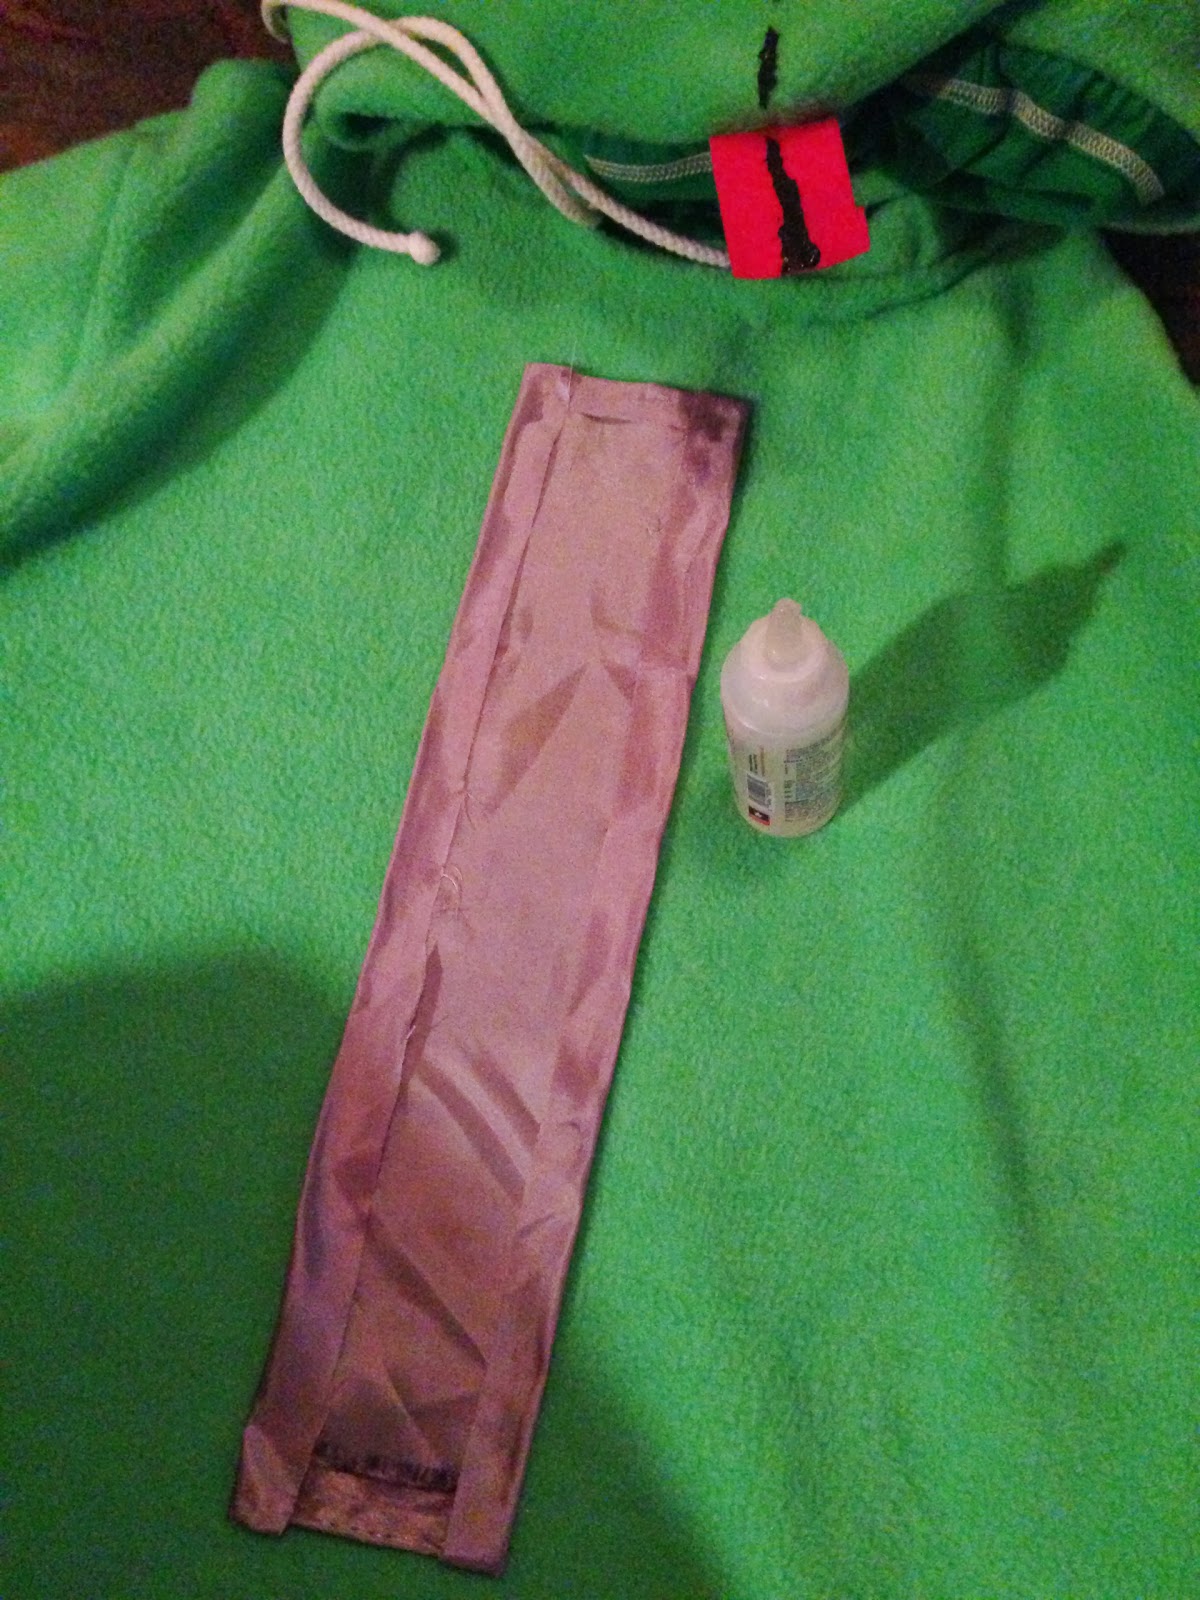
Silver metallic or grey shiny fabric remnant for the zipper
foam board, black sharpie and silver metallic marker
fabric glue
white china marker or seamstress chalk
a Styrofoam ball (white) cut in half
a small bag of poly fill
2 stiff black felt squares
2 black pipe cleaners
1 pink felt square
a green hoodie with string from the thrift store that you will cut up
1/4″ elastic for the mittens and the spats
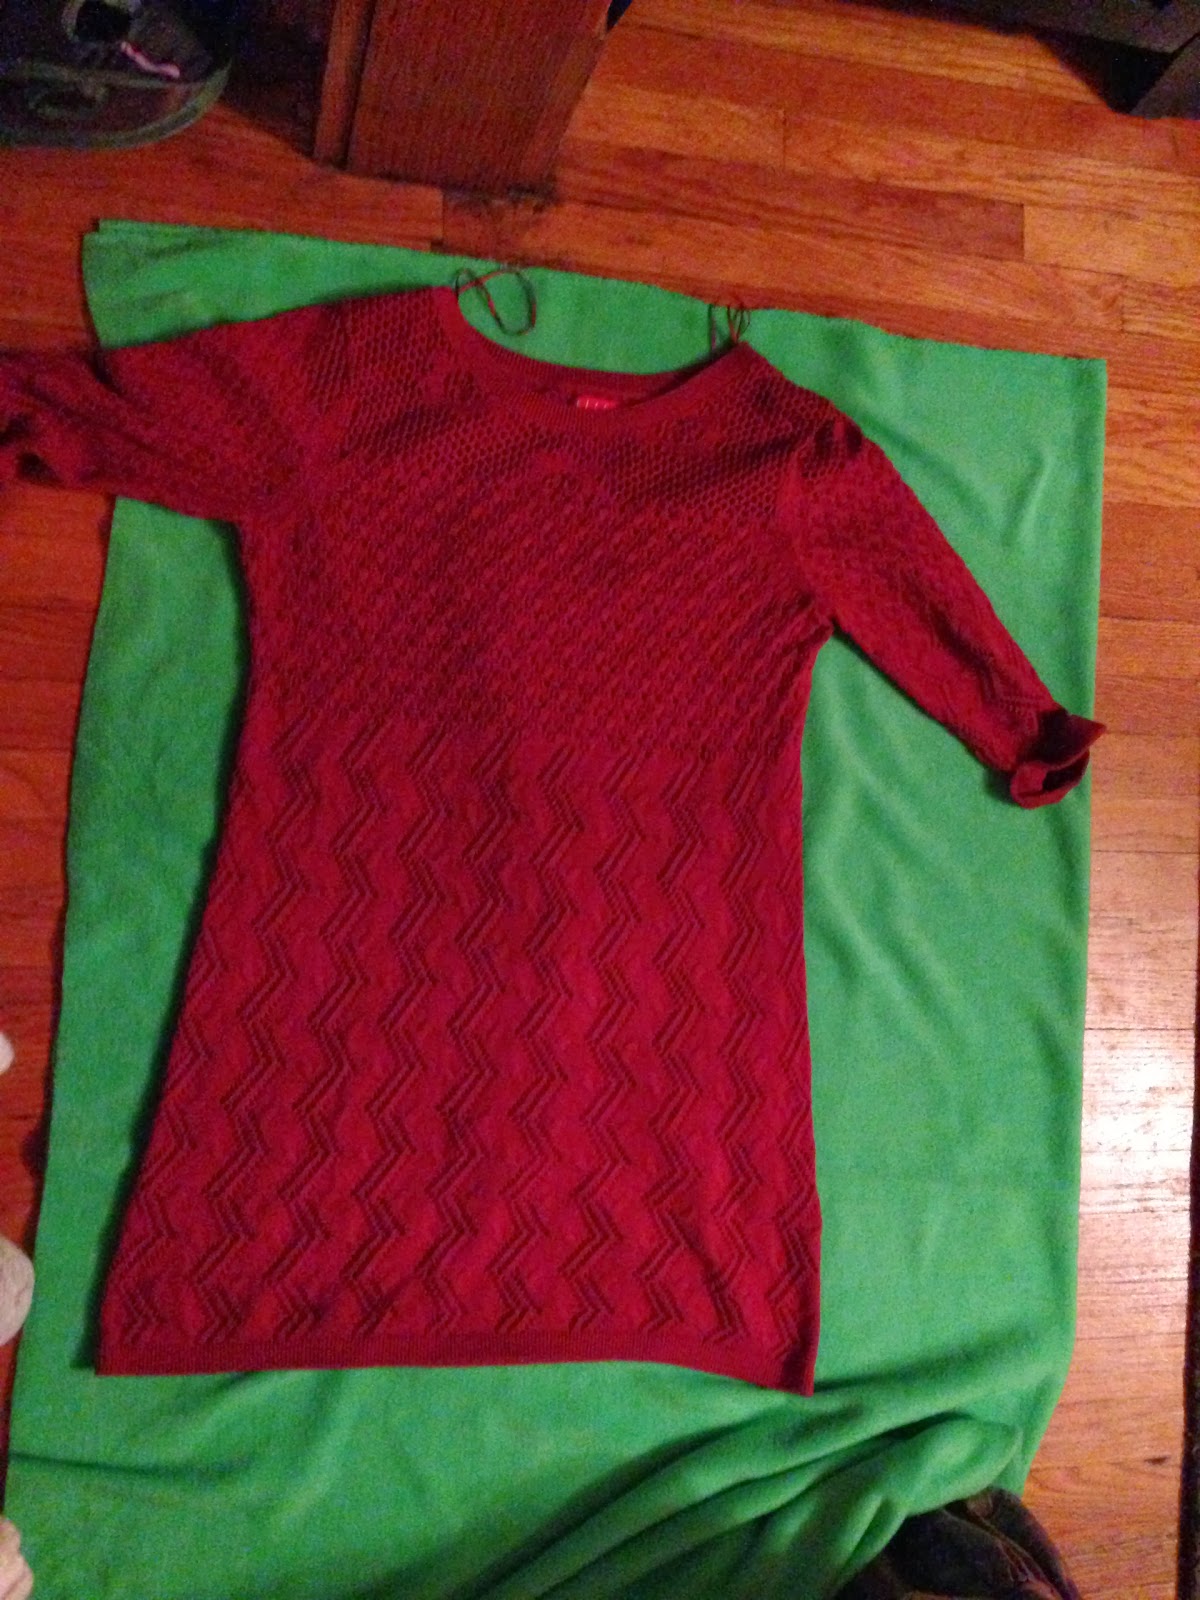
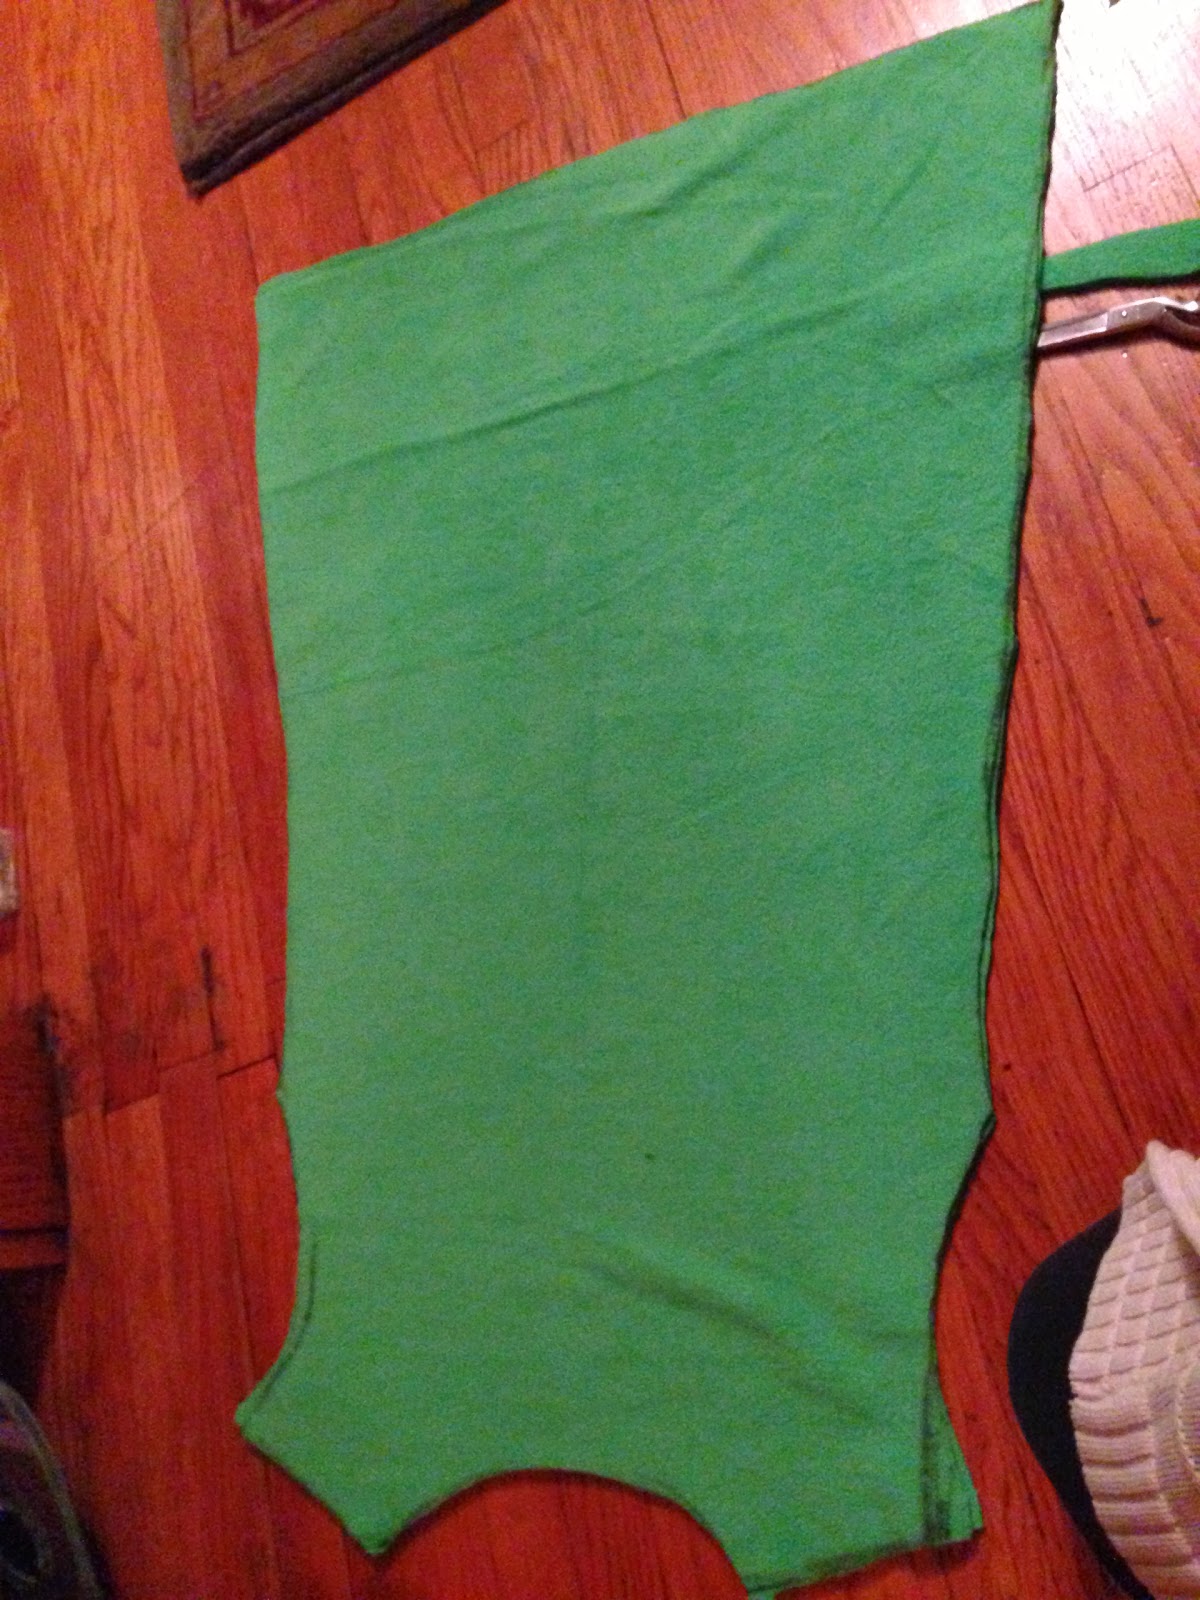
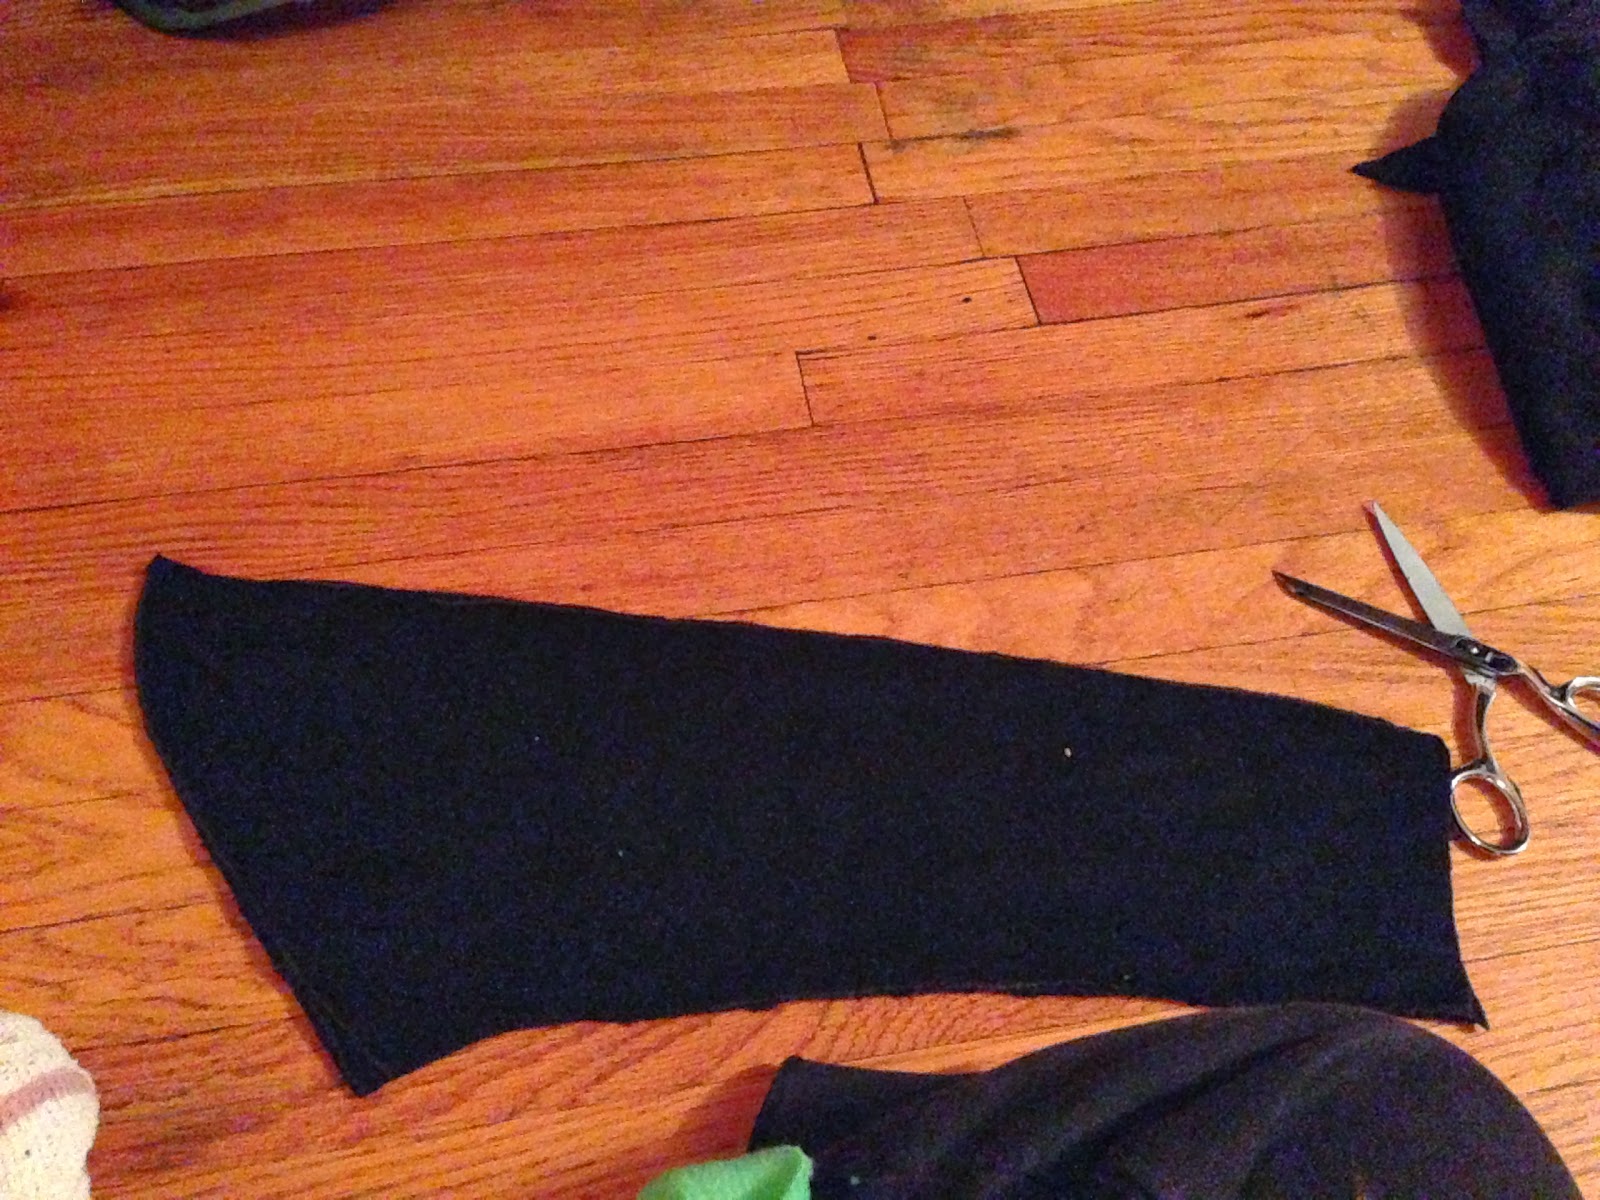
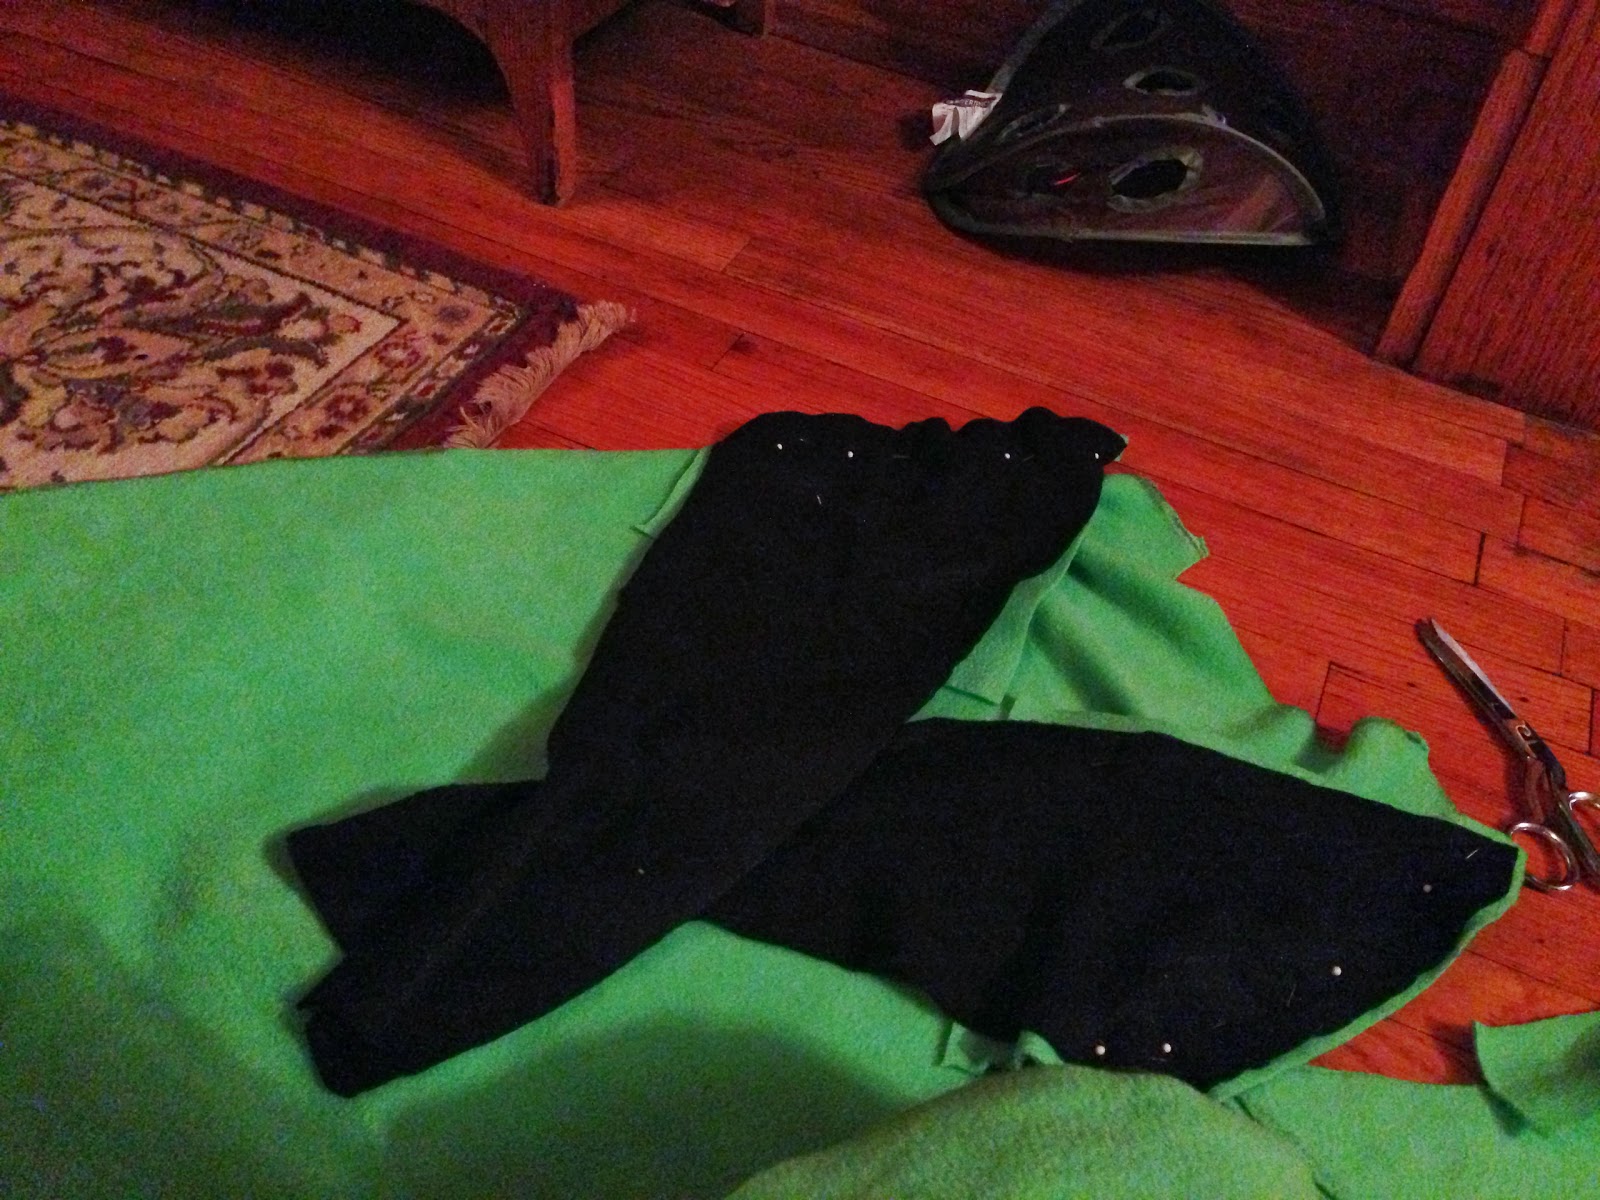
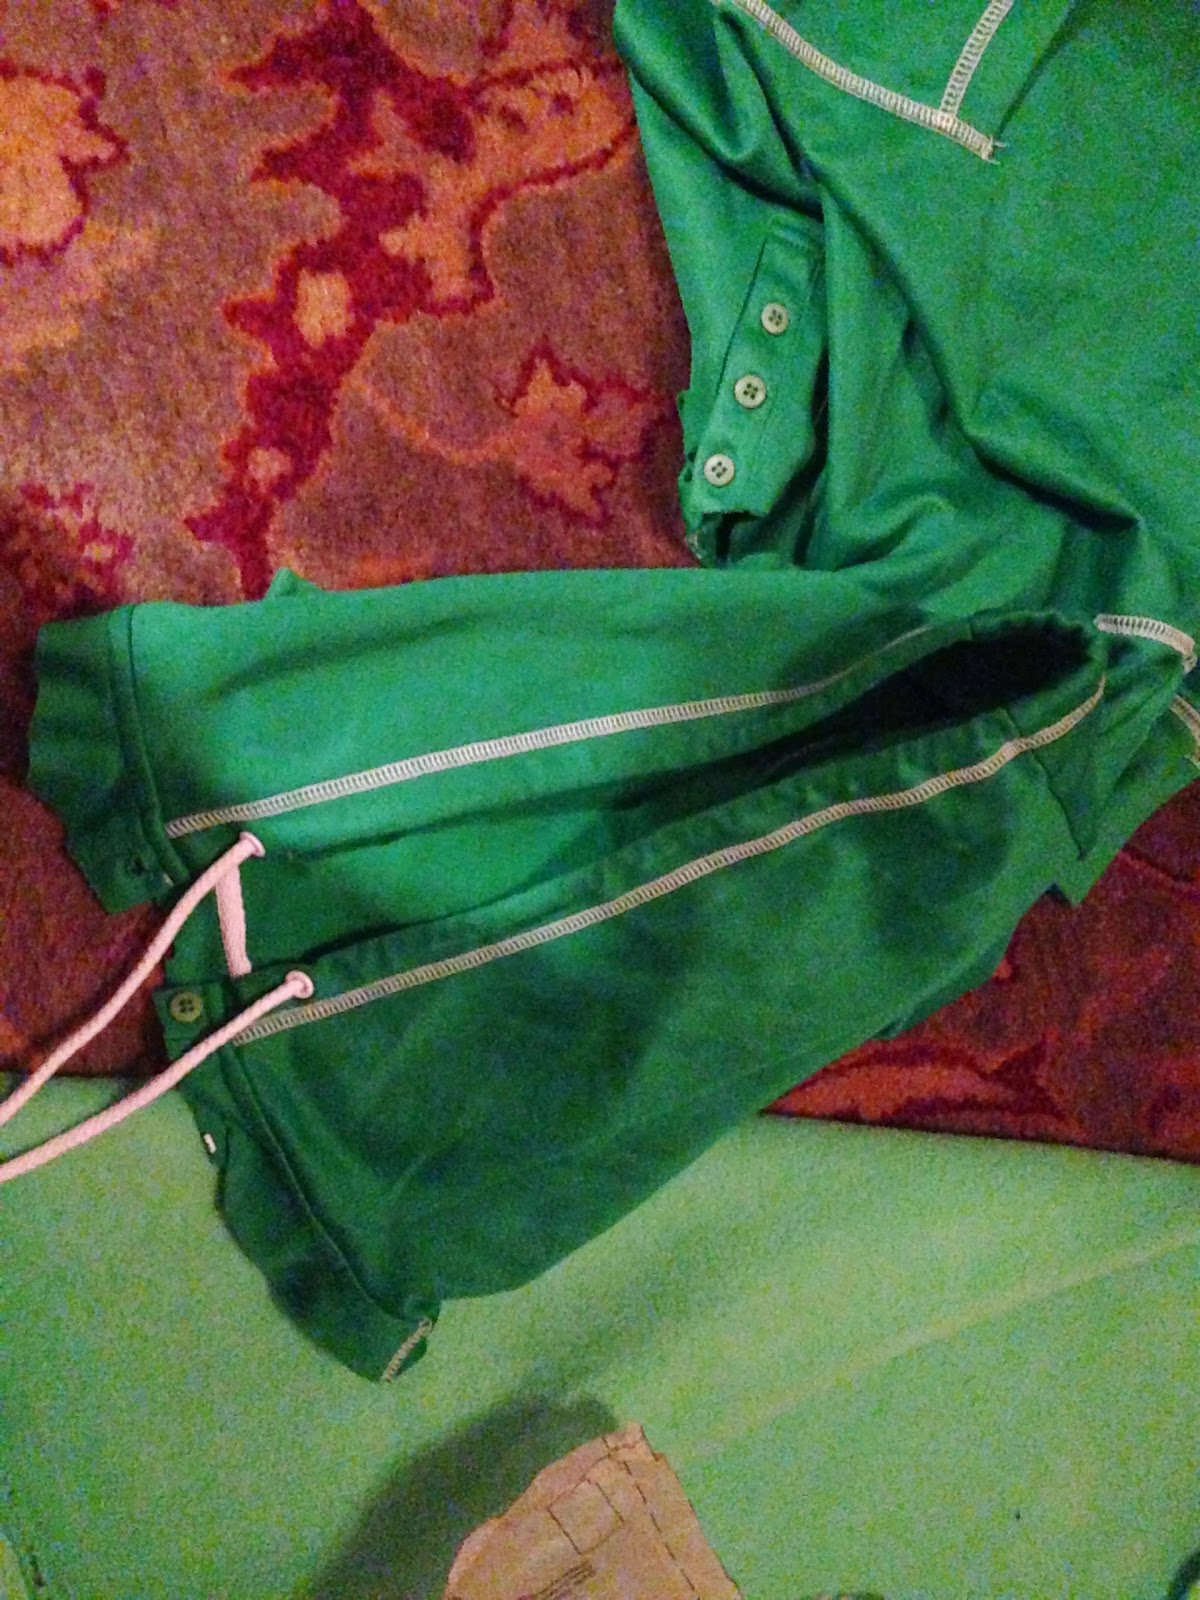
1: Lay your green fleece down, wrong side out, and make sure it is folded so you have a front and back once you are done. Lay your pattern guide over it. You see I am using that large sweater dress as my guide, I checked to make sure it would fit my daughter. Cut around with a 1/2 seam allowance around the whole thing, and only cut the bodice. The sleeves you will use black fleece. I used a sharpie to draw then I cut, knowing I was drawing on the wrong side it wouldn’t matter.
2: Next, use the sleeves of whatever you are using as your pattern, and draw and cut sleeves. Double up your fleece so you have front and backs, wrong side out. Make two. Allow for a 1/2 seam allowance.
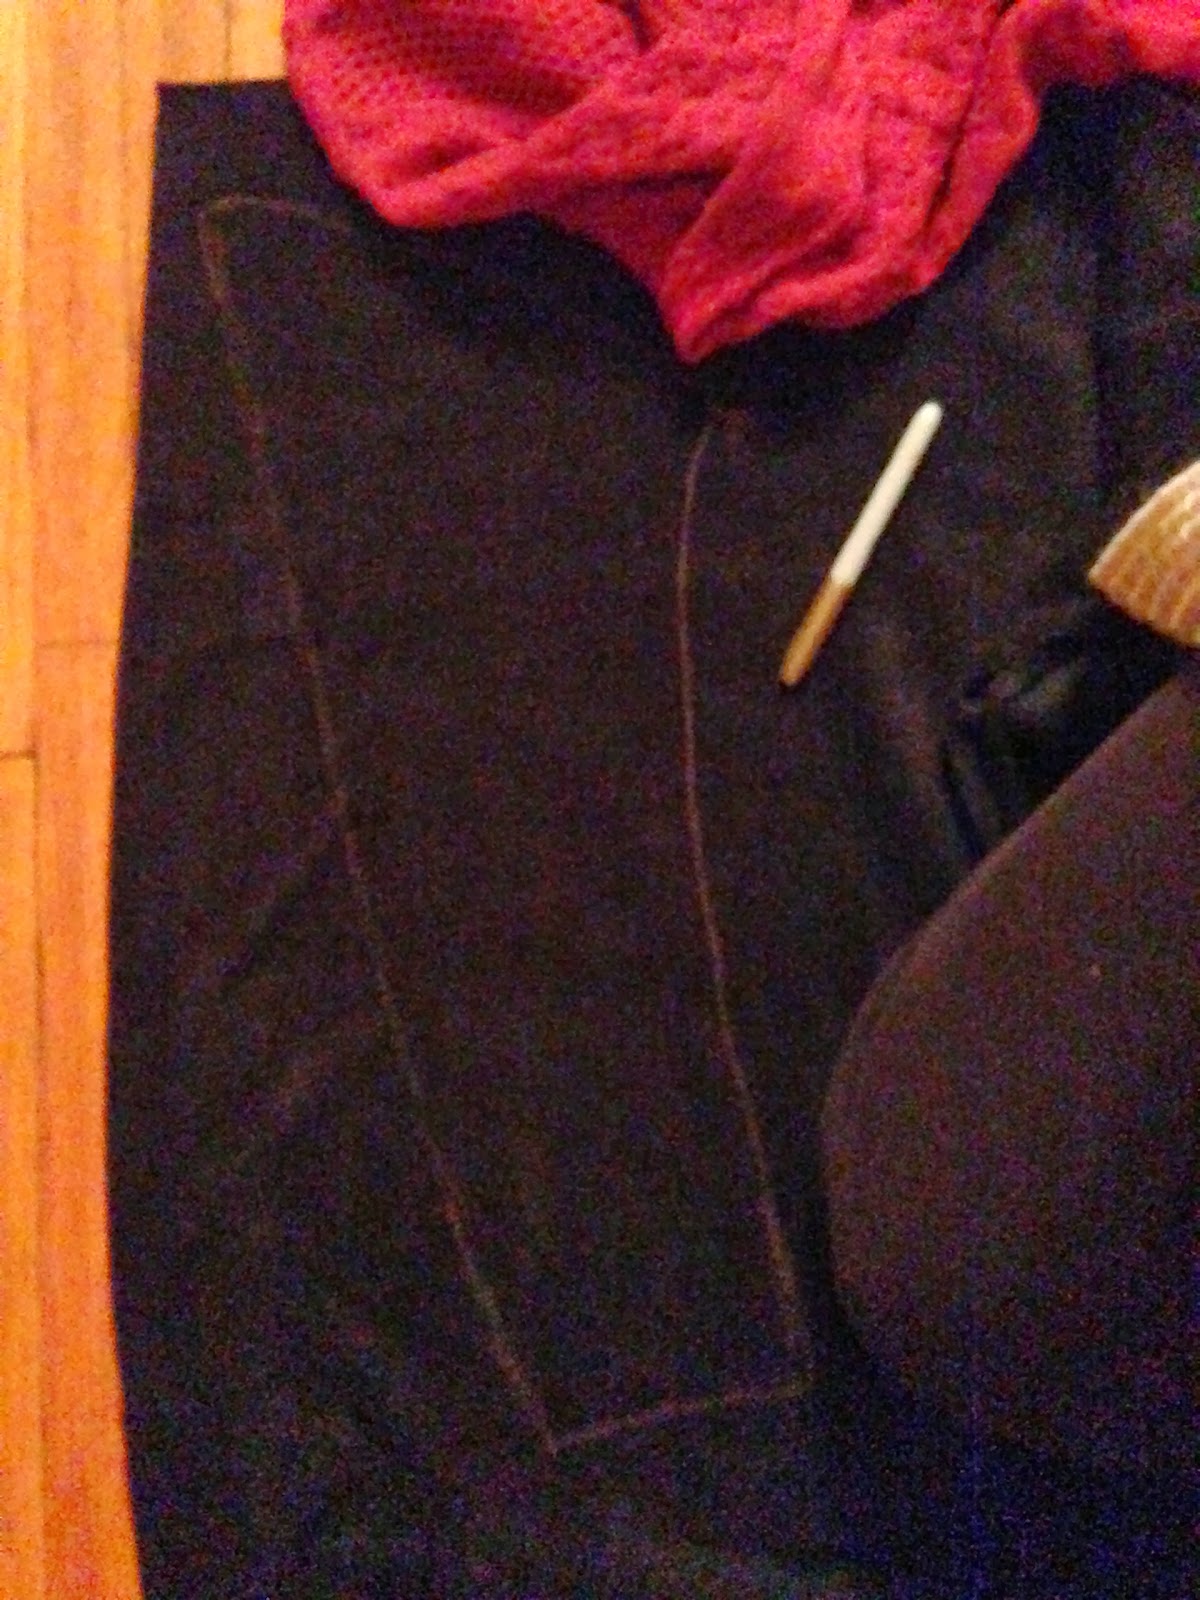
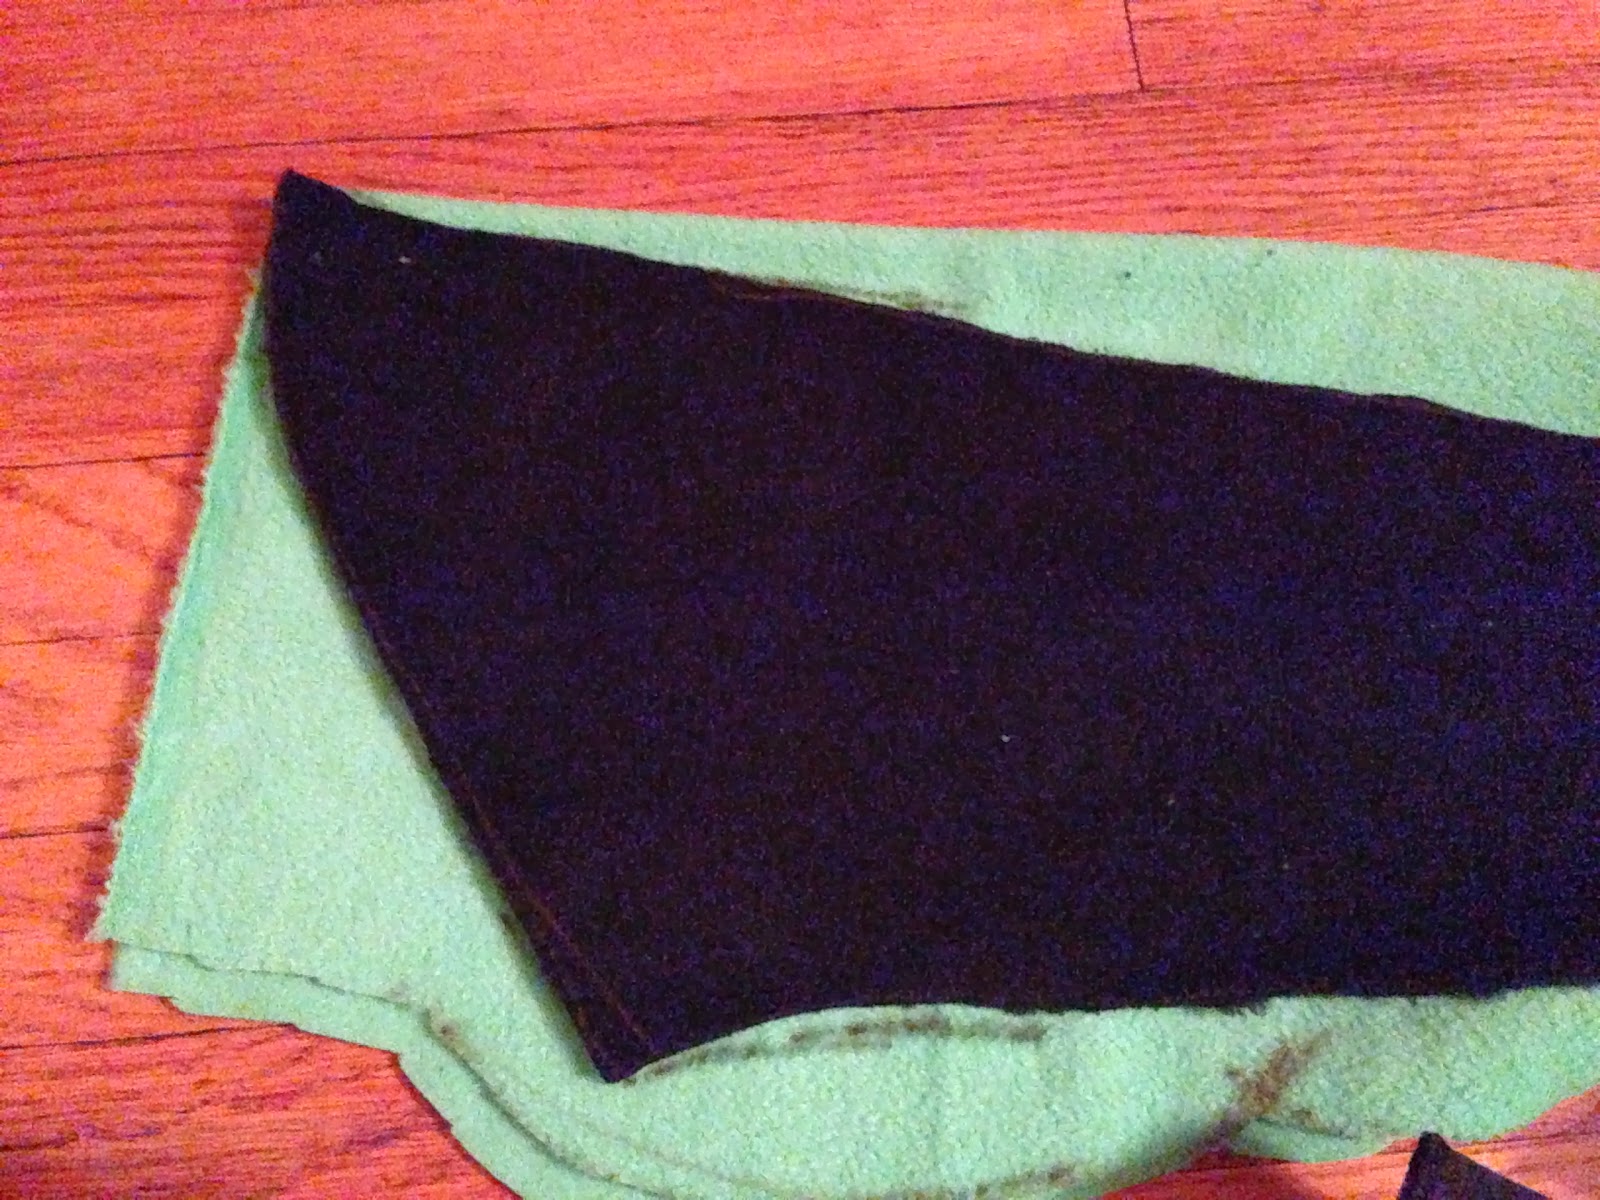
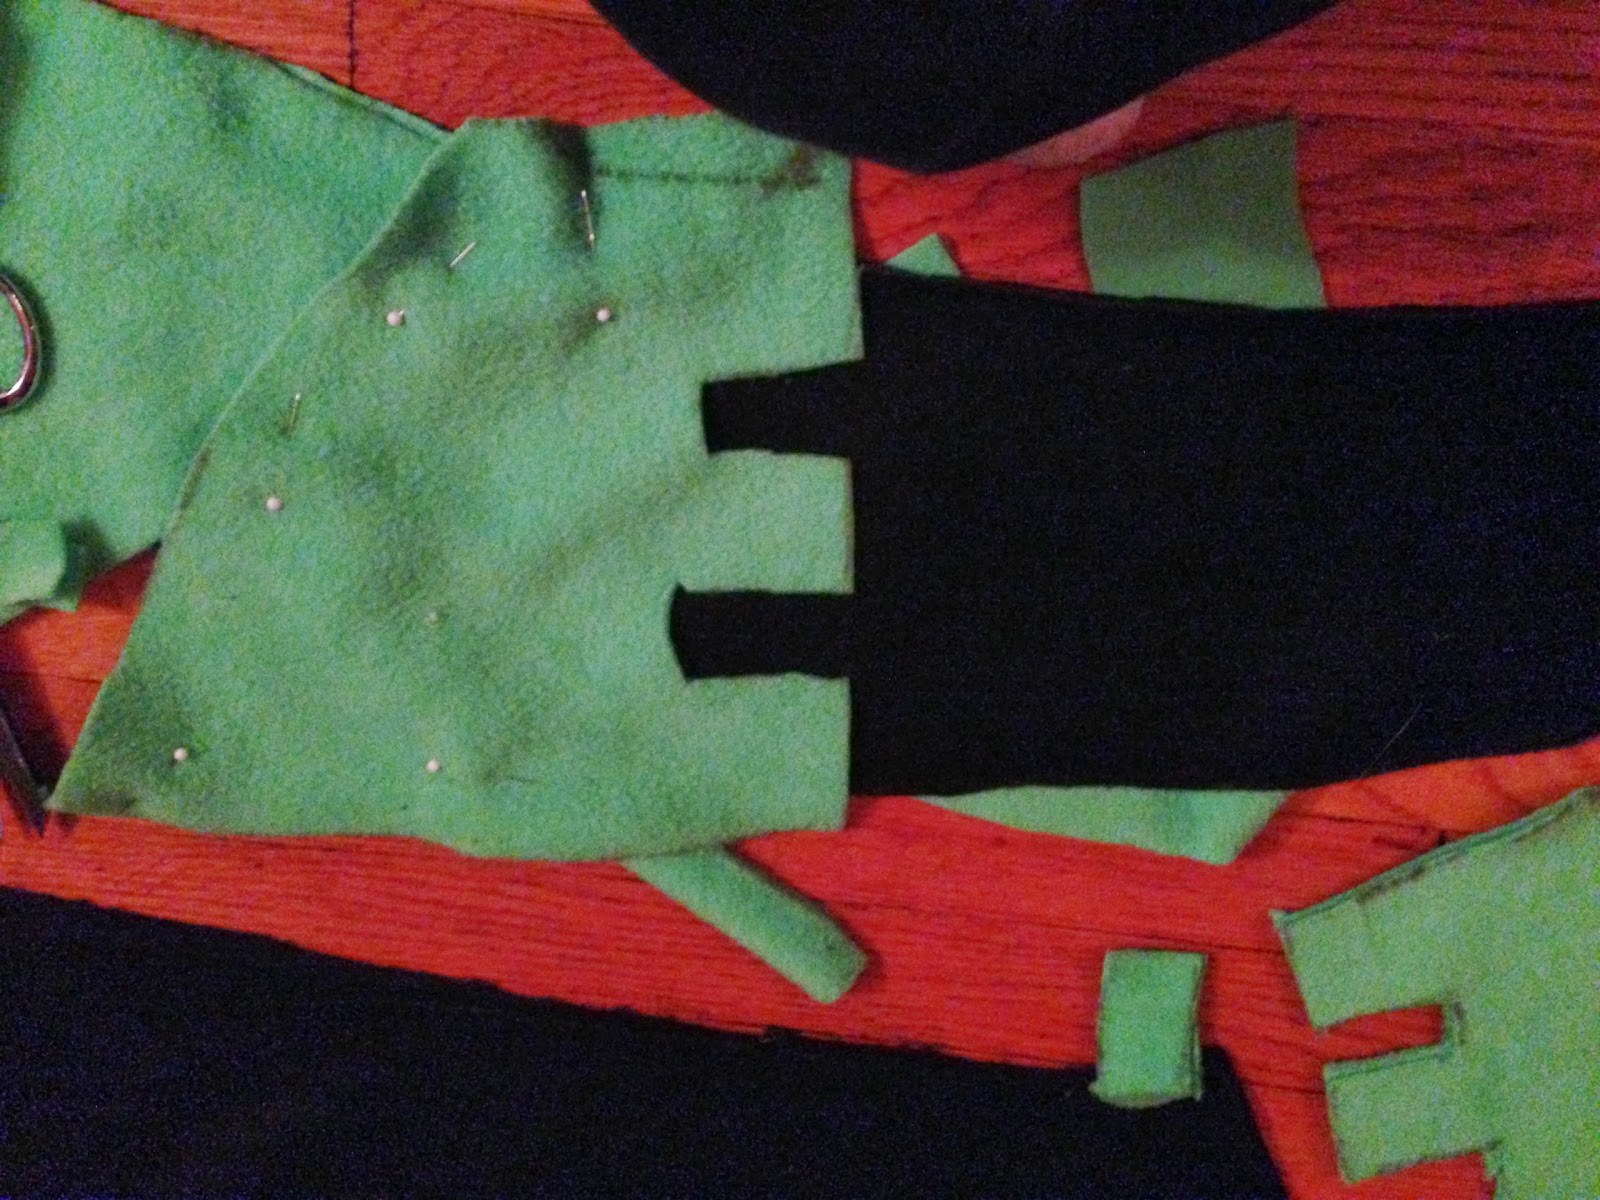
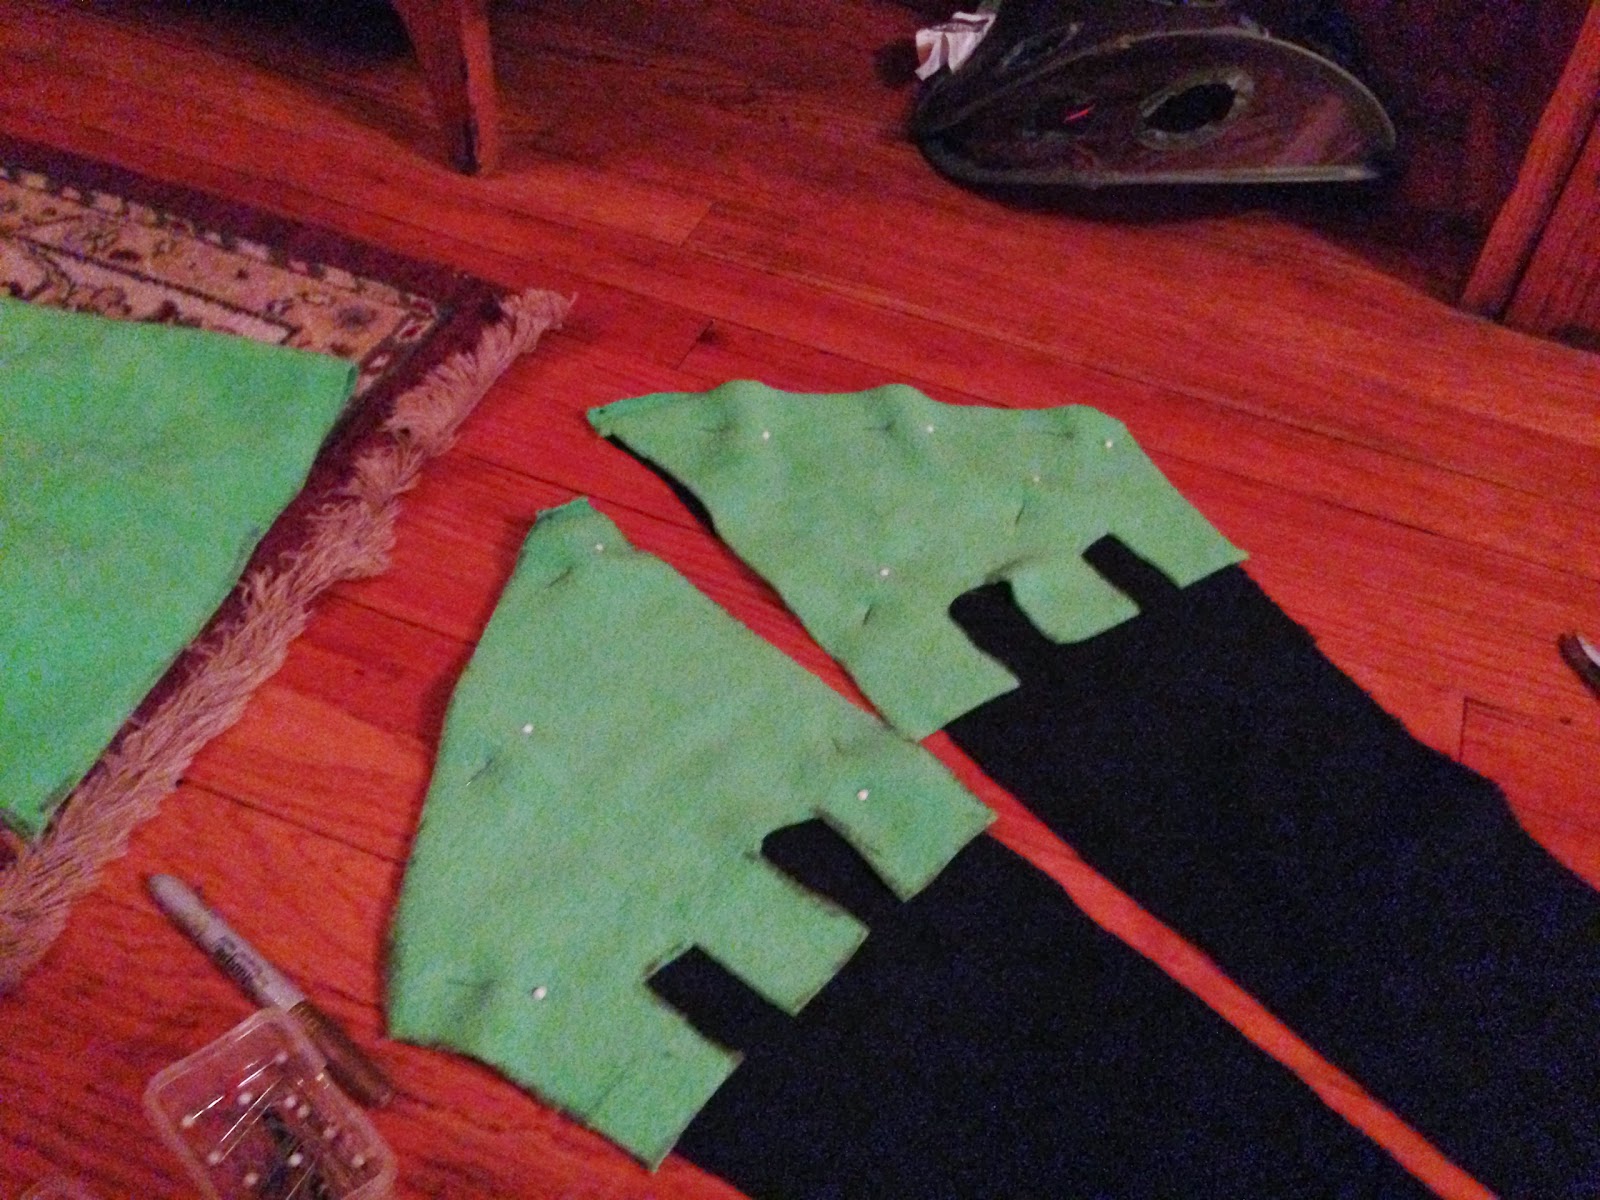
3: Now GIR has these notched sleeve caps on him, so I took my black sleeves, laid them on green, wrong side out, and drew and cut these by eye. Then I laid the prepped and cut caps on top of the black, right side up and pinned them on the front sleeves only.
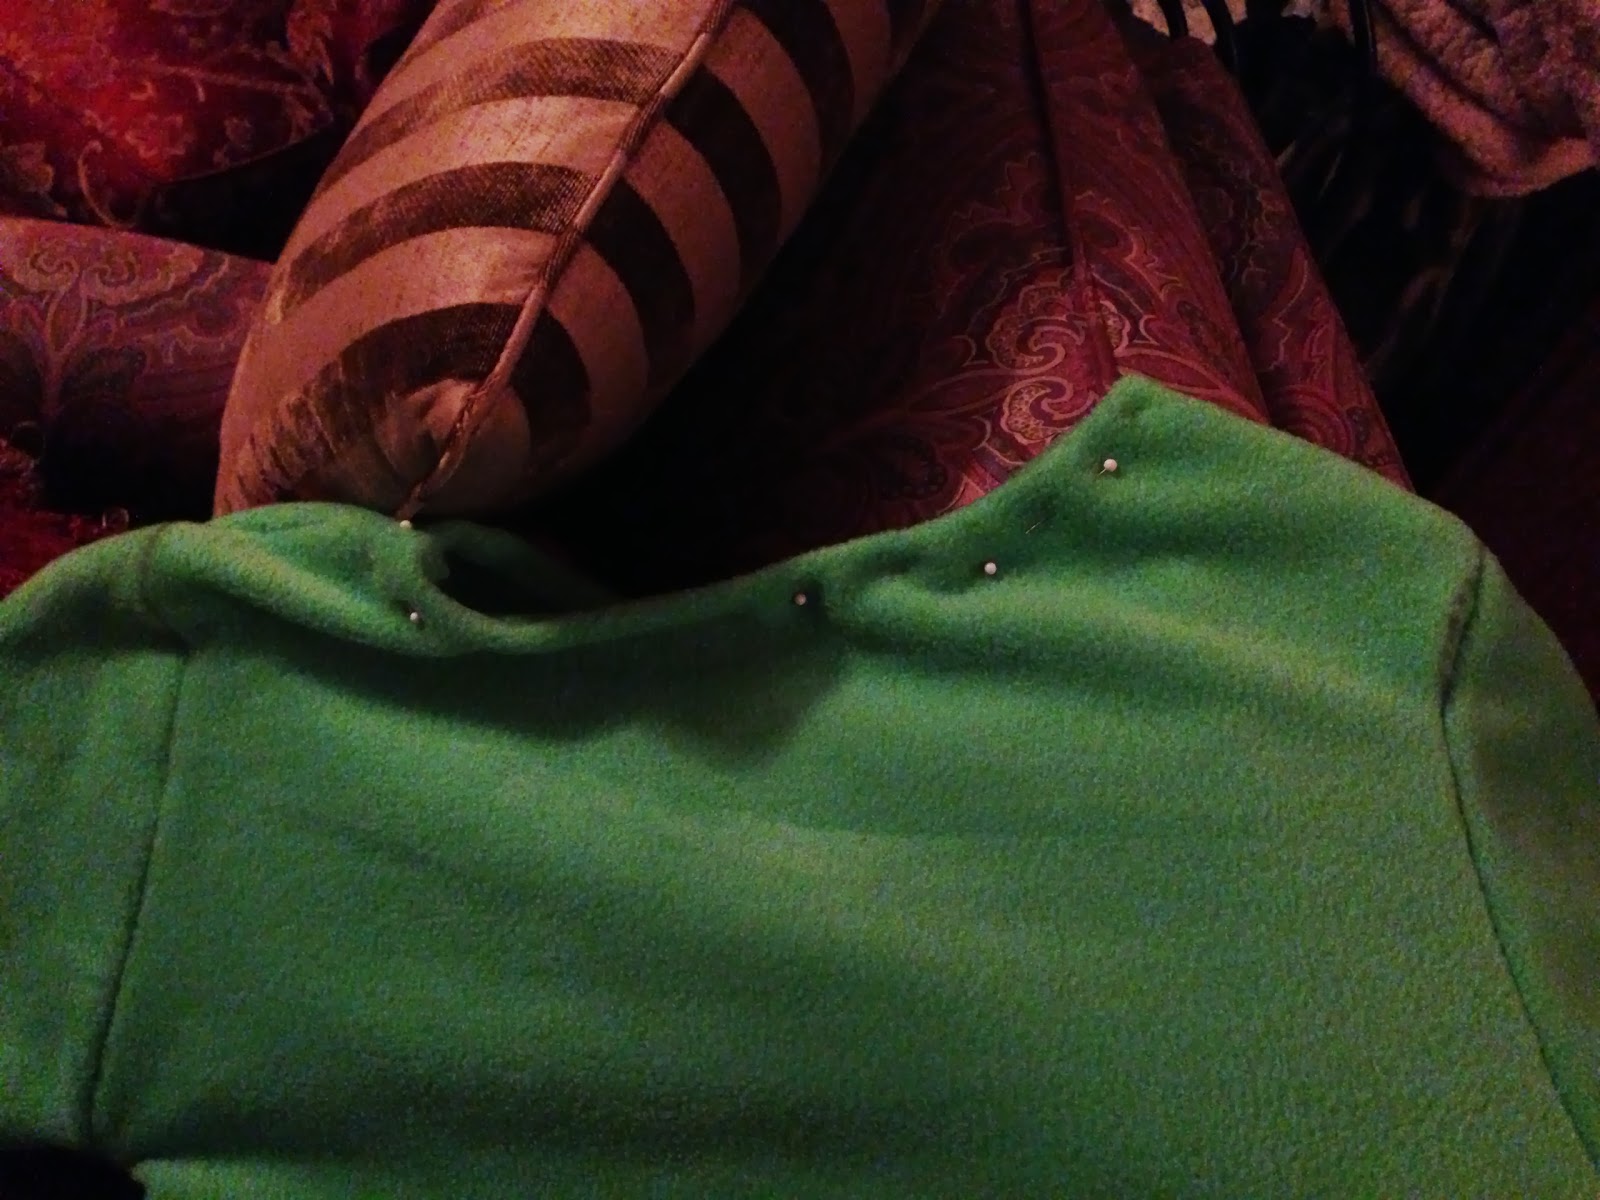
4: Now working inside out, I pinned everything together, sleeves to bodice, and bodice front and back along the sides. Then I ran it all under the sewing machine using green thread.
5: Then I took the neckline and pinned it down for a seam.
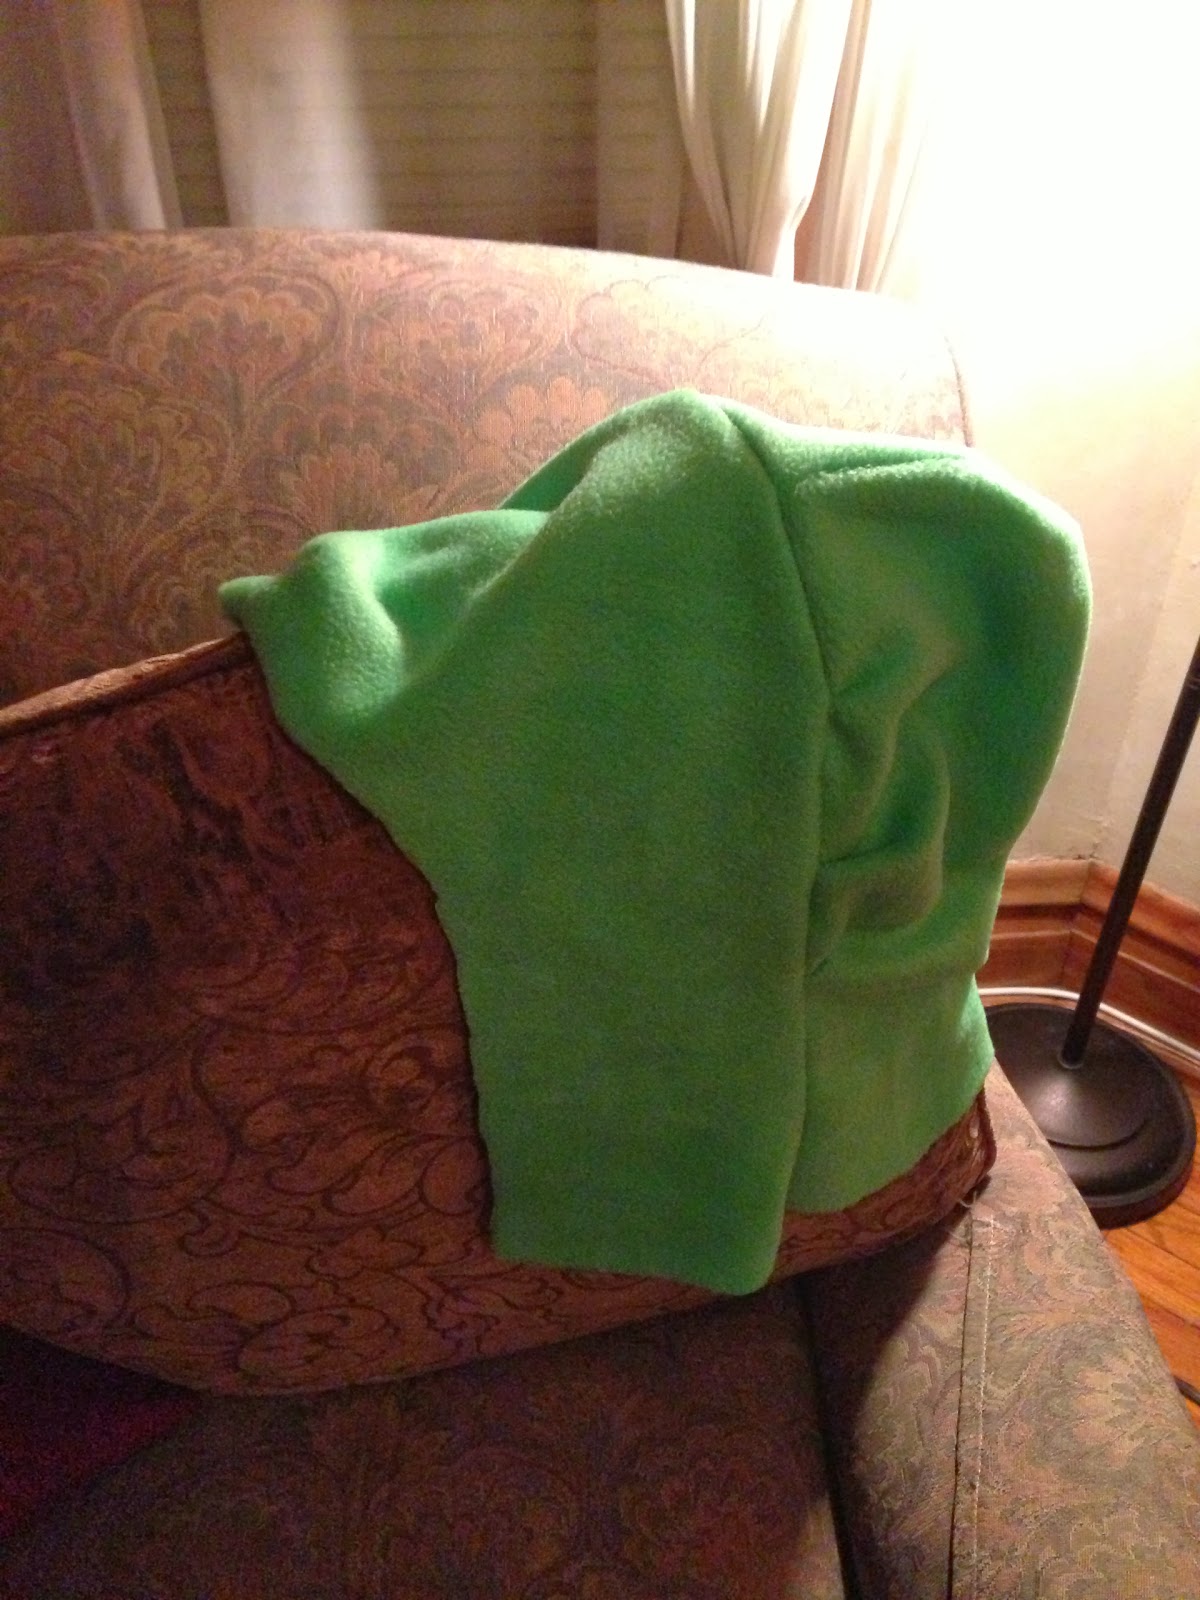
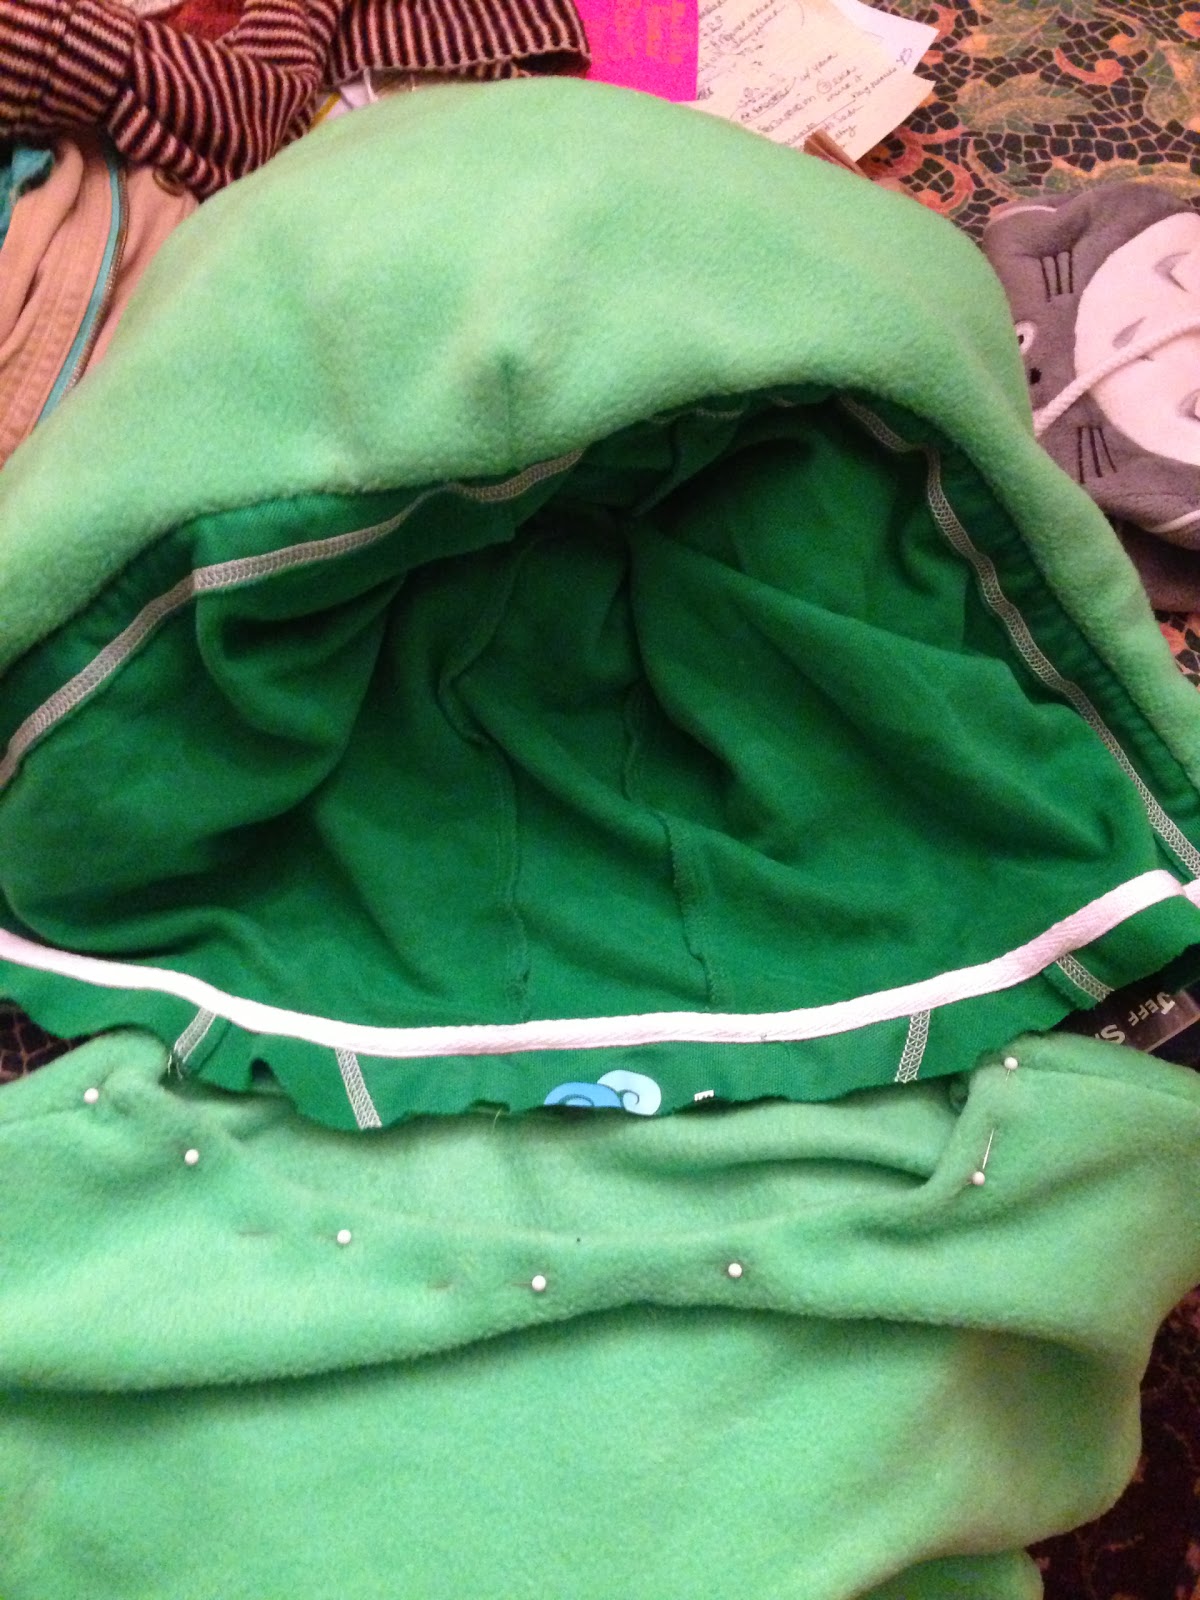
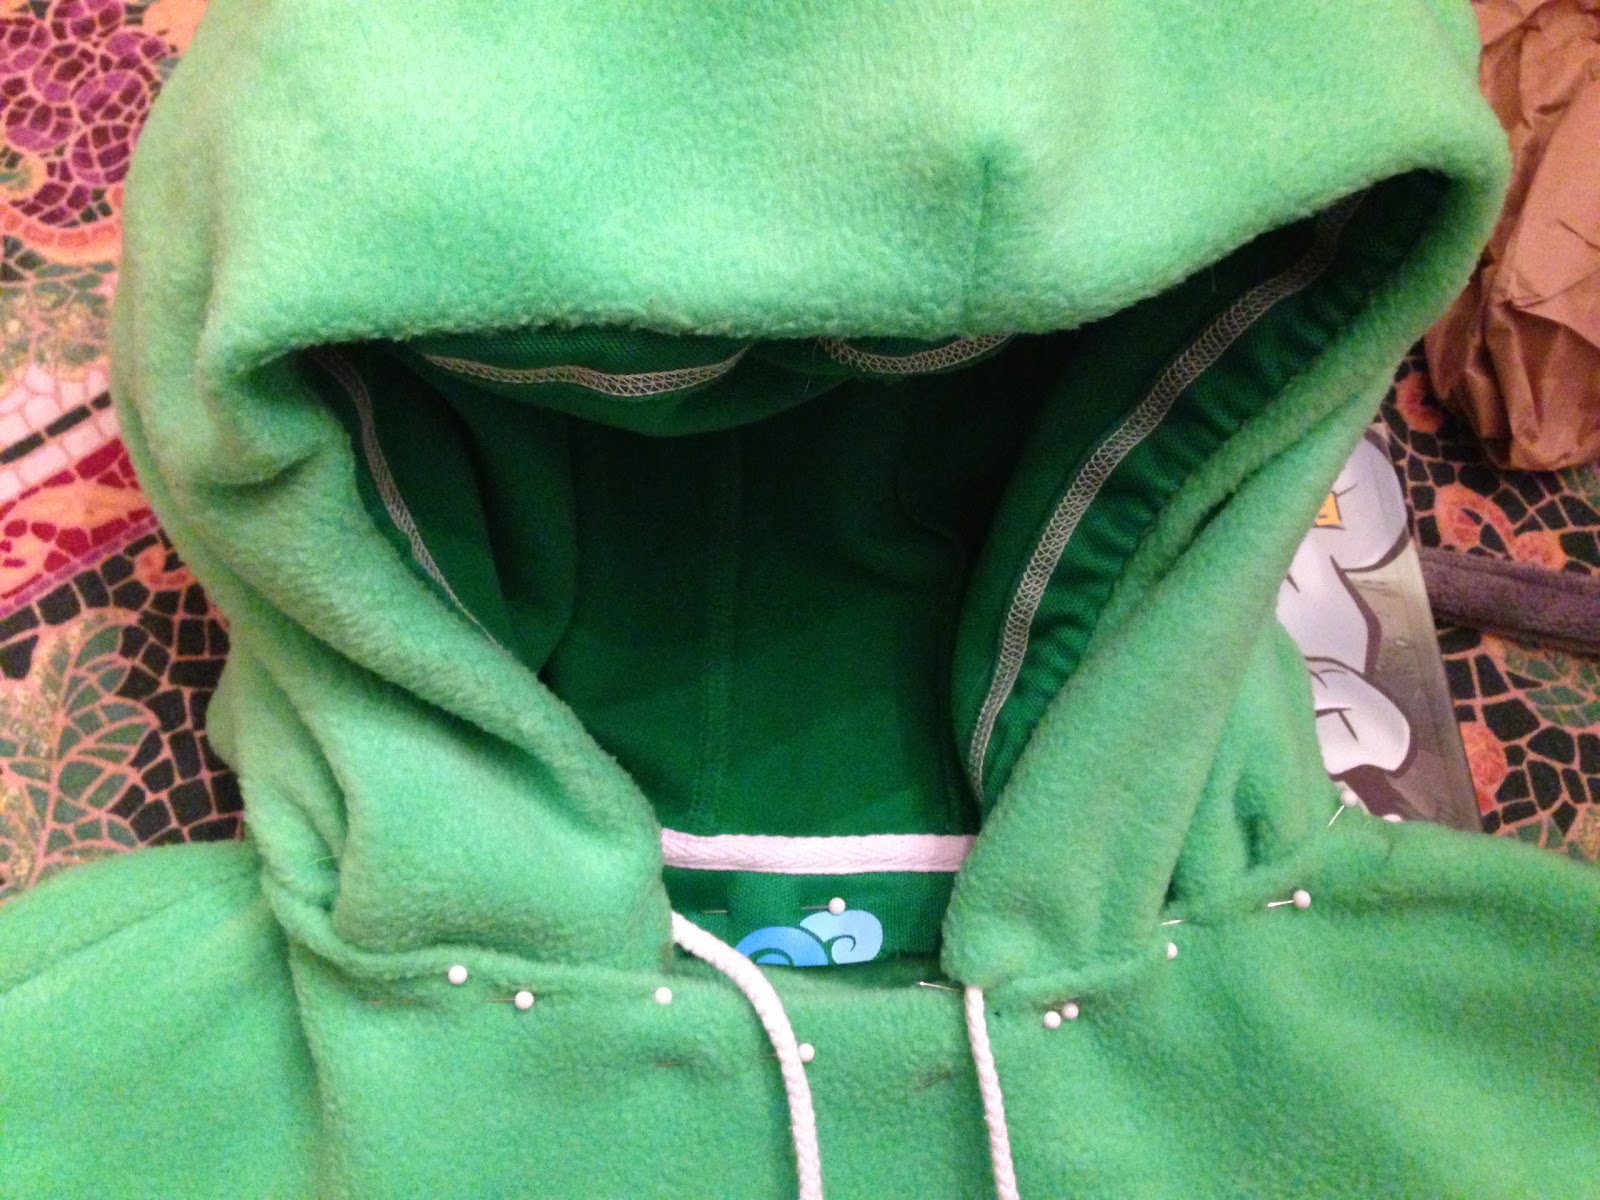
6: Then I used my hood pattern pieces to cut the top part of the hood. I pinned it inside out, sewed the seams inside out and flipped it right side up.
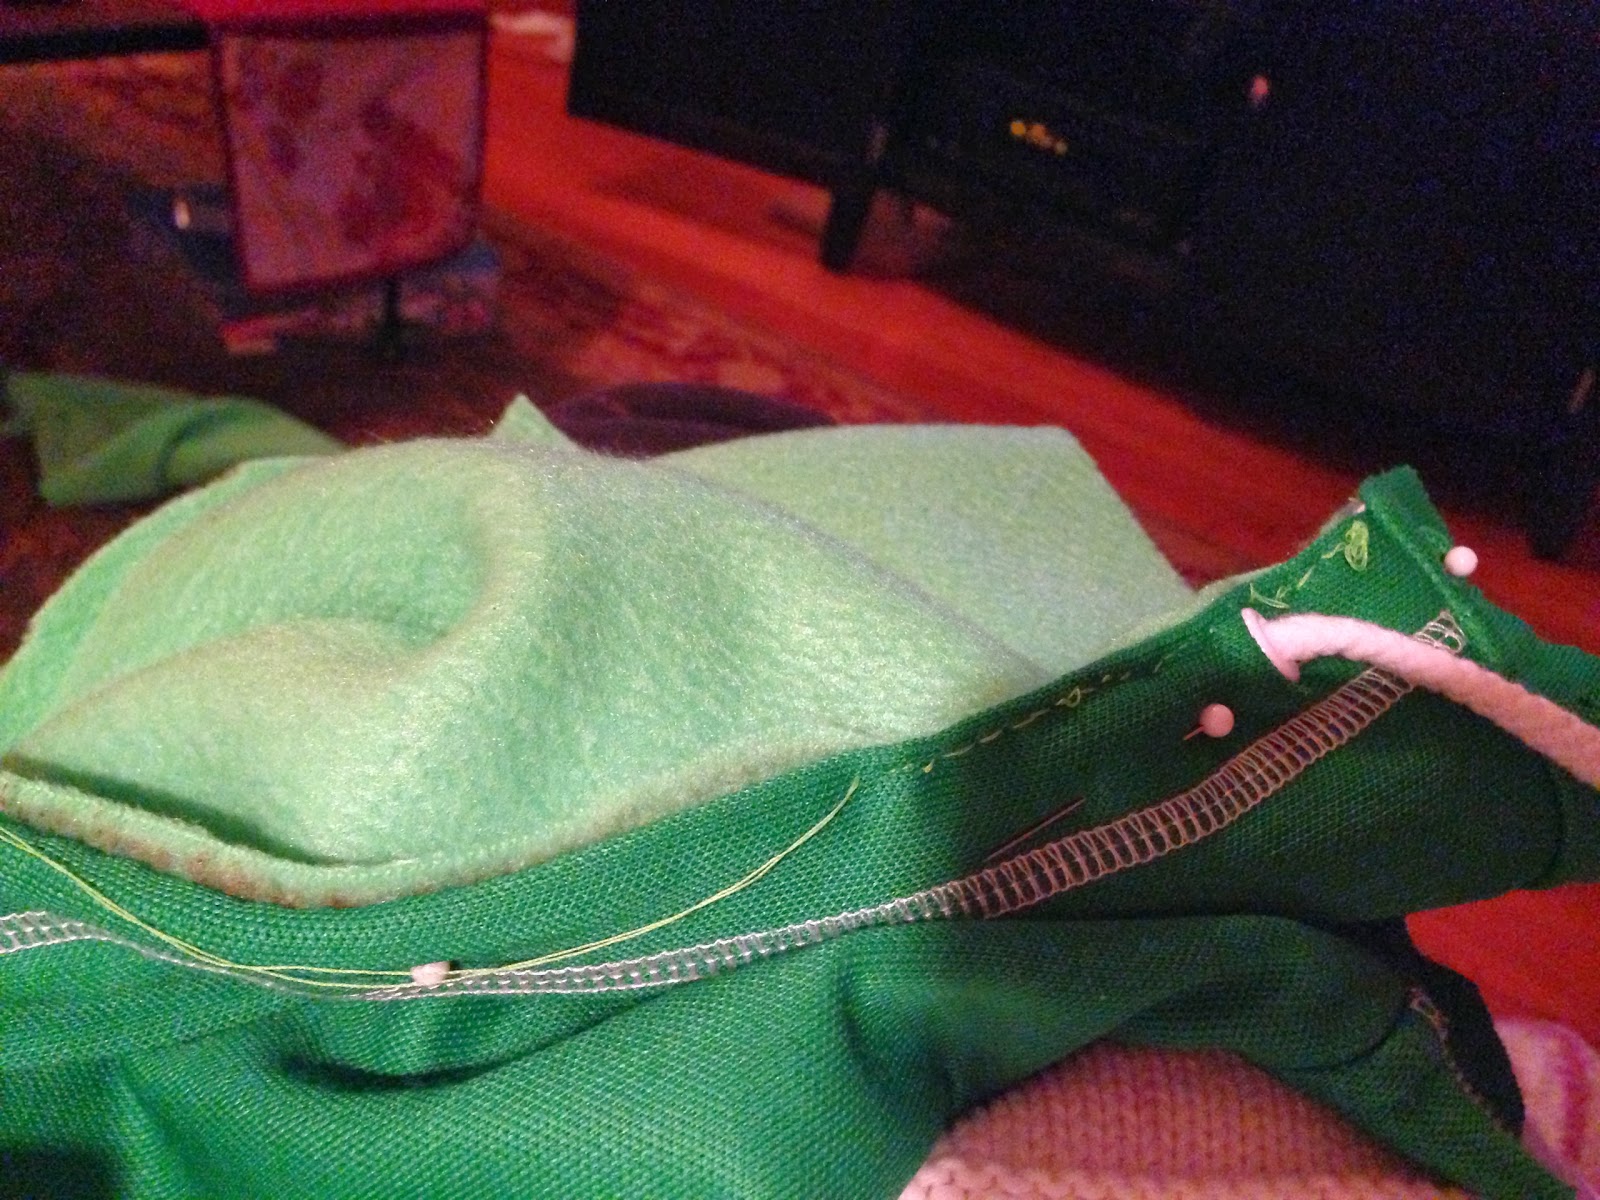
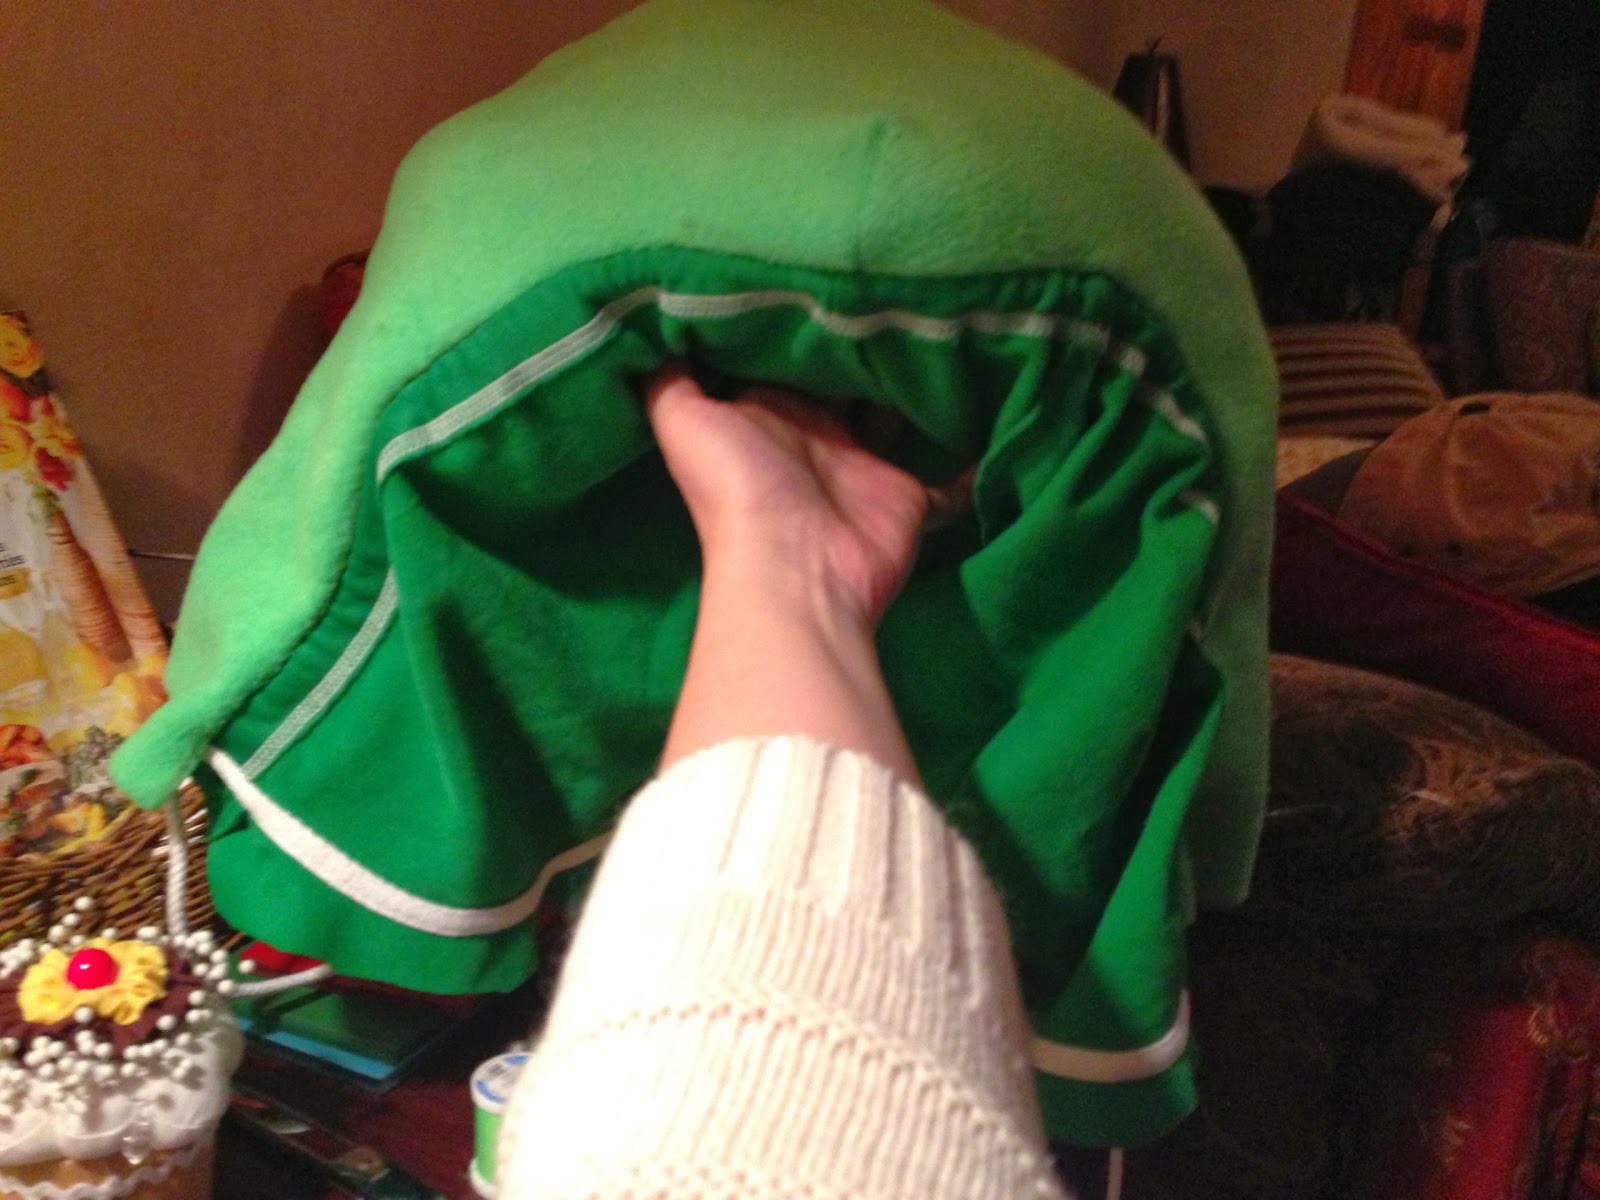
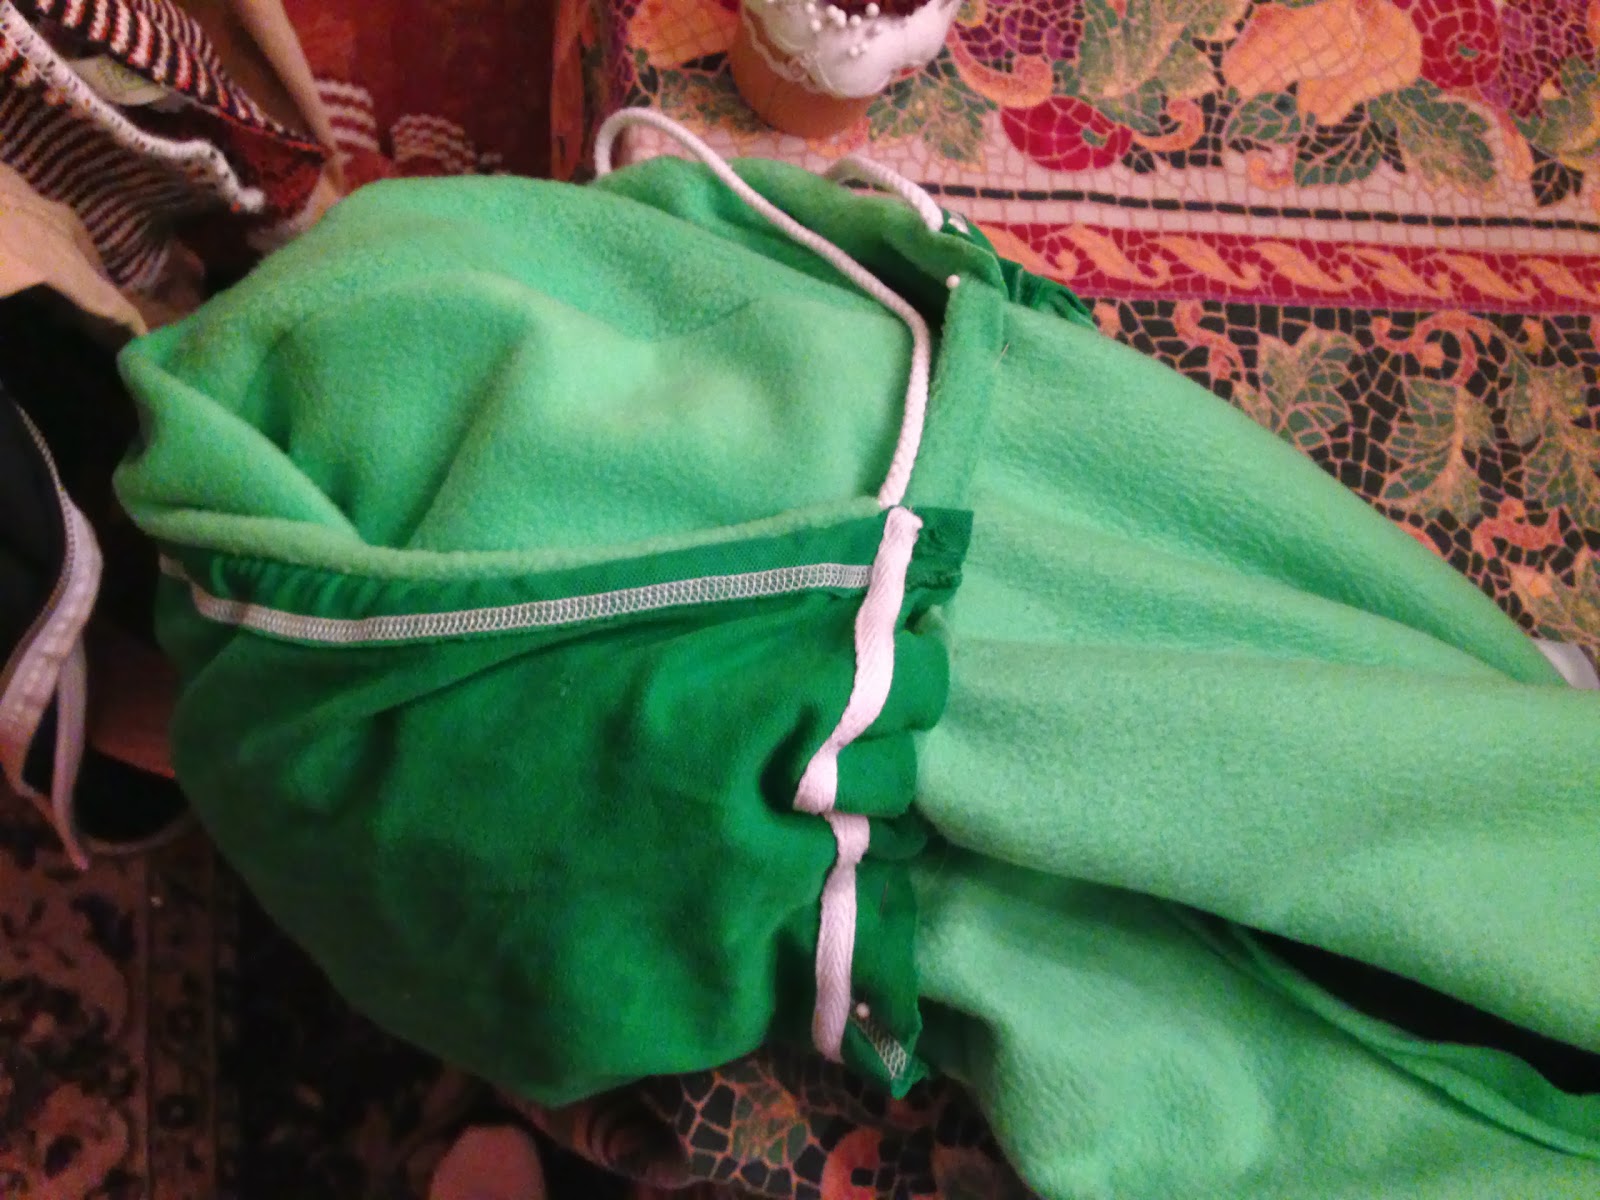
7: Next I took a green hoodie I bought for 2 bucks at a thrift shop, and cut the hoodie part off just under the neckline. I pinned the thrift store hoodie to the top of the fleece hoodie, right sides together, just along the outside part that goes around the head. Then I ran it under a sewing machine as well. Turned it right side out, and then it was ready to be filled with some poly fill.
8: Fill the hoodie from the bottom, and fill it only as much as your GIR wants. The original GIR has a huge head, so I filled it pretty full at first. Of course my tweener kid was horrified. SO we went way more subtle with the POOFY head. Once it is filled, pin the hood to the waiting neckline of the pullover, wrong side together, then run that under the sewing machine.
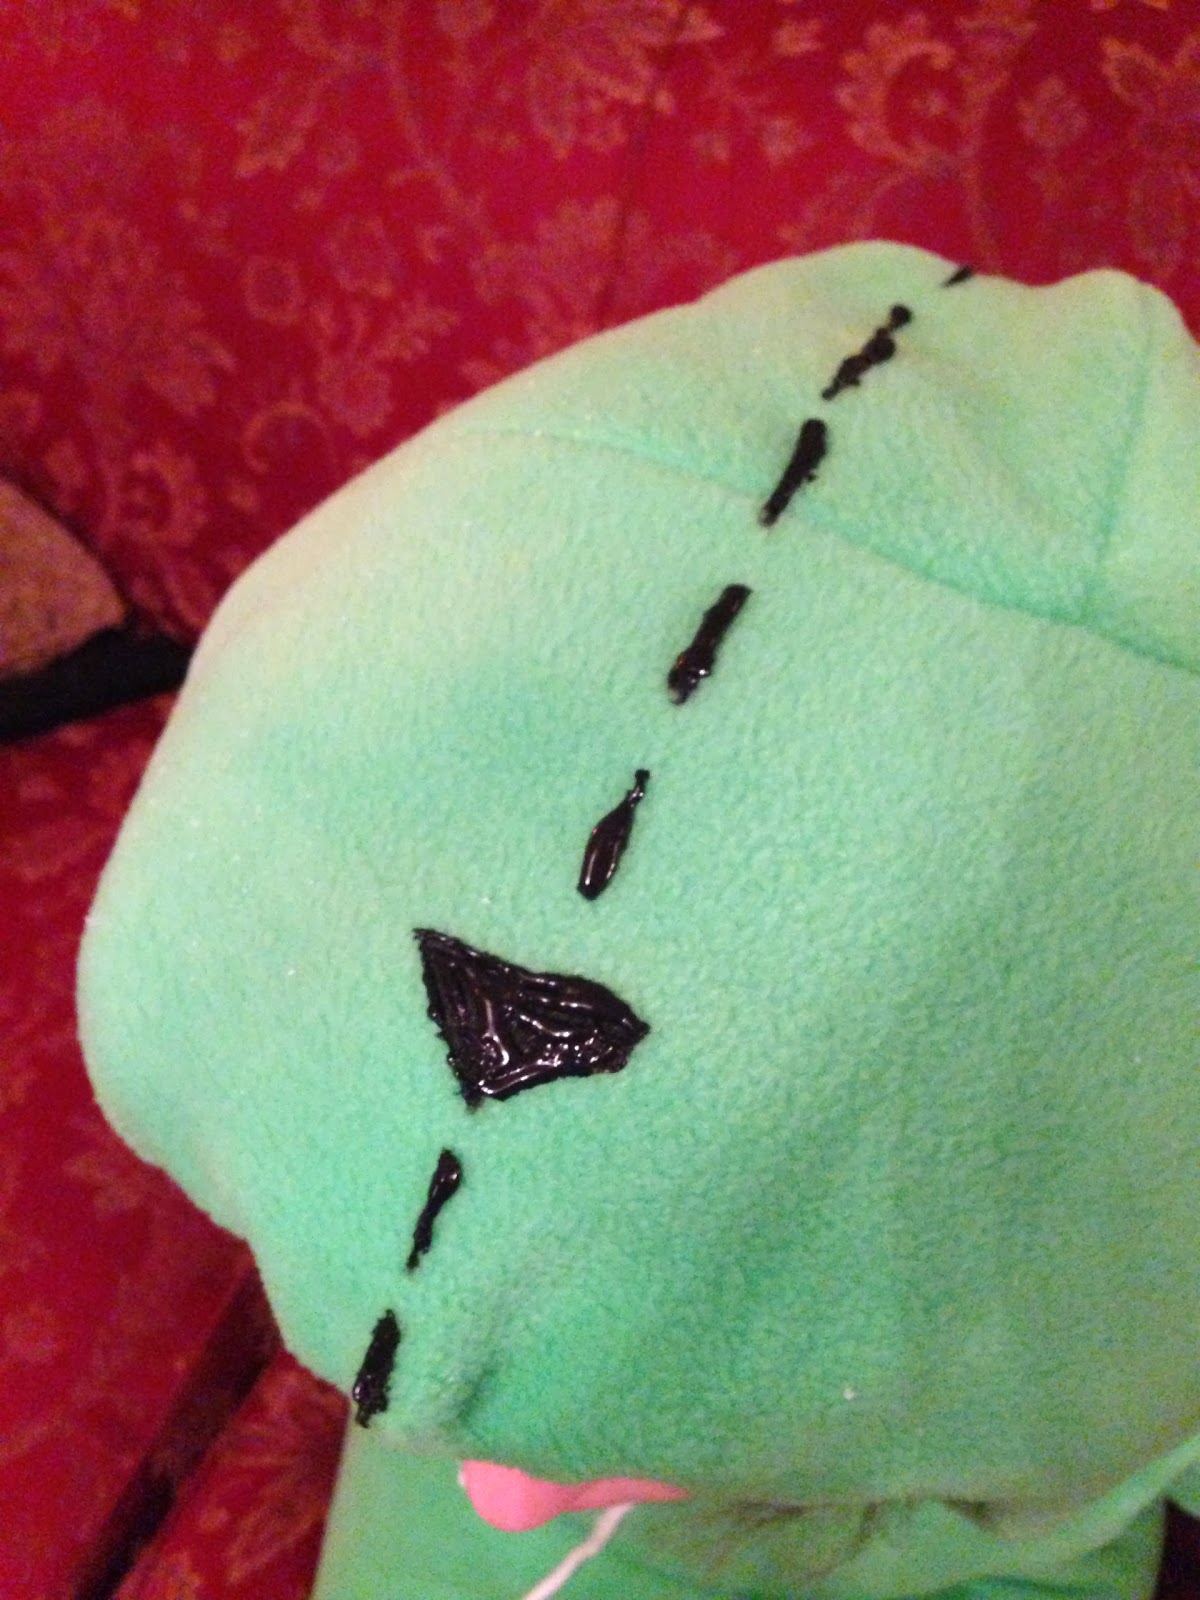
9: Now take the black fabric puffy paint, and draw dashed lines and a little triangle for GIR’s nose a few inches above the top of the hood. Let dry.
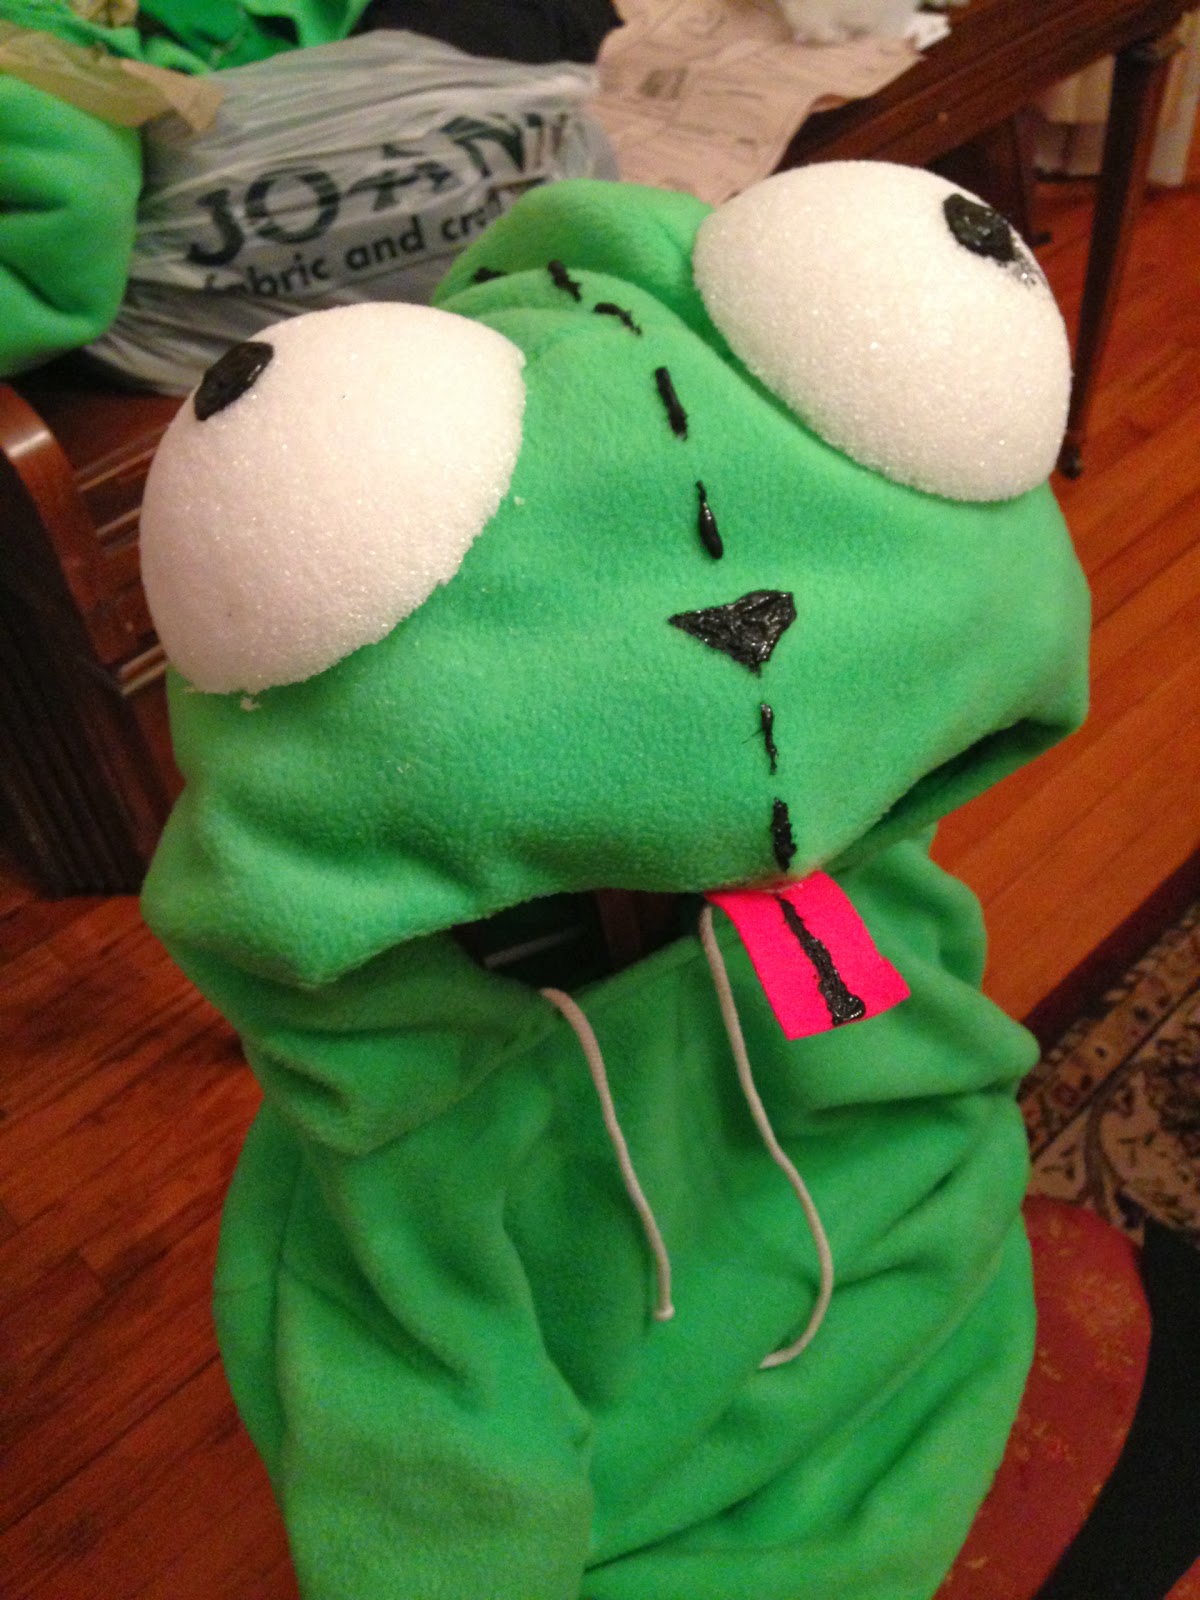
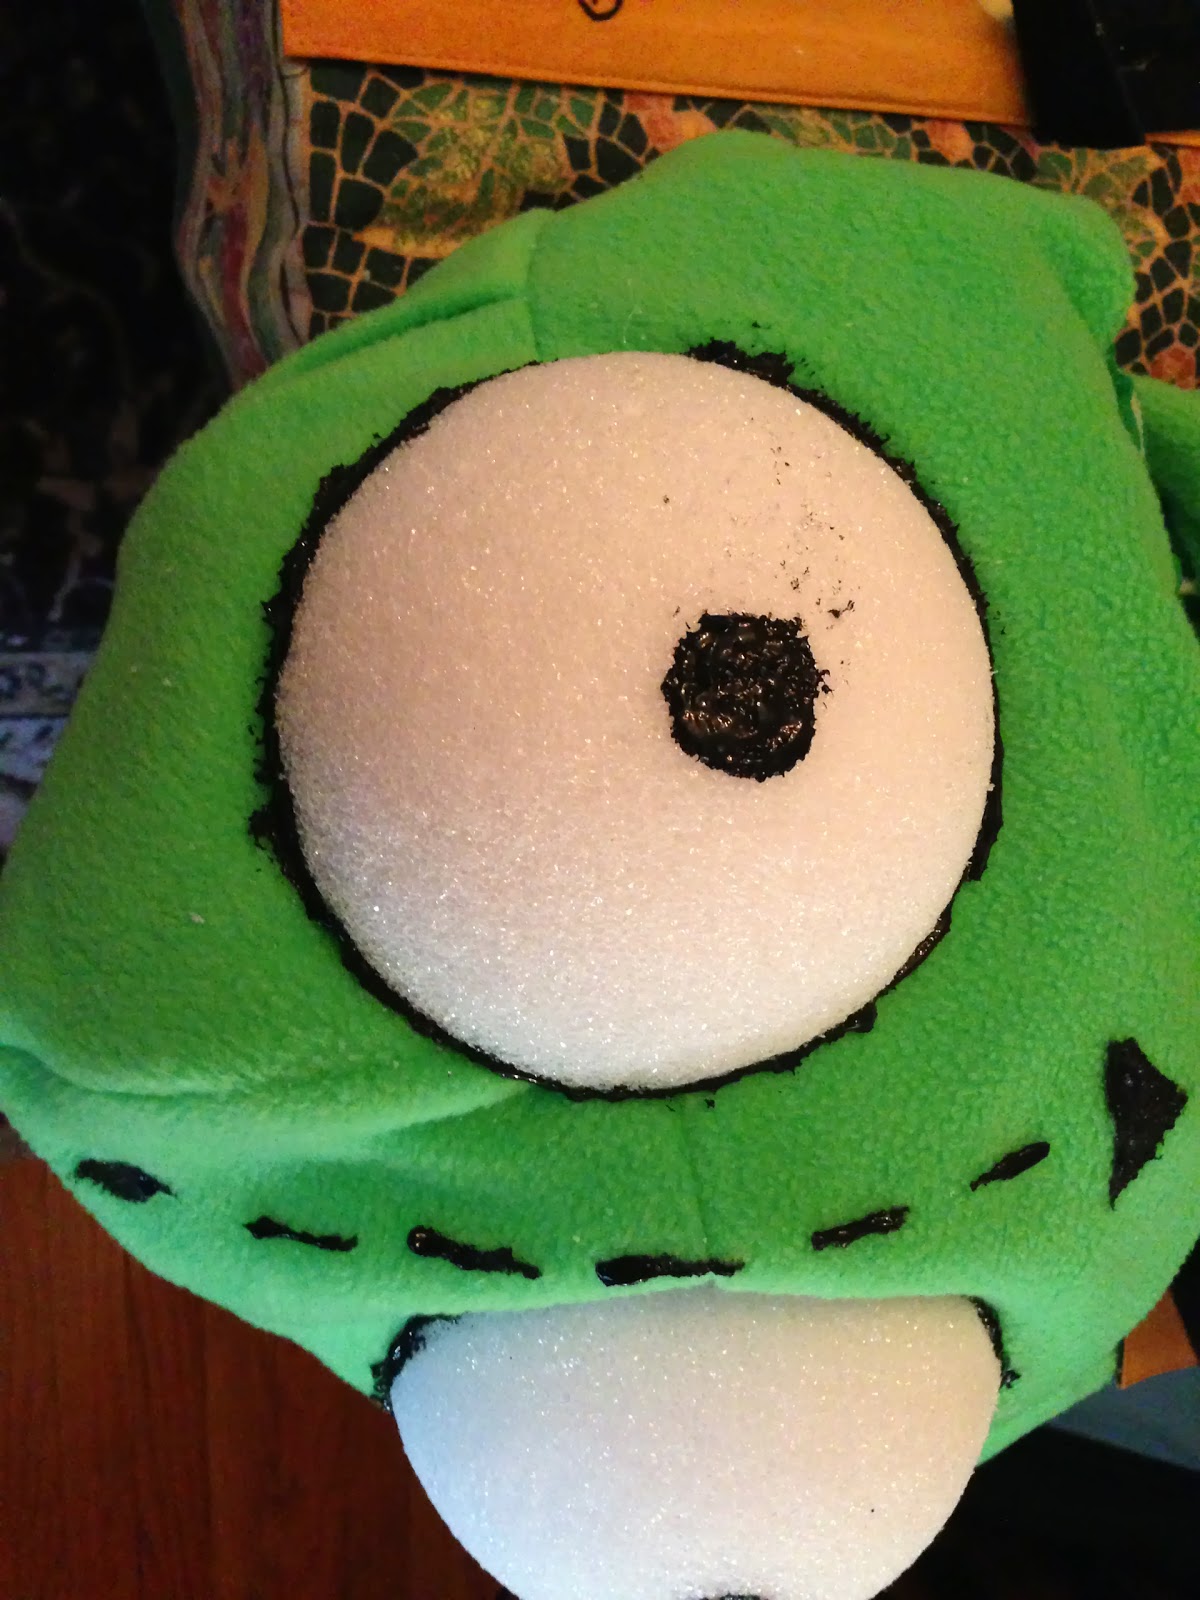
10: Next, take your two halved styrofoam balls glue them on top of the hoodie using fabric glue. Let set. Then using the black fabric puffy paint, draw a large circle at the center of the ball, and a careful black outline around the balls.
11: Cut a tongue out of the pink felt, and using fabric glue stick it to the center top of the hoodie hanging down. Using black puffy paint, draw a center line on the tongue and let it dry.
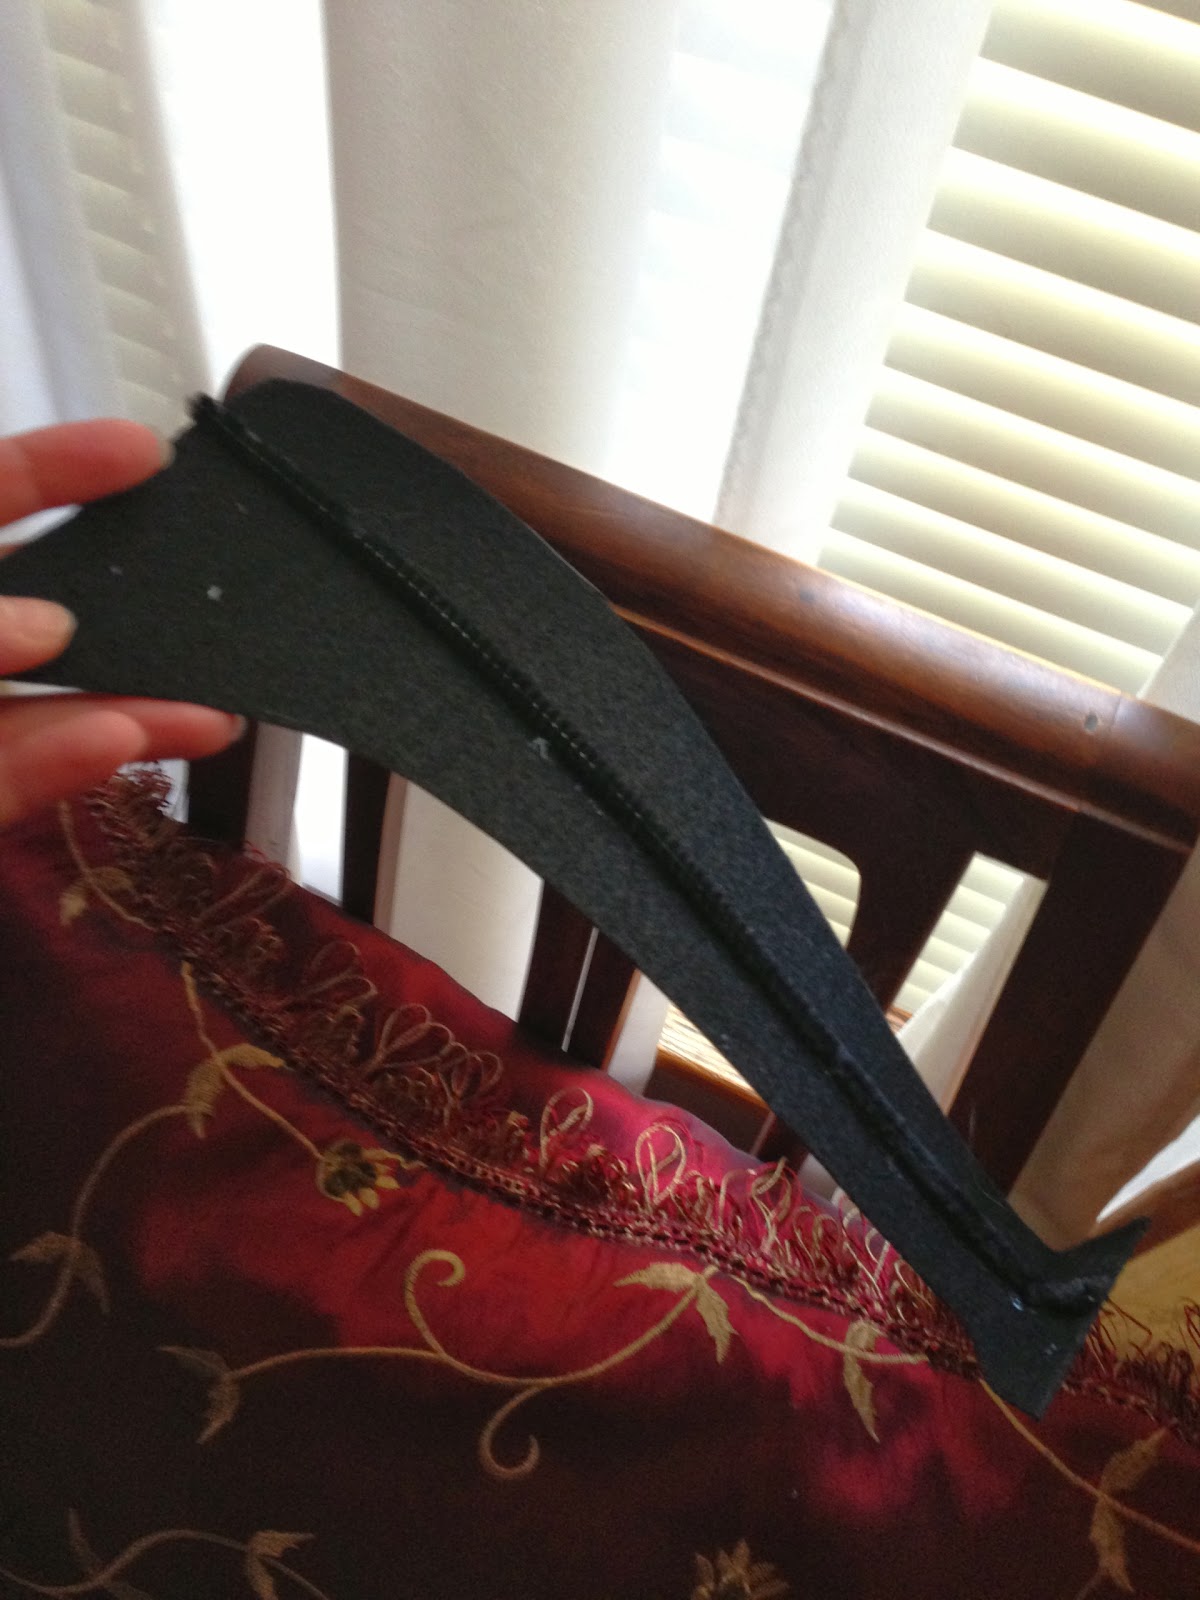
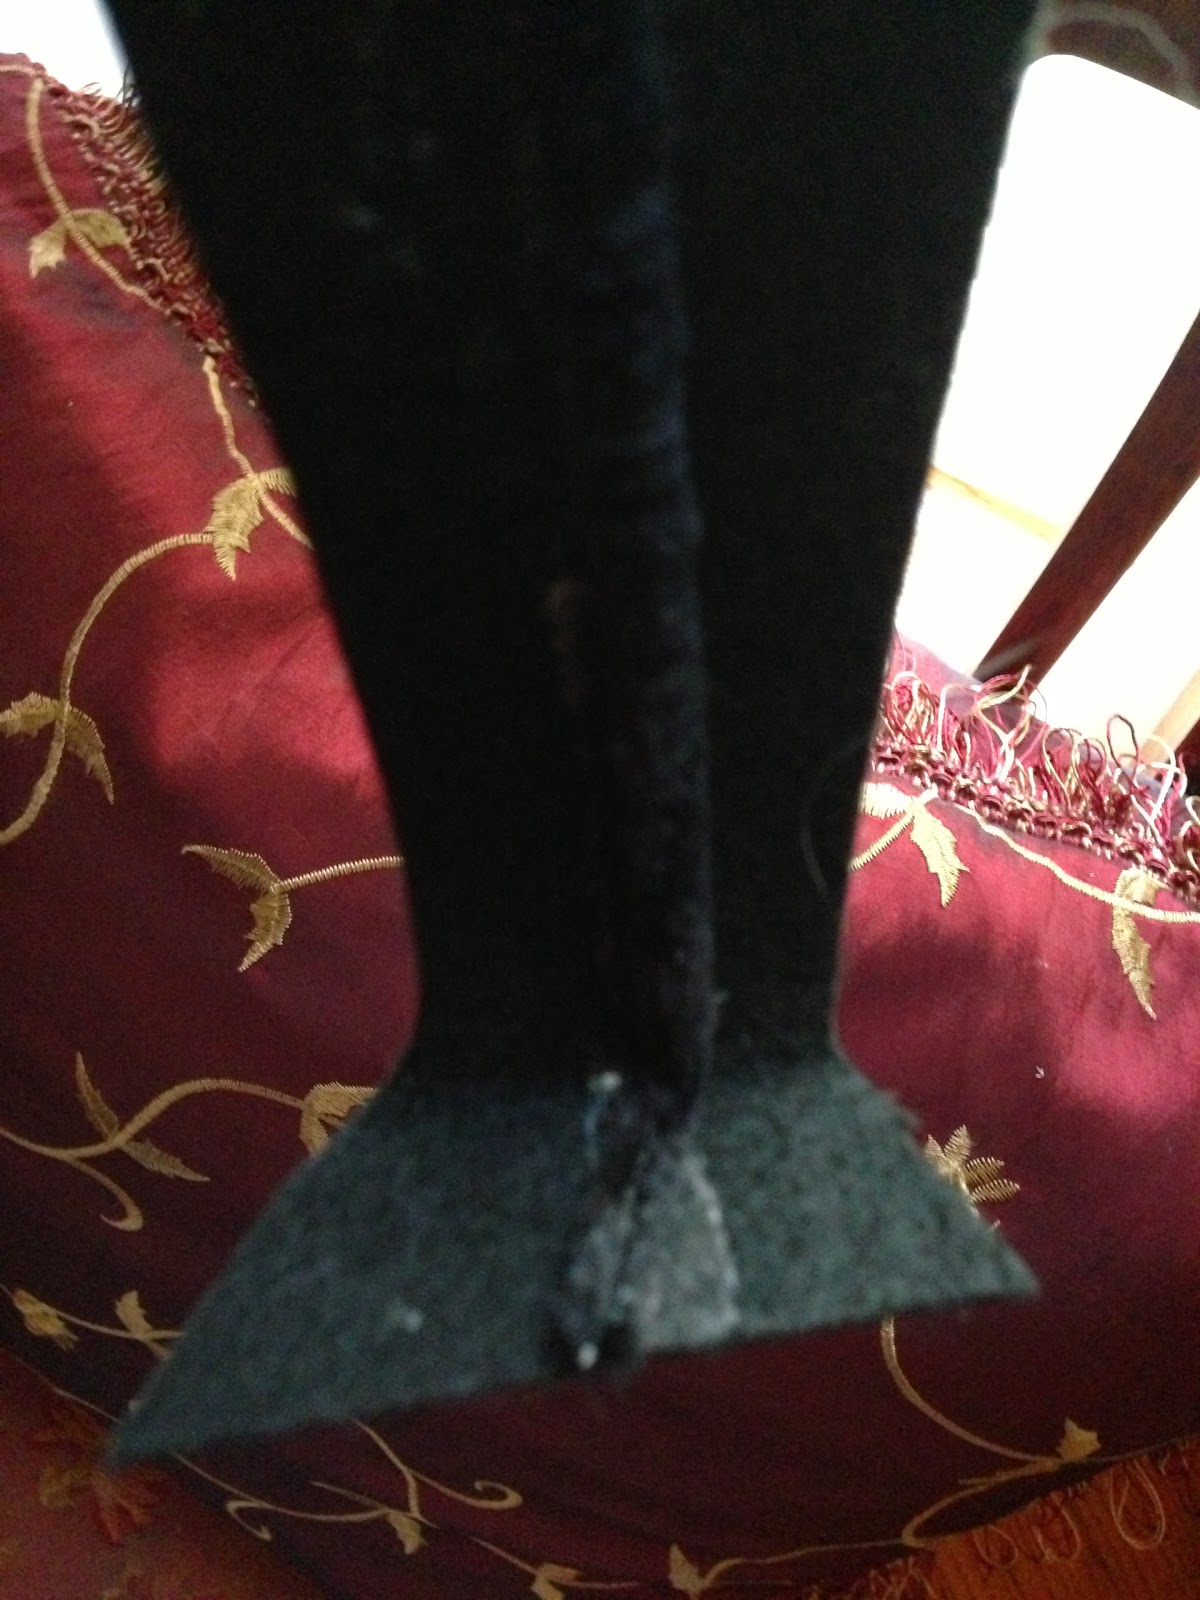
12: Now GIR’s ears pose a problem because they do stick up and is part of his charm. So we cut (by eye) the ears in the stiff felt (not the soft felt, the stiff squares). I added an inch on the bottom to fold down and make a surface to glue the ears to the hoodie. Then I glued pipe cleaners along the back of the ears and down to the inch flap, folding the pipe cleaner along with the tab of the felt. I let these dry overnight.
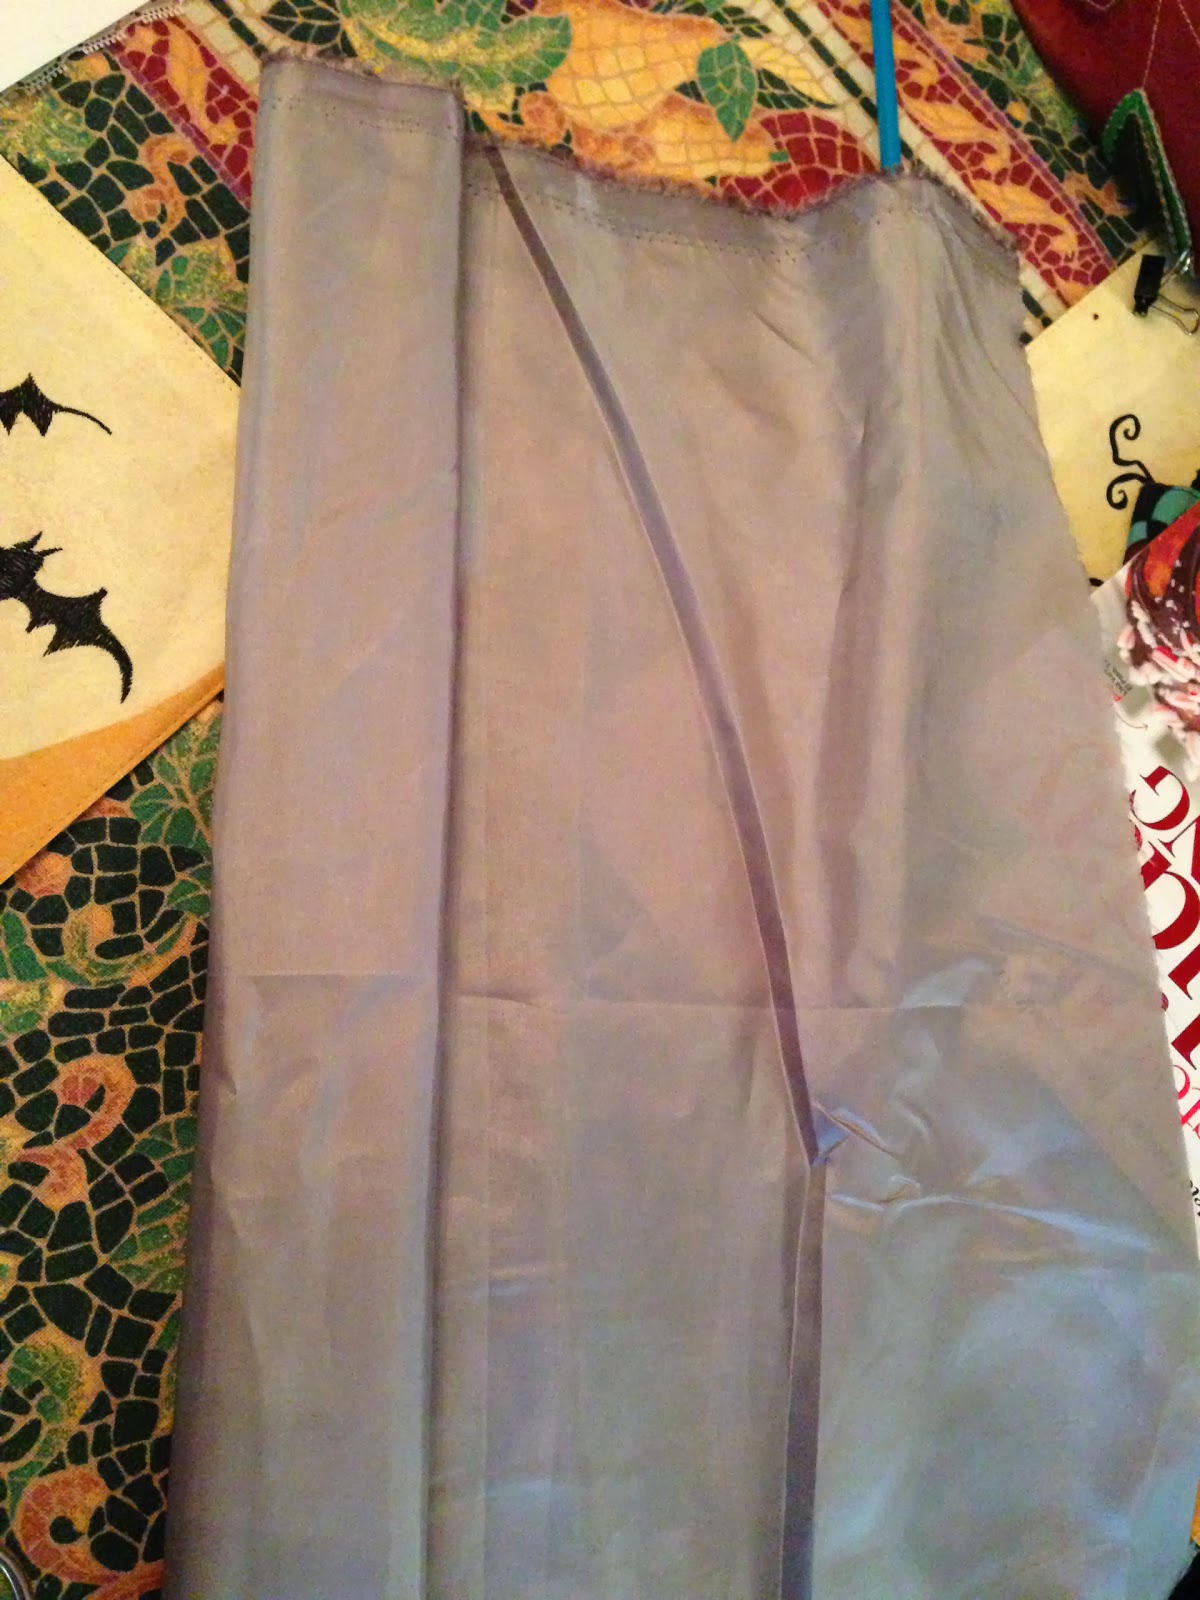
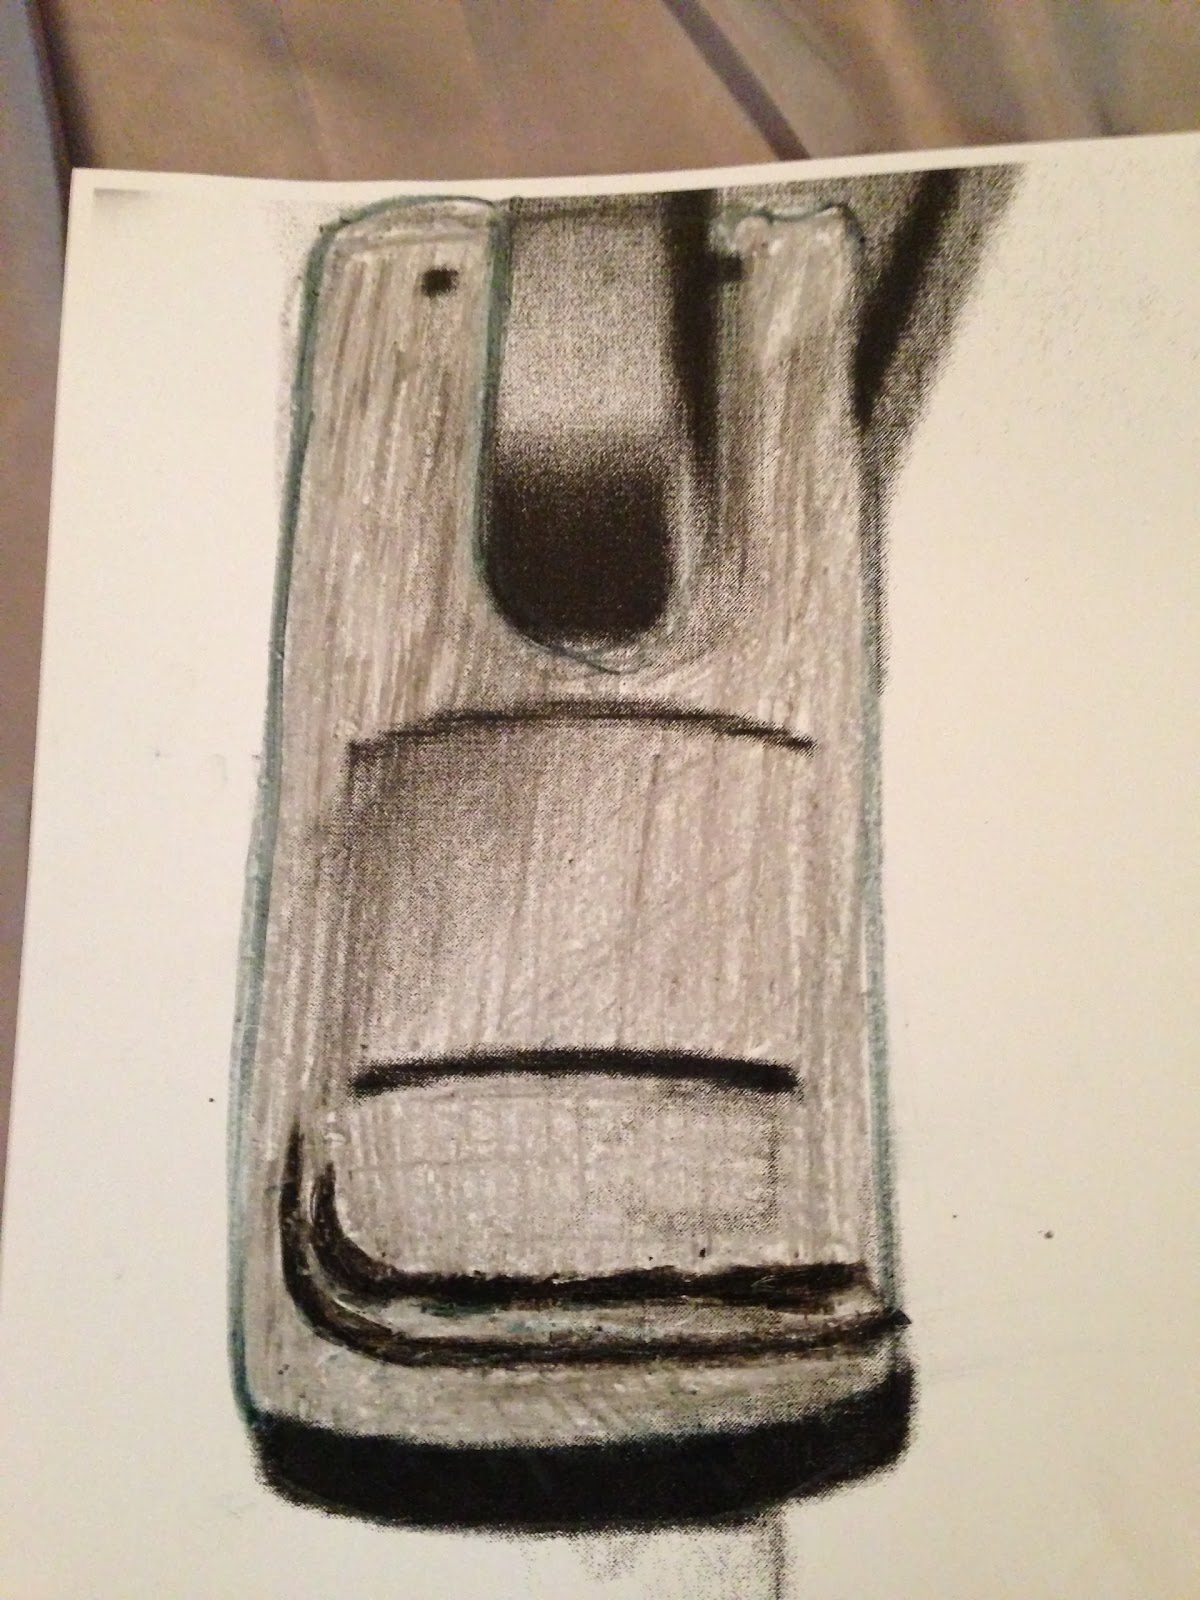
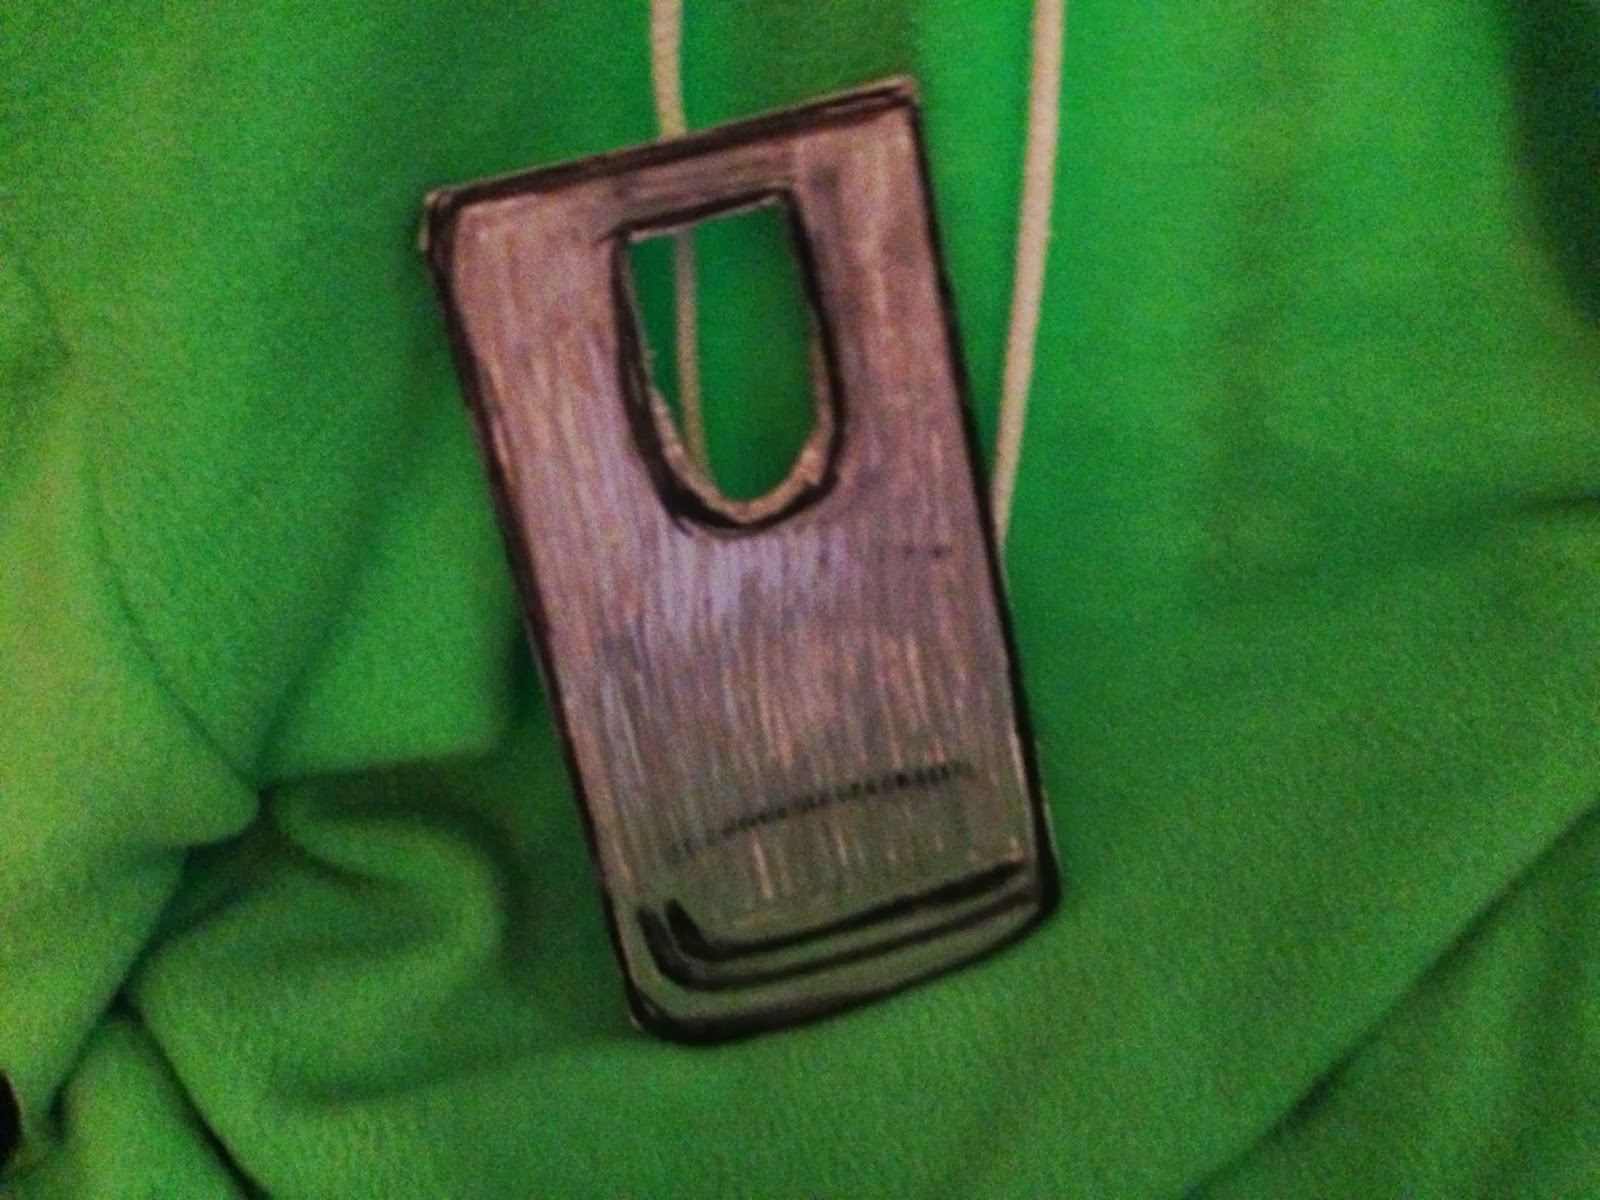
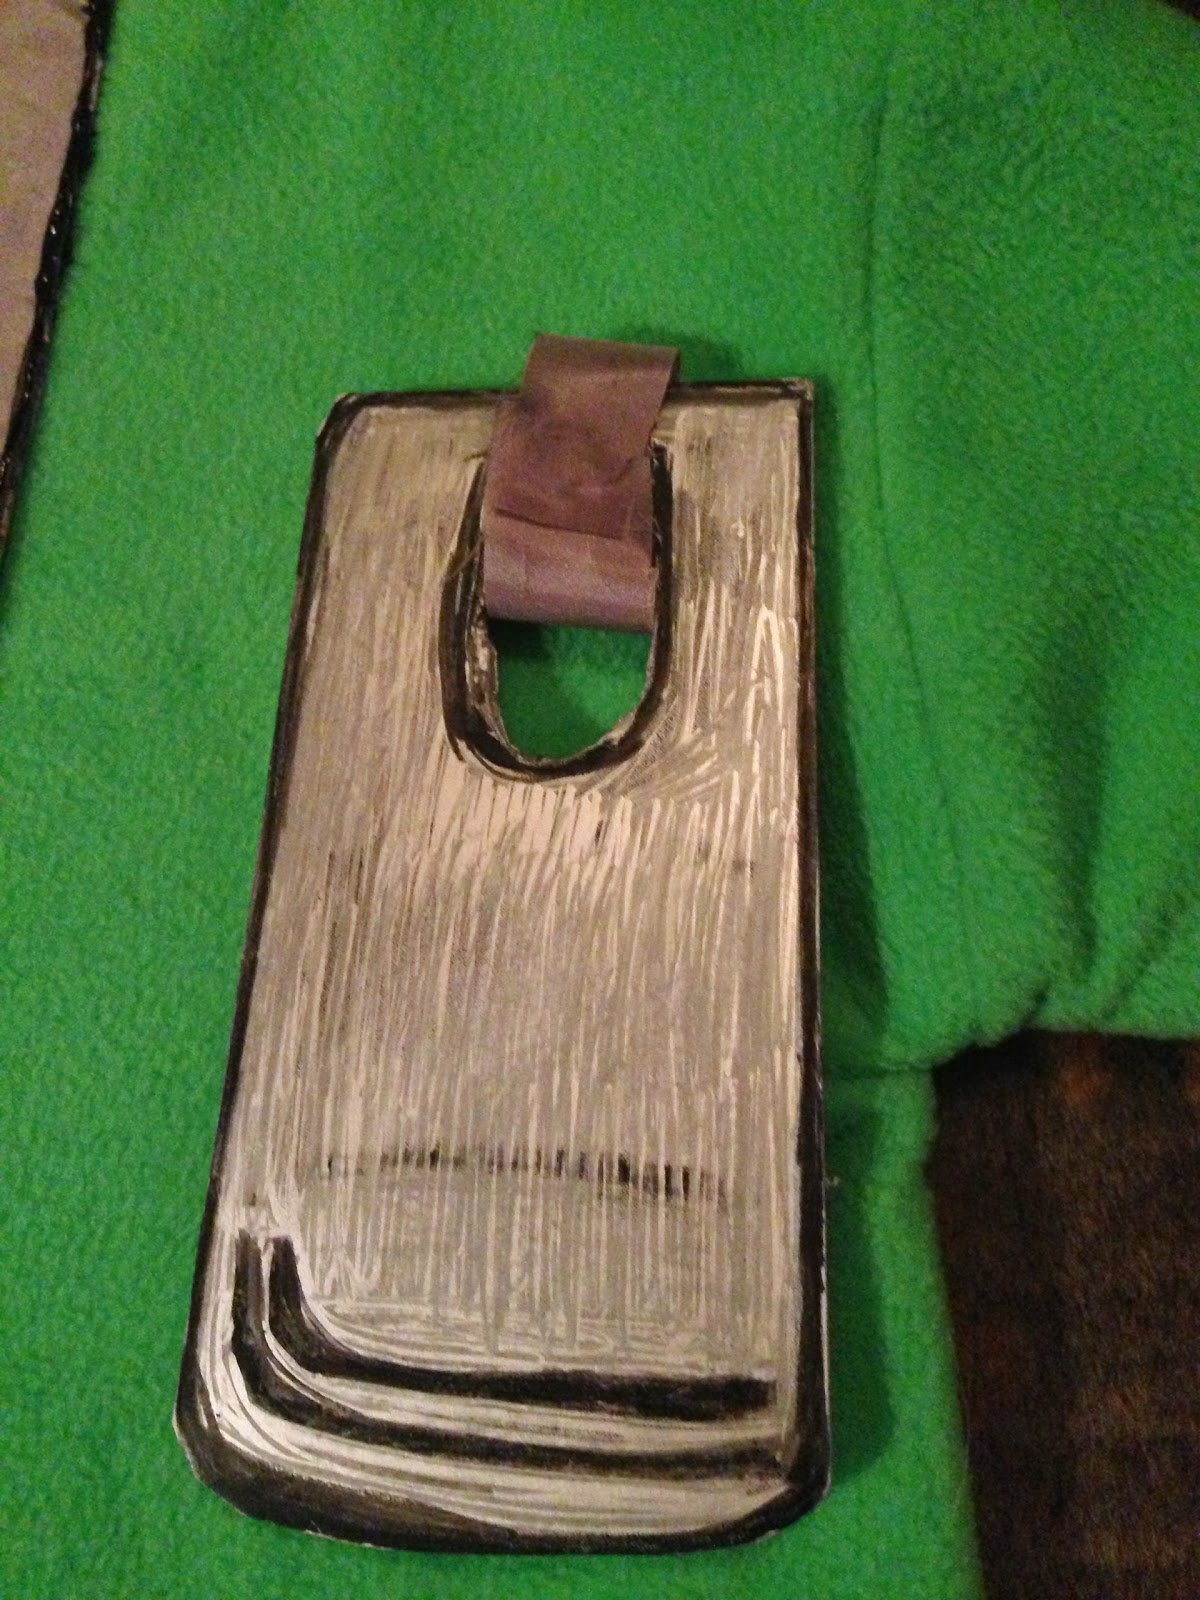
13: Next is GIR’s zipper, which is a big part of his costume. The over sized zipper is kind of hilarious. I printed a zipper VERY large on a printer, like 8-10″ long, glued it to some 1/2″ foam core, drew over it with a sharpie and metallic marker, and cut it out. I also cut a long strip of sliver metallic fabric so that it fit nicely at the center of the pullover.
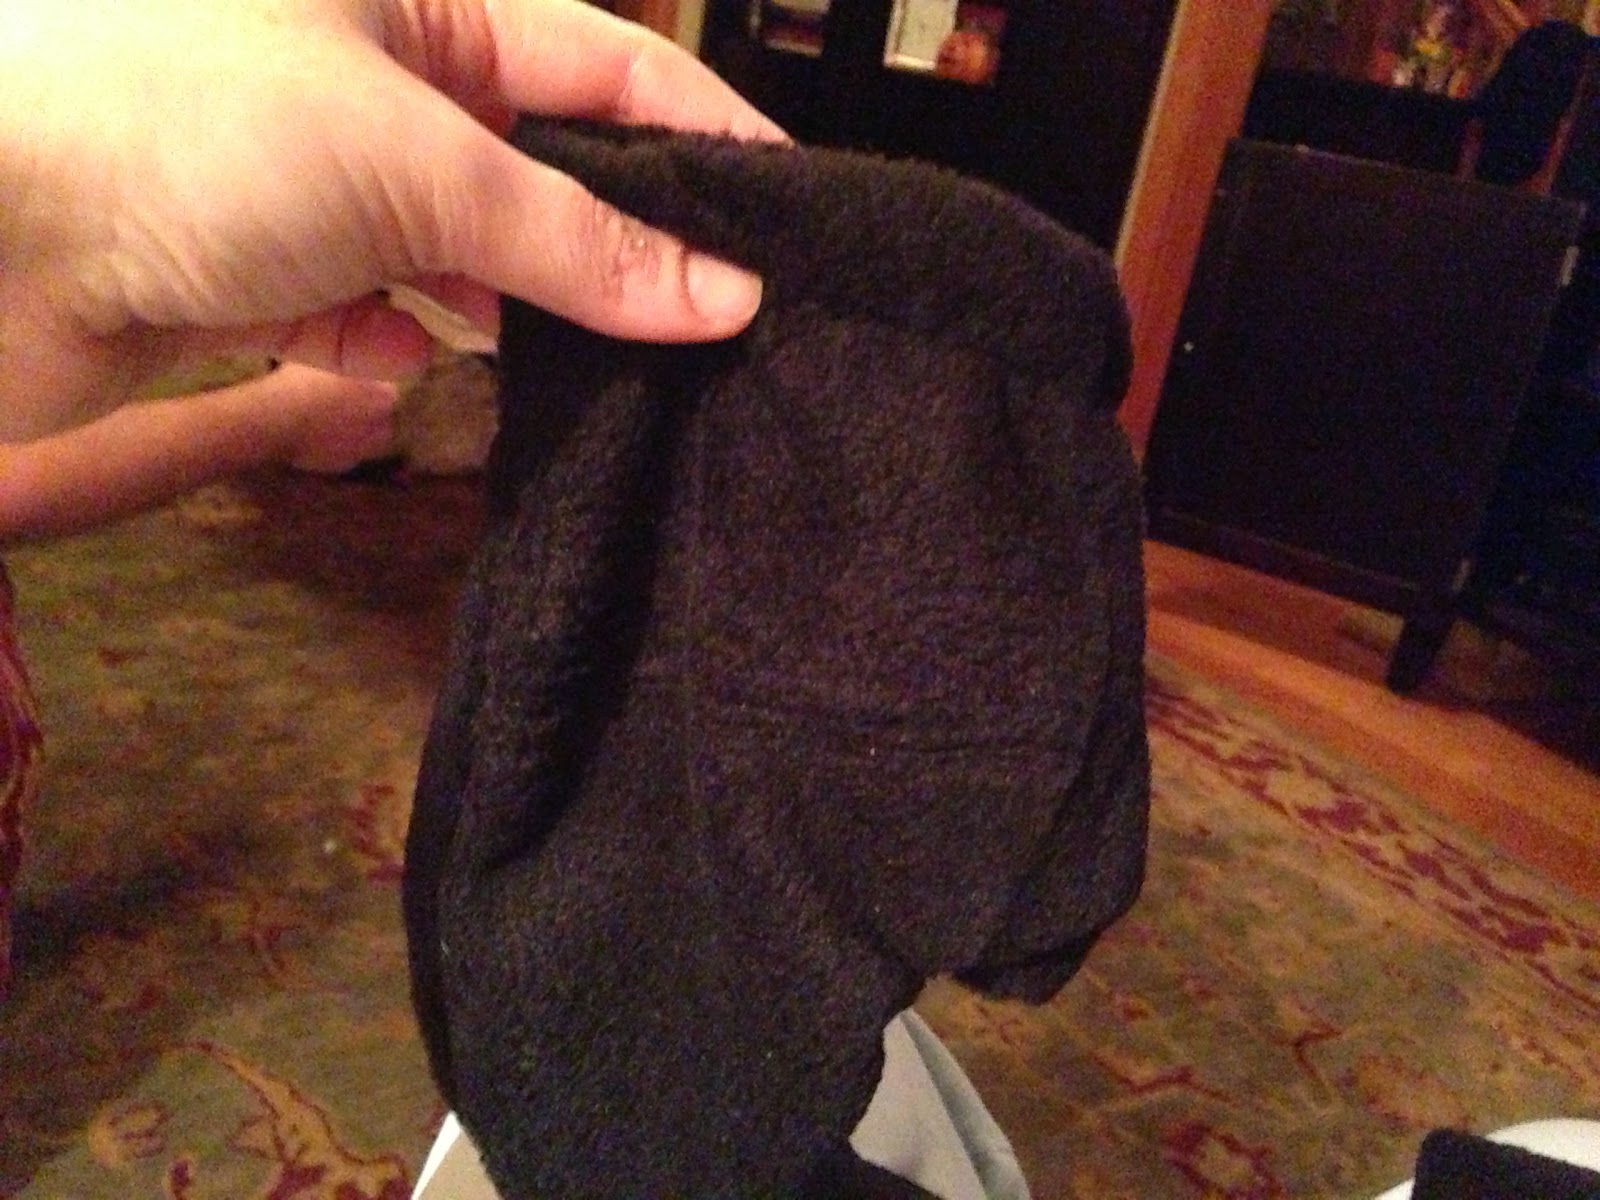
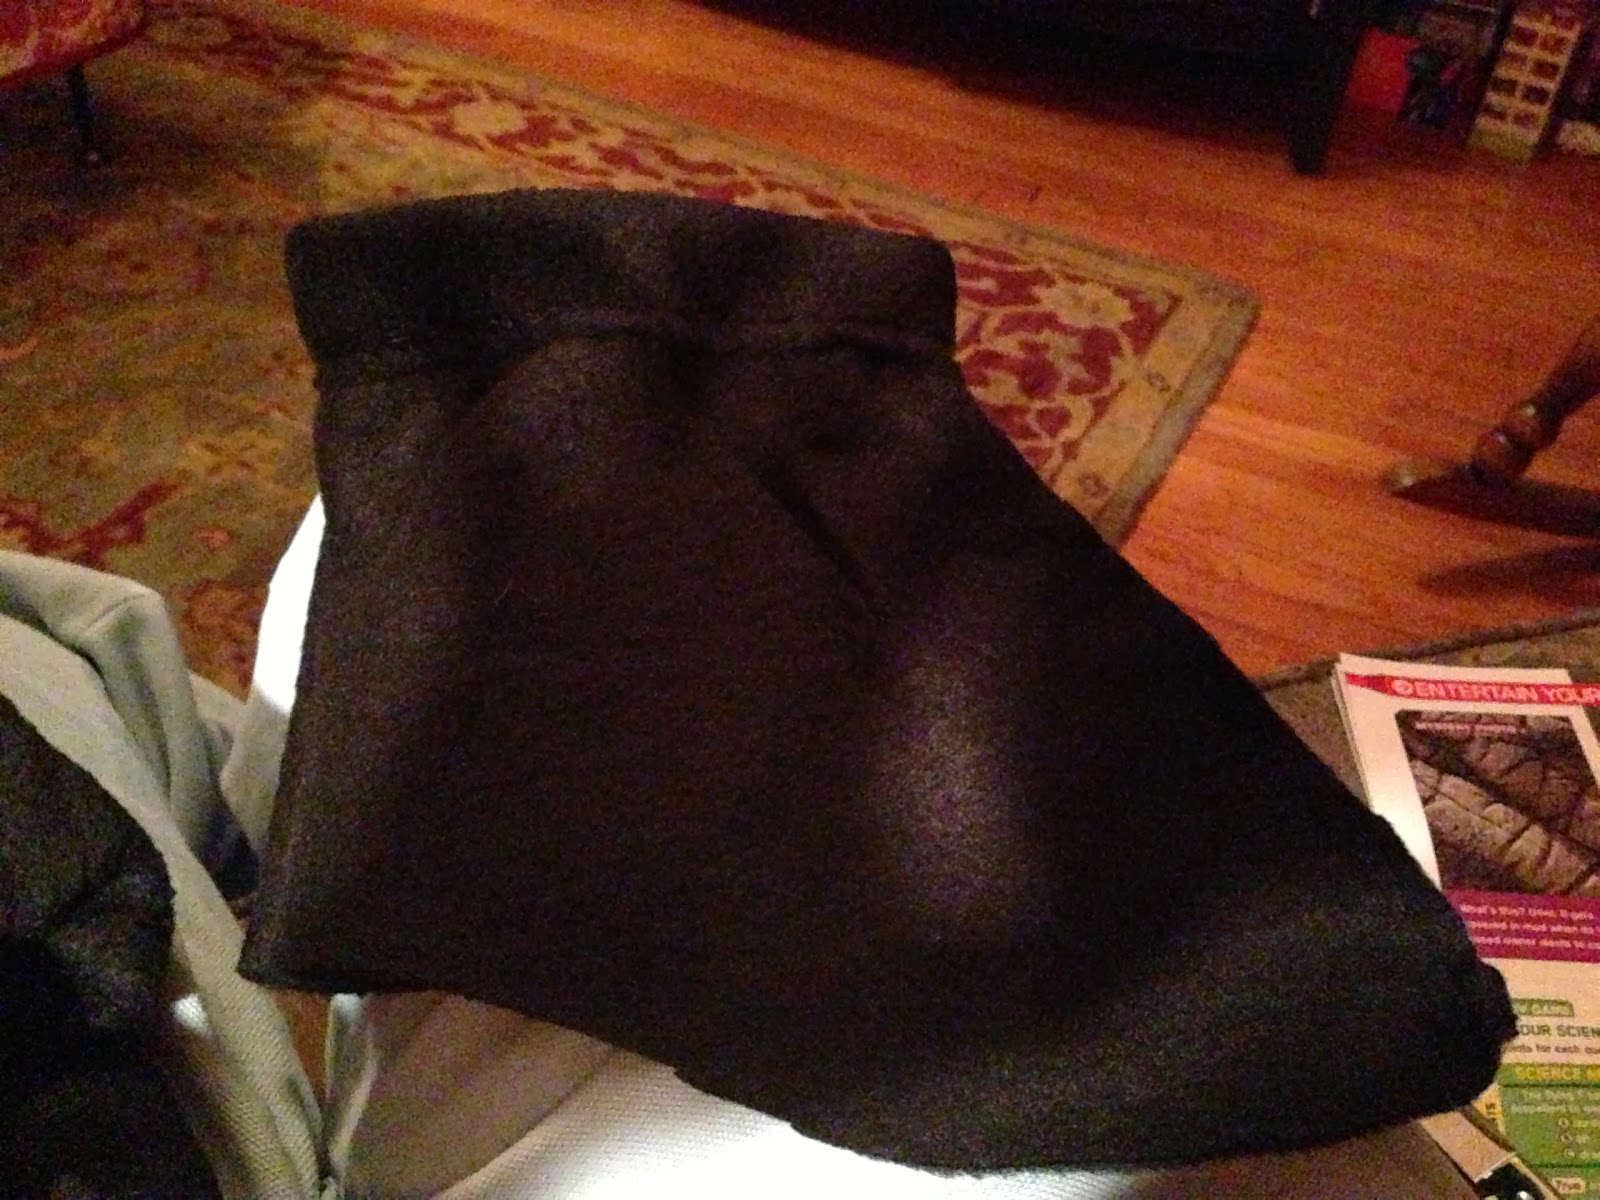
14: I quickly made the black mittens and spats according to the pattern directions. I made sure my daughter also had a pair of warm and comfortable black pants to wear.
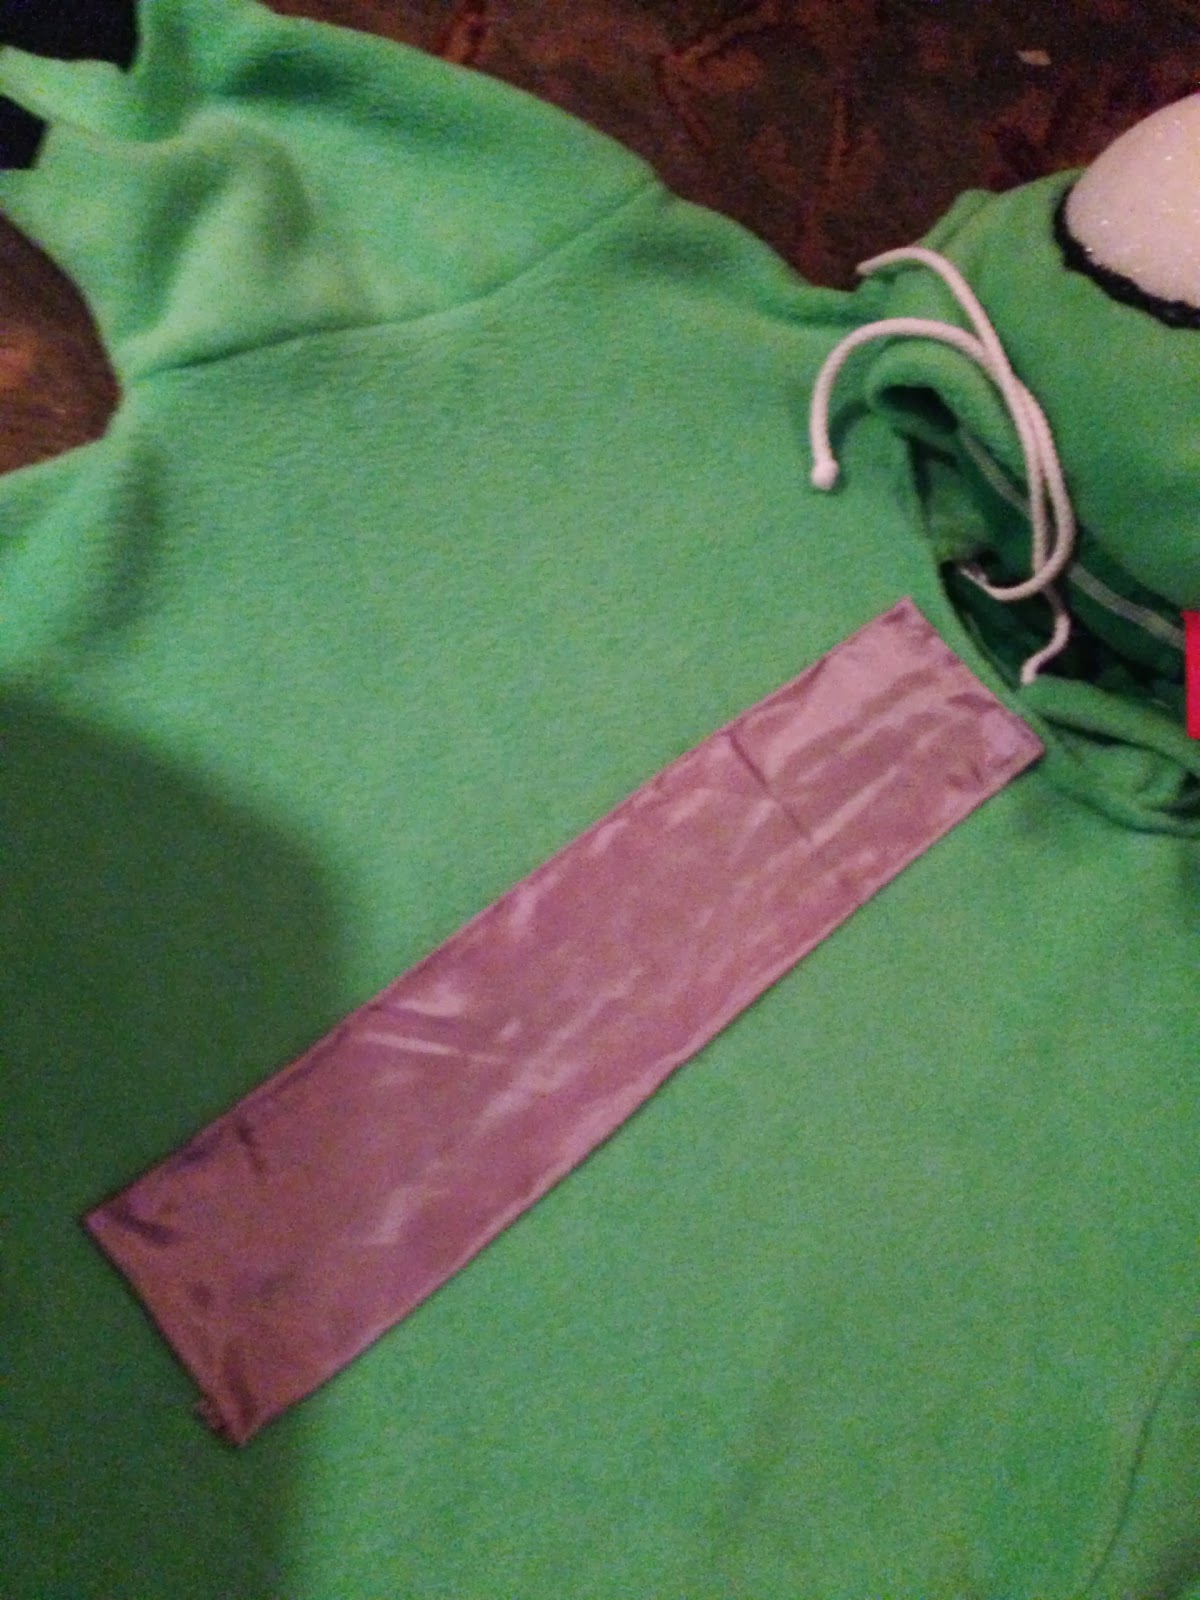
15: Using fabric glue, turn over the grey strip that is laying down the center of the pullover (the right side down), and fold the outside edges in and down, using the fabric glue. Then flip the strip over and glue it down the center of the pullover.
16: Using the black fabric paint again, draw a thin edge around the grey fabric strip. Then create a blocky zig zag pattern along the center. I did this by eye, using Internet reference of GIR’s zipper.
17: Finally, I took a small rectangular piece of silver fabric and made a loop around the hole in the zipper, and with the same fabric glue, glued the top of the loop on the top of the grey strip along the middle of the pullover. I then hemmed the bottom to the length my daughter wanted and that’s it! A costume of a costume of a silly robot.
Phew. Never a dull Halloween around here!
Flora is an award-winning creative director in Chicago turned food and lifestyle blogger extraordinaire. She is also author to the popular BEE NATIVE! gardening book series and various children's books that celebrate the wonder and hard work of bees and butterflies. Her blog and social spaces inspire thousands to create, learn, cook, grow, and craft, making their world lovelier one pixel/petal/seed/bite/stitch/brushstroke at a time. Follow her on all the social spaces, YouTube, and Amazon, and get creative!
Latest posts by Flora Caputo
(see all)