In this video tutorial, I’m going to show you three easy ways to add distressed textures to your logos, design and illustration work in Photoshop. You can either follow along using the free download of each texture or brush used, or you can apply these techniques using your own resources.
01. Multiply a texture on top
This is the most common method for adding textures in Photoshop. Not only is it insanely easy and fast to do, it also looks great. Just place a texture on top of your work and then go to the Layers panel and select a Blending Mode (Multiple and Linear Burn are two of my favorites).
Note: I'm using one of the Standard Issue Grunge Textures in this video. You can download the texture I'm using below for FREE.
02. Use a layer mask
[Skip to 1:02] Layer masks are fantastic because they allow you to create textures and distress your work in Photoshop in a 100% non-destructible way. Just choose the layer you want to distress, click the Layer Mask button in the Layers panel, and then start concealing parts of the layer with a brush (make sure you have the color set to black to conceal).
Note: I'm using the Lo-Fi Subtle Grain & Noise Brushes in this video. You can download the brush I'm using below for FREE.
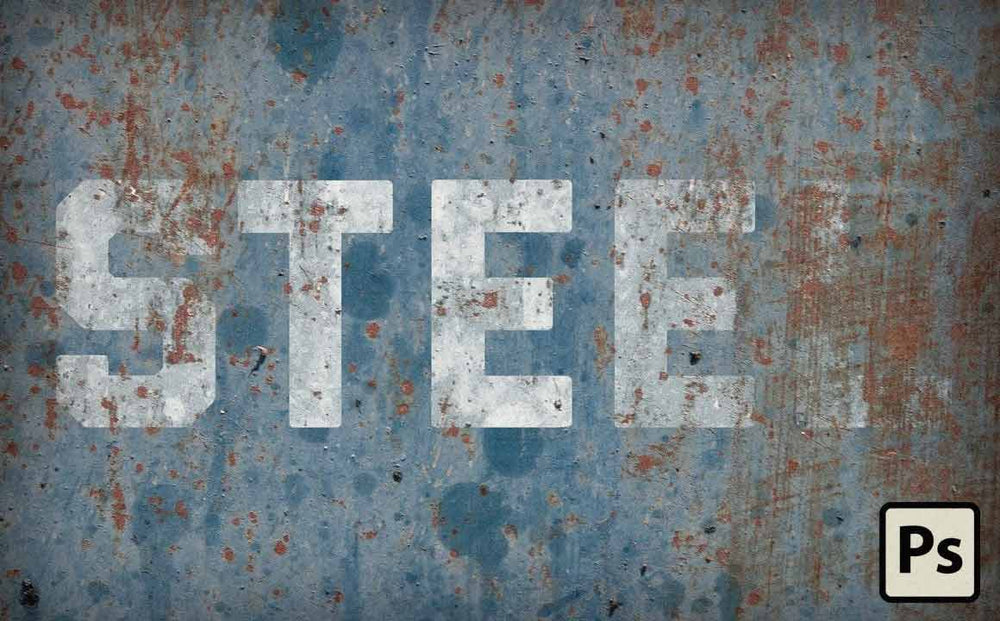
03. Add transparent texture on top
[Skip to 2:32] This is a little trick I really enjoy. When you learn to use Select > Select Color Range you can create some neat effects. This is the trick I used to achieve the effect you see on the cover of this tutorial.
Note: I'm using one of the pre-made templates from the Retro-Textures Mockup Collection.
Click here to download the free texture I use in the video.
Click here to purchase a full bundle or pre-made templates that create this effect.
If you have any questions just let me know in the comments below the video. Happy to help!