How to Decorate Sugar Skulls
Learn how to decorate sugar skulls for Día de Muertos, the colorful Mexican holiday dedicated to honoring and celebrating our loved ones who have passed away. On this page full of photos, I'll explain how to use royal icing to decorate your sugar skulls, as well as how to embellish your Day of the Dead sugar skulls with beads, sequins, gems, glitter and more!
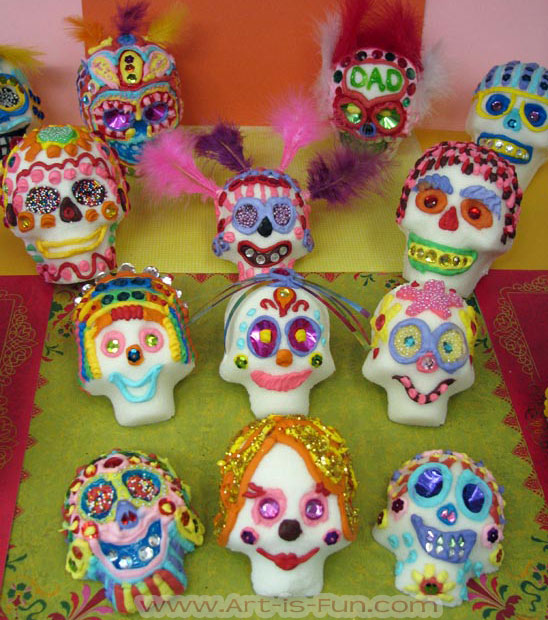
First, check out my sugar skulls below. Don't they look fun to make?!
Making sugar skulls is a fun (and culturally relevant) way to celebrate Day of the Dead. You can do it at home, in the classroom, or run a special workshop at your church, library or community center. Why not invite a bunch of friends over and have a sugar skull decorating party?
Día de Muertos is celebrated from October 31 through November 2 each year. It is a special time for honoring and celebrating our loved ones who have passed over. The festivities for Day of the Dead begin weeks ahead of time, as sugar skulls are made and decorated to honor the dead and as well as celebrate the cycle of life and death.
Click here to read more about sugar skulls and their significance to Day of the Dead.
You can also learn how to make medium sugar skulls and life-size sugar skulls!
How to Decorate Sugar Skulls
Icing is the most important supply you will need to decorate sugar skulls. I highly recommend mixing royal icing with food coloring to get vibrant colors that you can apply to your sugar skulls. Royal icing becomes really hard when it dries and once dry, it lasts a long time without crumbling or disintegrating. You can buy pre-made icing in tubes from the grocery store, but those tubes of icing will not dry as hard as royal icing, so your sugar skulls would not be as long-lasting. If you choose to buy pre-mixed icing in tubes, be sure to stay away from anything marked "gel" or "icing gel", because it will never dry!
Click here to learn how to mix royal icing to decorate sugar skulls.
You can use icing to make designs such as: waves, swirls, dots, flowers, stars, squiggles, crosses, zig-zags, mandalas, hearts, and more!
In addition to adding color and designs to sugar skulls, royal icing is important because it also acts as a "glue" to embed objects, such as:

colored foil
gems / rhinestones
sequins
glitter
ribbons
candy sprinkles
fake feathers
beads
trinkets
fake flowers
doll clothes or miniature accessories, such as tiaras or hats
anything else you can think of that will stick to the skull!
You don't need to use glue when decorating your sugar skulls, because the icing is your glue.
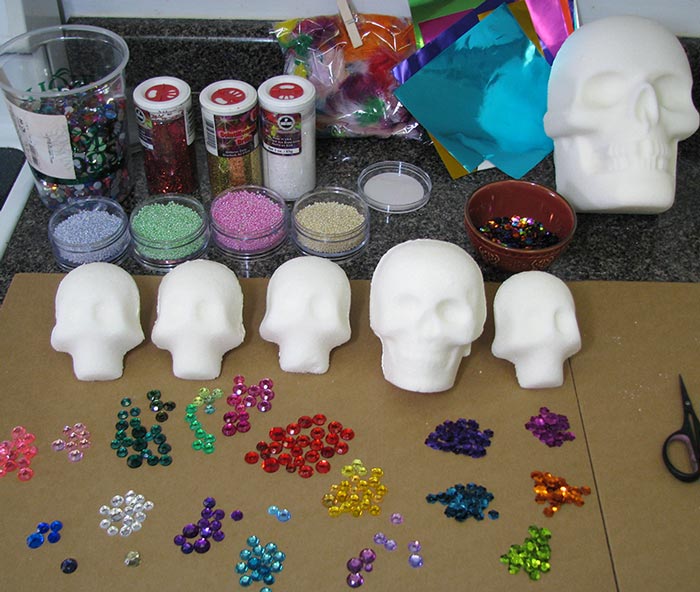
Sequins, beads, rhinestones, foil, feathers & more
Getting Started
The fun thing about decorating sugar skulls is that there are no rules in terms of what the skull should look like. Aside from decorating the basic features of the skull, such as the eyes, nose and teeth, your skull designs can be mostly abstract - consisting of colorful swirls, flowers or patterns, or you can decorate your skull to resemble a person with details such as hair, glasses, a hat, etc. Let your imagination run wild!
You can also decide if you want your sugar skull to be completely covered in color and designs, or if you want take a more minimalist approach. For instance, in the row of suagr skulls below, the skull to the left is the most decorated, with every spot on the skull covered with decorations. The middle skull is mostly covered in decoration but has some of the plain white sugar showing through, while the skull on the right has the most white sugar showing through. The amount of decoration that you apply to your skulls is up to you.

A great way to begin decorating your sugar skulls is to start with the eyes, then do the nose and teeth. That way you establish a focal point by creating the skull's main features, which you can then decorate around.
If you are decorating more than one sugar skull, it can be handy to set up an assembly line of sorts. First do the eyes on a bunch of skulls and then set them aside to dry, so by the time you have finished the eyes on the last skull, the eyes of the first skull might be dry. This makes it easy to add decorations around the eyes without worrying about smudging the icing.
Also, if you plan to decorate a lot of skulls, set aside several hours to decorate them. If you get really detailed (which is part of the fun!), it can take a lot longer than you might think to finish the skulls. Plus, after you mix the icing, it will gradually begin to harden, so the bags of icing are only usable for a certain period of time, probably only a day.
Now I'll show you lots of photos and ideas for how to decorate sugar skulls. This is the fun part!

I've organized the photos and tips into the following sections:
Sugar skull eyes are in many ways the most fun part of the skull to decorate. Here are several close-up examples of how you can decorate the inside of your sugar skull's eyes and noses:
Colored foil

Squeeze icing into eye sockets, then press colored foil into the icing. See a detailed demonstration of this technique here.
Rings of Icing

Squeeze rings of different colored icing into the eye sockets, then press a sequin into the middle.
Gems or rhinestones

Fill the eye sockets with icing, then press a gem or rhinestone into the center of each eye.
Beads

Fill the eye sockets with icing, then pour small beads into the wet icing. Set aside to let the icing dry.
Candy sprinkles

Fill the eye sockets with icing, then pour colored candy sprinkles into the wet icing. Set aside to let the icing dry.
Gems and glass beads

Fill the eye sockets with icing, then press a gem or rhinestone into the middle. Pour beads into the remaining icing, then set aside to dry.
Colored foil looks great inside the sugar skull's eye sockets. Here's how to do it:
Cut 2 pieces of colored foil to fit inside the skull's eye sockets. You can approximate the size you'll need to cut and then trim it to fit, or you can use a ruler and measure.
Cut a single slit in the foil, from one edge to the center of the foil. When you place the foil inside the eye socket, the foil will overlap at the slit to form sort of a "cone-shape" inside the eye socket. The slit helps the foil fit inside the eye correctly.
Fill the eye socket with royal icing. You don't need to fill it too much - just enough to act as a glue for the foil. If you overfill the eye socket, the icing will ooze out when the foil is pressed into it.

4. Press the foil into the eye socket. Wipe off any excess icing that oozes through the slit.

5. (Below) Outline the edge of the foil with icing. This helps to glue the foil to the skull, and also hides any foil edges that may be jutting out.

6. You can choose to leave the colored foil as is, or decorate it further by adding icing on top.

7. To add rhinestones, sequins, etc, press the object into the icing before it dries.

You can also place colored foil in the skull's nose or mouth, or place a strip of foil on the sugar skull's forehead, which you can then write on with icing. It's traditional to write someone's name on the skull's forehead - either the recipient (if the skull will be given as a gift), or the name of the dead (if the skull will be placed on an altar).
Before you decorate the area around the sugar skull's eyes, it's a good idea to allow some time for the eyes to dry. This reduces the chance of smudging the decorations you've already done inside the eyes.
Here are several ideas for how you can decorate the area immediately surrounding the sugar skull's eyes:
Flames

Use icing to create "flames".

You can dab a row of icing on top of the eyes, and then outline those dabs with another color.

When the icing is still wet, you can press gems or other objects into the icing.
Glitter flames

Lay the skull back so that the front of the skull faces upwards. Dab icing above of the eyes, sprinkle glitter into the icing and let dry.
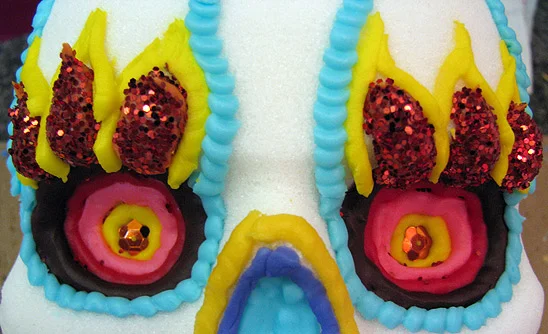
Once the icing is completely dry, you can use a soft brush to gently brush away the excess glitter. Outline the glitter designs with different colored icing.
Eyeglasses

Use icing to draw a pair of eyeglasses around the sugar skull's eyes.
Dots & Waves

Use colored icing to surround the eyes with dots and waves (or any other designs or patterns you can think of).
Icing & Sequins

Outline the sugar skull's eyes with different colored icing and press sequins into the wet icing.
Lines

Use icing to draw lines shooting out from the eyes.
Eyebrows

Use icing to draw eyebrows above the eyes. (Do you see how the orange icing is crumbled on the right side? That's because I touched it before it was completely dry. Remember not to do that!)
Here are several ways you can decorate your sugar skull's teeth and mouth:
Gems or rhinestones

Draw a line with icing where you want the mouth to go, and press rhinestones or gems into the wet icing for teeth.
Icing

Use different colored icing for each tooth.
Icing mouth with teeth

Use icing to draw a mouth with teeth.
Icing lips

Use icing to draw a mouth without teeth.
Girly icing lips

Use icing to draw lips.
Icing teeth

Use icing to draw a mouth, and dabs of different colored icing on top for teeth.
Now that you've decorated the eyes, nose and mouth of your sugar skull, here are a bunch of ideas for decorating the rest of the skull. You have a lot of creative freedom, so feel free to let loose and express yourself!
Rope Technique

You can spice up designs with this easy technique to make the icing look like a "rope", as in the light blue icing designs in the photo above:

Squeeze out a dab of icing, then press down as if wiping the tip of the icing bag on the skull. Quickly lift and move the tip of the icing bag just a millimeter or two, then repeat the process: squeeze out a dab of icing, press down, lift, move, squeeze, press, lift, move, etc.
It's actually pretty easy once you get the hang of it, and the effect is quite nice!
Gems, Sequins & Rhinestones

Another easy technique to decorate your sugar skulls is to dab a bit of icing on the sugar skull and then press a rhinestone or sequin into it, like the row of rhinestones on the above sugar skull and the examples below.
In addition to pressing the rhinestones flat into the icing, you can also press the rhinestones on their sides, which is what I did with the row of clear rhinestones at the top of the skull (above photo). Once the icing dries it holds the rhinestones in place, but until then you'll need to keep an eye on it to make sure the rhinestones don't fall over.
Stripes


Making stripes with icing is an easy way to fill in space. Above left, stripes are drawn to fill in the bottom part of the back of the skull. Above right, stripes are drawn as hair on top of the skull's head, and then embedded with sequins.
Embed Beads

Decorating Sugar Skulls with Beads

You can embed beads in your icing, for instance by dropping the beads in a row as shown above right, or piling them on in one spot as shown above left.
Flowers with icing
Here are some examples of how you can draw flowers with icing. You can put flowers anywhere on the skull, such as the forehead, cheeks, chin, back, etc.


Mandalas with icing


The photos above are an example of how you can draw a mandala on your skull with icing. On the left, you can see a circle of pink icing embedded with a ring of sequins around a rhinestone. I then added orange and yellow petals with sequins in the middle of each petal. Finally, I outlined the petals with light purple icing.
The photo to the right shows an example of a simple mandala drawn with icing on the back of the sugar skull.
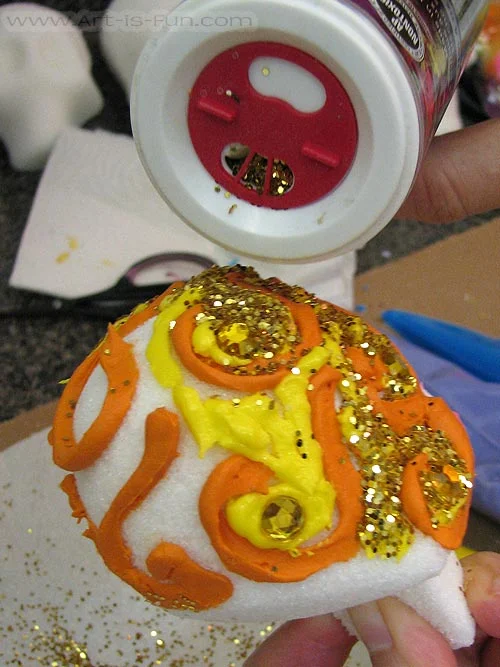
Glitter hair
Below, you can see how I drew some curls with orange icing, which I let dry before filling in the gaps with yellow icing. I sprinkled some gold glitter onto the wet yellow icing, working on a section at a time, to ensure that the icing was wet when I applied the glitter.


Ribbon hair

Cute Sugar Skull with Ribbon Hair
You can attach pieces of ribbon to your skull, gluing it down with icing. In the sugar skull above, I squeezed purple icing on top of the skull's head and pressed several short pieces of curling ribbon into the icing. Then to help glue the pieces down, I squeezed a dab of icing on the top end of the ribbons and placed a rhinestone into the icing, then set it aside to dry.
Dabs of icing hair
Another way to create hair is to apply dabs of icing in different colors all over the top, sides and back of the skull.


Feathers
Colorful fake feathers can add a lot of pizazz to your sugar skulls. The feathers can be used as hair or as decorations.


The photos above show a sugar skull who has feathers for hair. The feathers were pressed into dabs of icing, which you can see pointed out in the photo on the right.

A dramatic way to position feathers on the sugar skull is to have the feathers sticking straight out of the skull, as demonstrated in the photo on the right.
To do this, I squeezed a dab of icing in between the 2 halves of the skull where there was a tiny gap between the front and the back, and wedged the end of the feather into the gap.
Then I added more icing around the feather, to help secure it. While the icing is still wet, the feather can fall out or fall to the side, so it's important to keep the feather in place until the icing has mostly set. After the icing has hardened, it will easily keep the feather in place.
If you want to insert very large feathers or even real flowers into the sugar skull, you can implant them when you're making the sugar skull.
TIPS on how to decorate sugar skulls
If you don't want to mix your own icing, you can buy pre-mixed colored icing, but stay away from anything marked as "gel" or "icing gel", because it will never harden. I learned this the hard way!
You don't need glue because the icing acts as a glue.
When you're done decorating your sugar skulls, handle them very carefully until they've had at least 24 hours to completely harden. Although the icing may feel dry to the touch after just 30 minutes or a couple hours, the icing hasn't completely dried all the way through and may still be damp underneath, so if you press too hard the icing might cave in.
Instead of starting with a white sugar skull, you can create a colored skull by mixing food coloring into the water before you add it to the sugar and meringue powder.
Don't eat the sugar skulls, especially if you decorate it with royal icing, which could break your teeth if you bite into it!
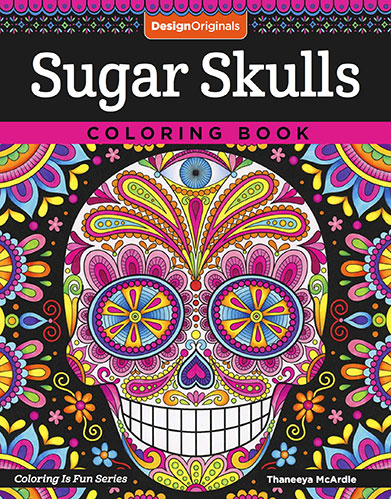
If you like coloring, check out my Day of the Dead-themed coloring books below!
Day of the Dead Coloring Book

Day of the Dead Coloring Book
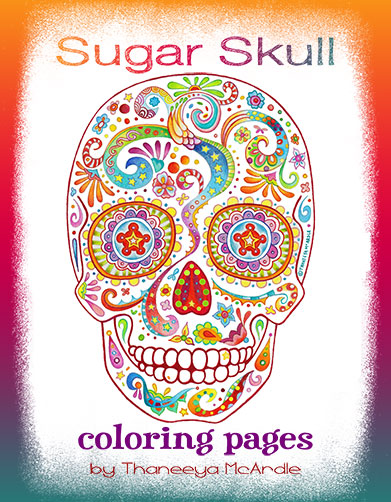
Sugar Skull Coloring Pages
As an Amazon Associate I earn from qualifying purchases.


