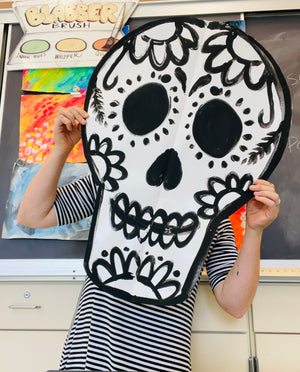

I absolutely love to teach my students about the Mexican holiday, Dia de los Muertos , also known as Day of the Dead. Dia Day los Muertos is a festive holiday for families to pay tribute and respects to their loved ones who have passed. During these festivities families decorate their loved ones graves, or ofrendas in colorful decorations, flowers and their loved ones favorite foods. One of the most popular decorations and foods of Dia de los Muertos are sugar skulls. Sugar skulls (or calaveras) are beautifully decorated sugar candies with colorful icing florals, swirls and more. This month during Hispanic heritage month, I decided to have my students creative giant calaveras using symmetry and printing!
Materials Required:
-
Oversized white paper (I used 18 x 24 posterboard)
-
Black tempera paint
-
Large paint brushes
To create our sugar skulls, I decided to go big and make them on large paper. The reason I chose to do them large was because I wanted my students to be able to paint the decorations of the sugar skull, and if their worked too small then the lines and shapes they would paint would perhaps not be as crisp as they could be.
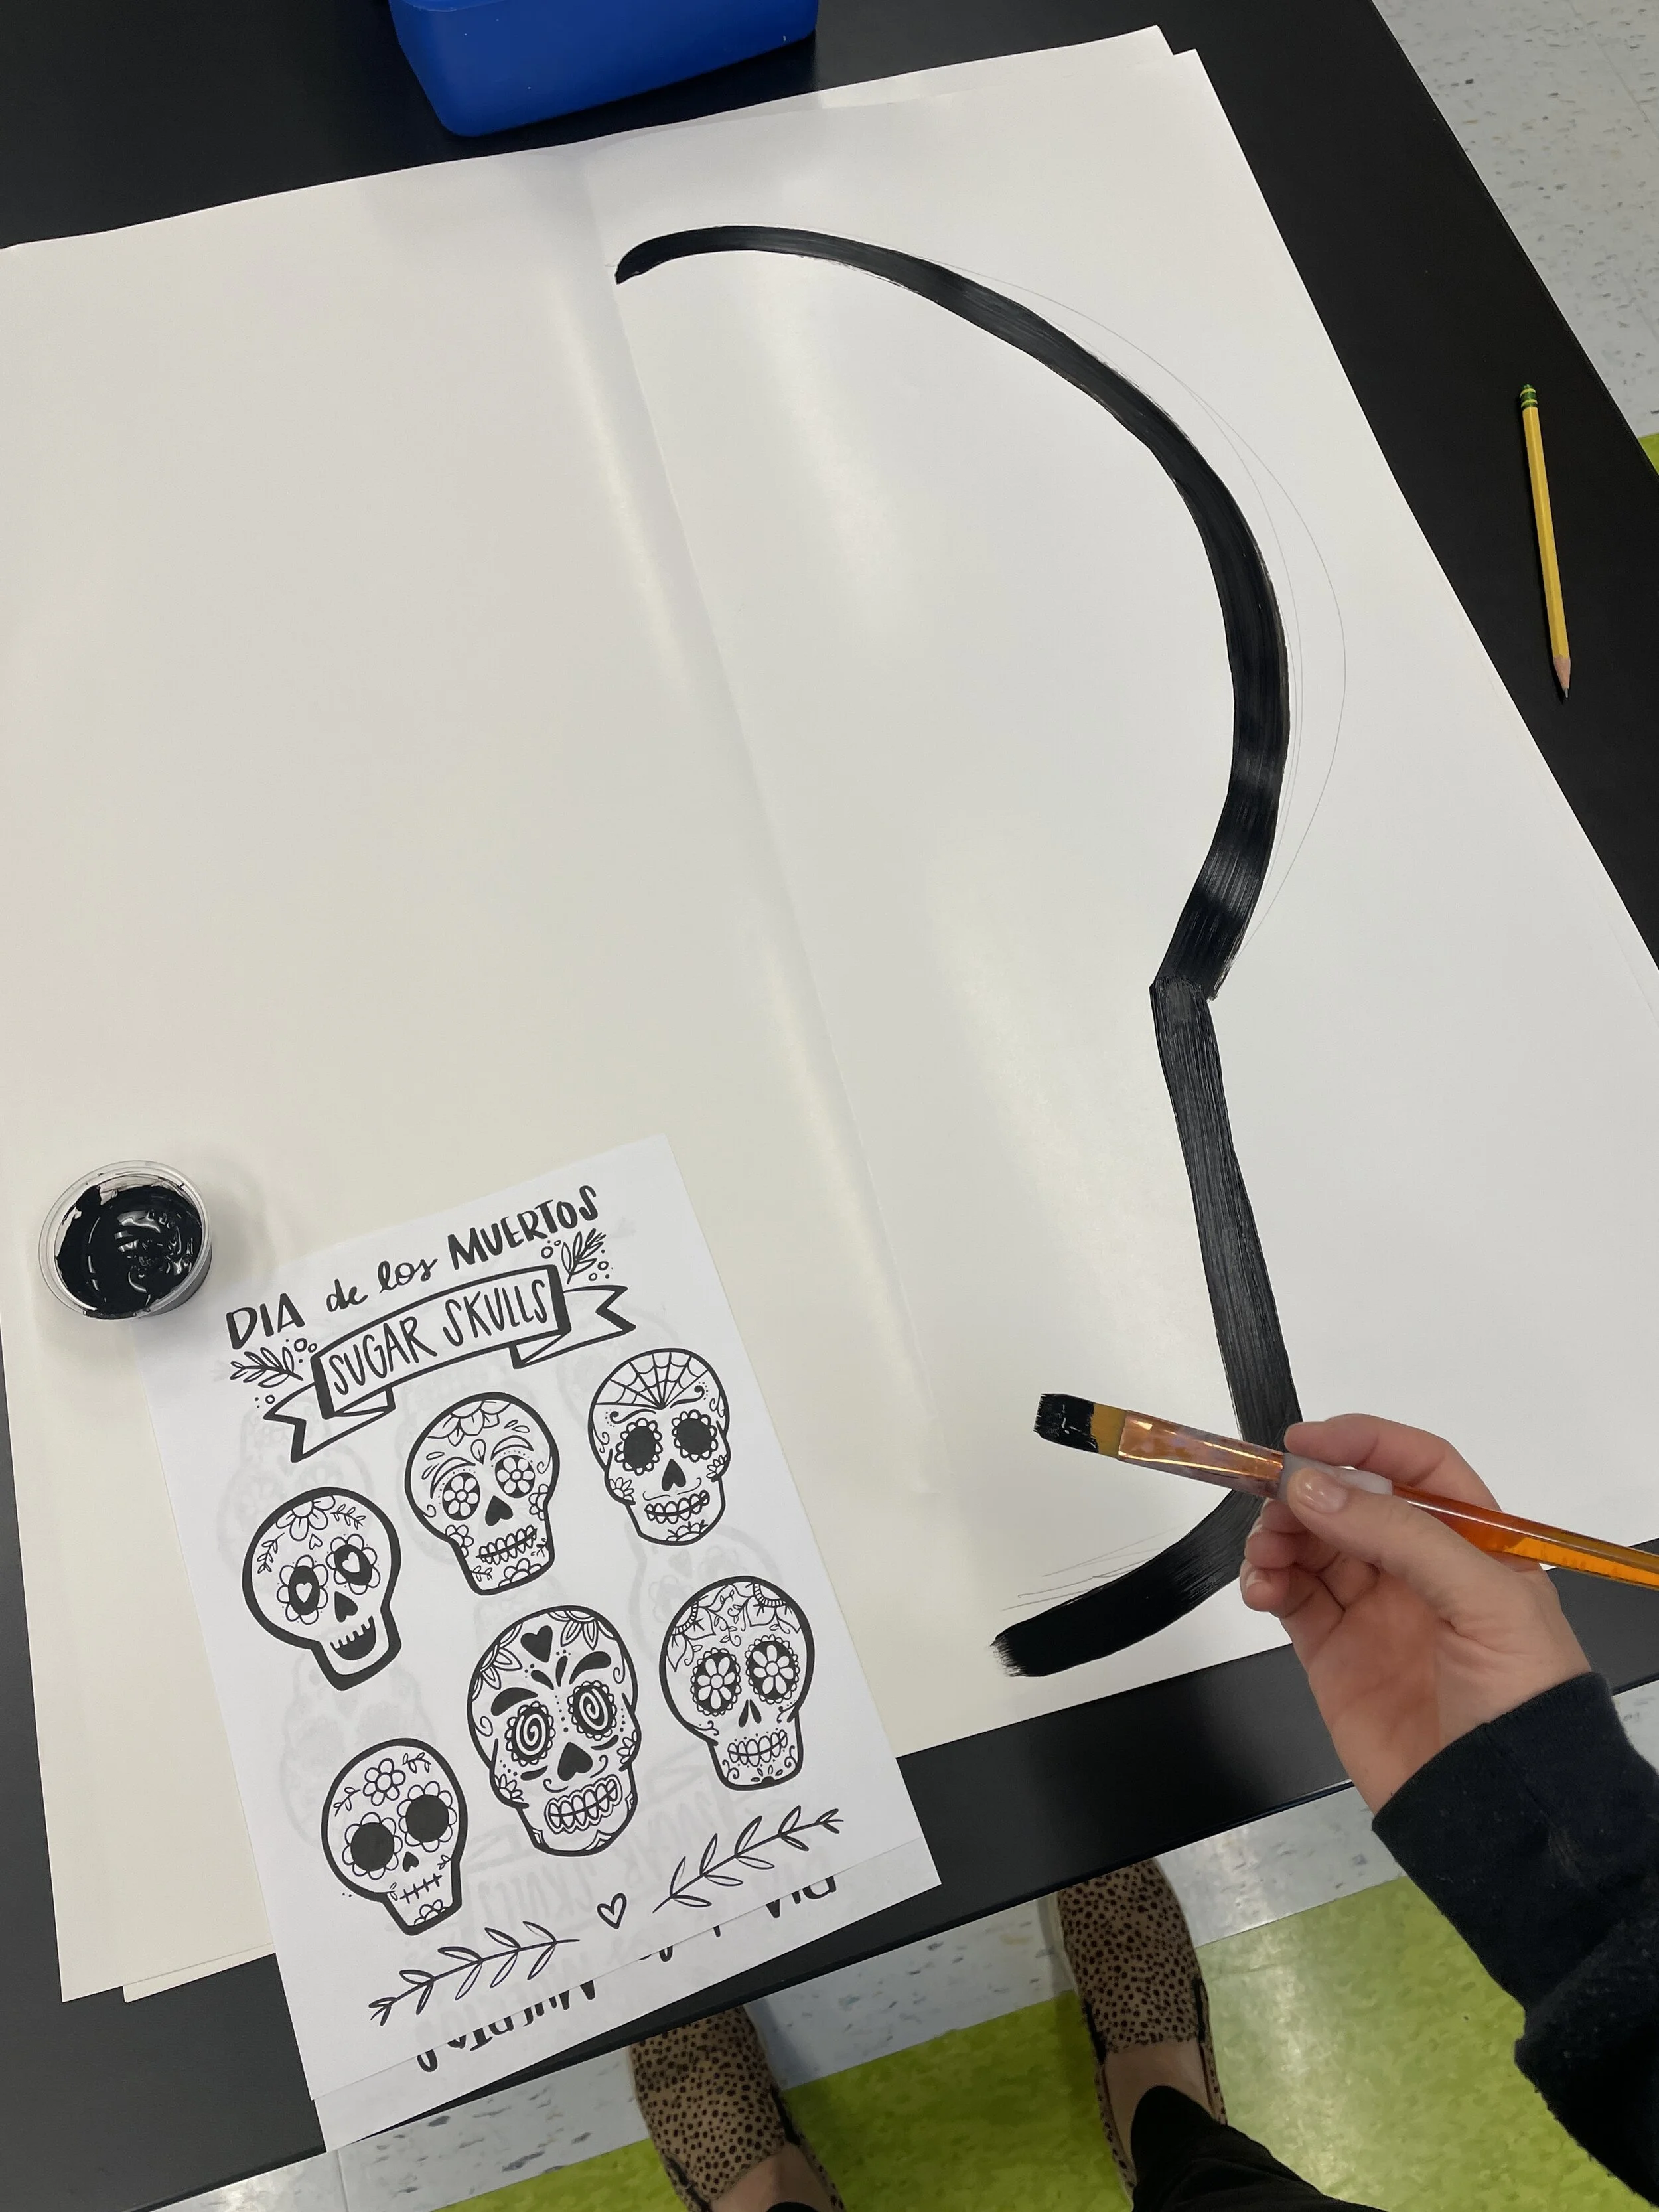
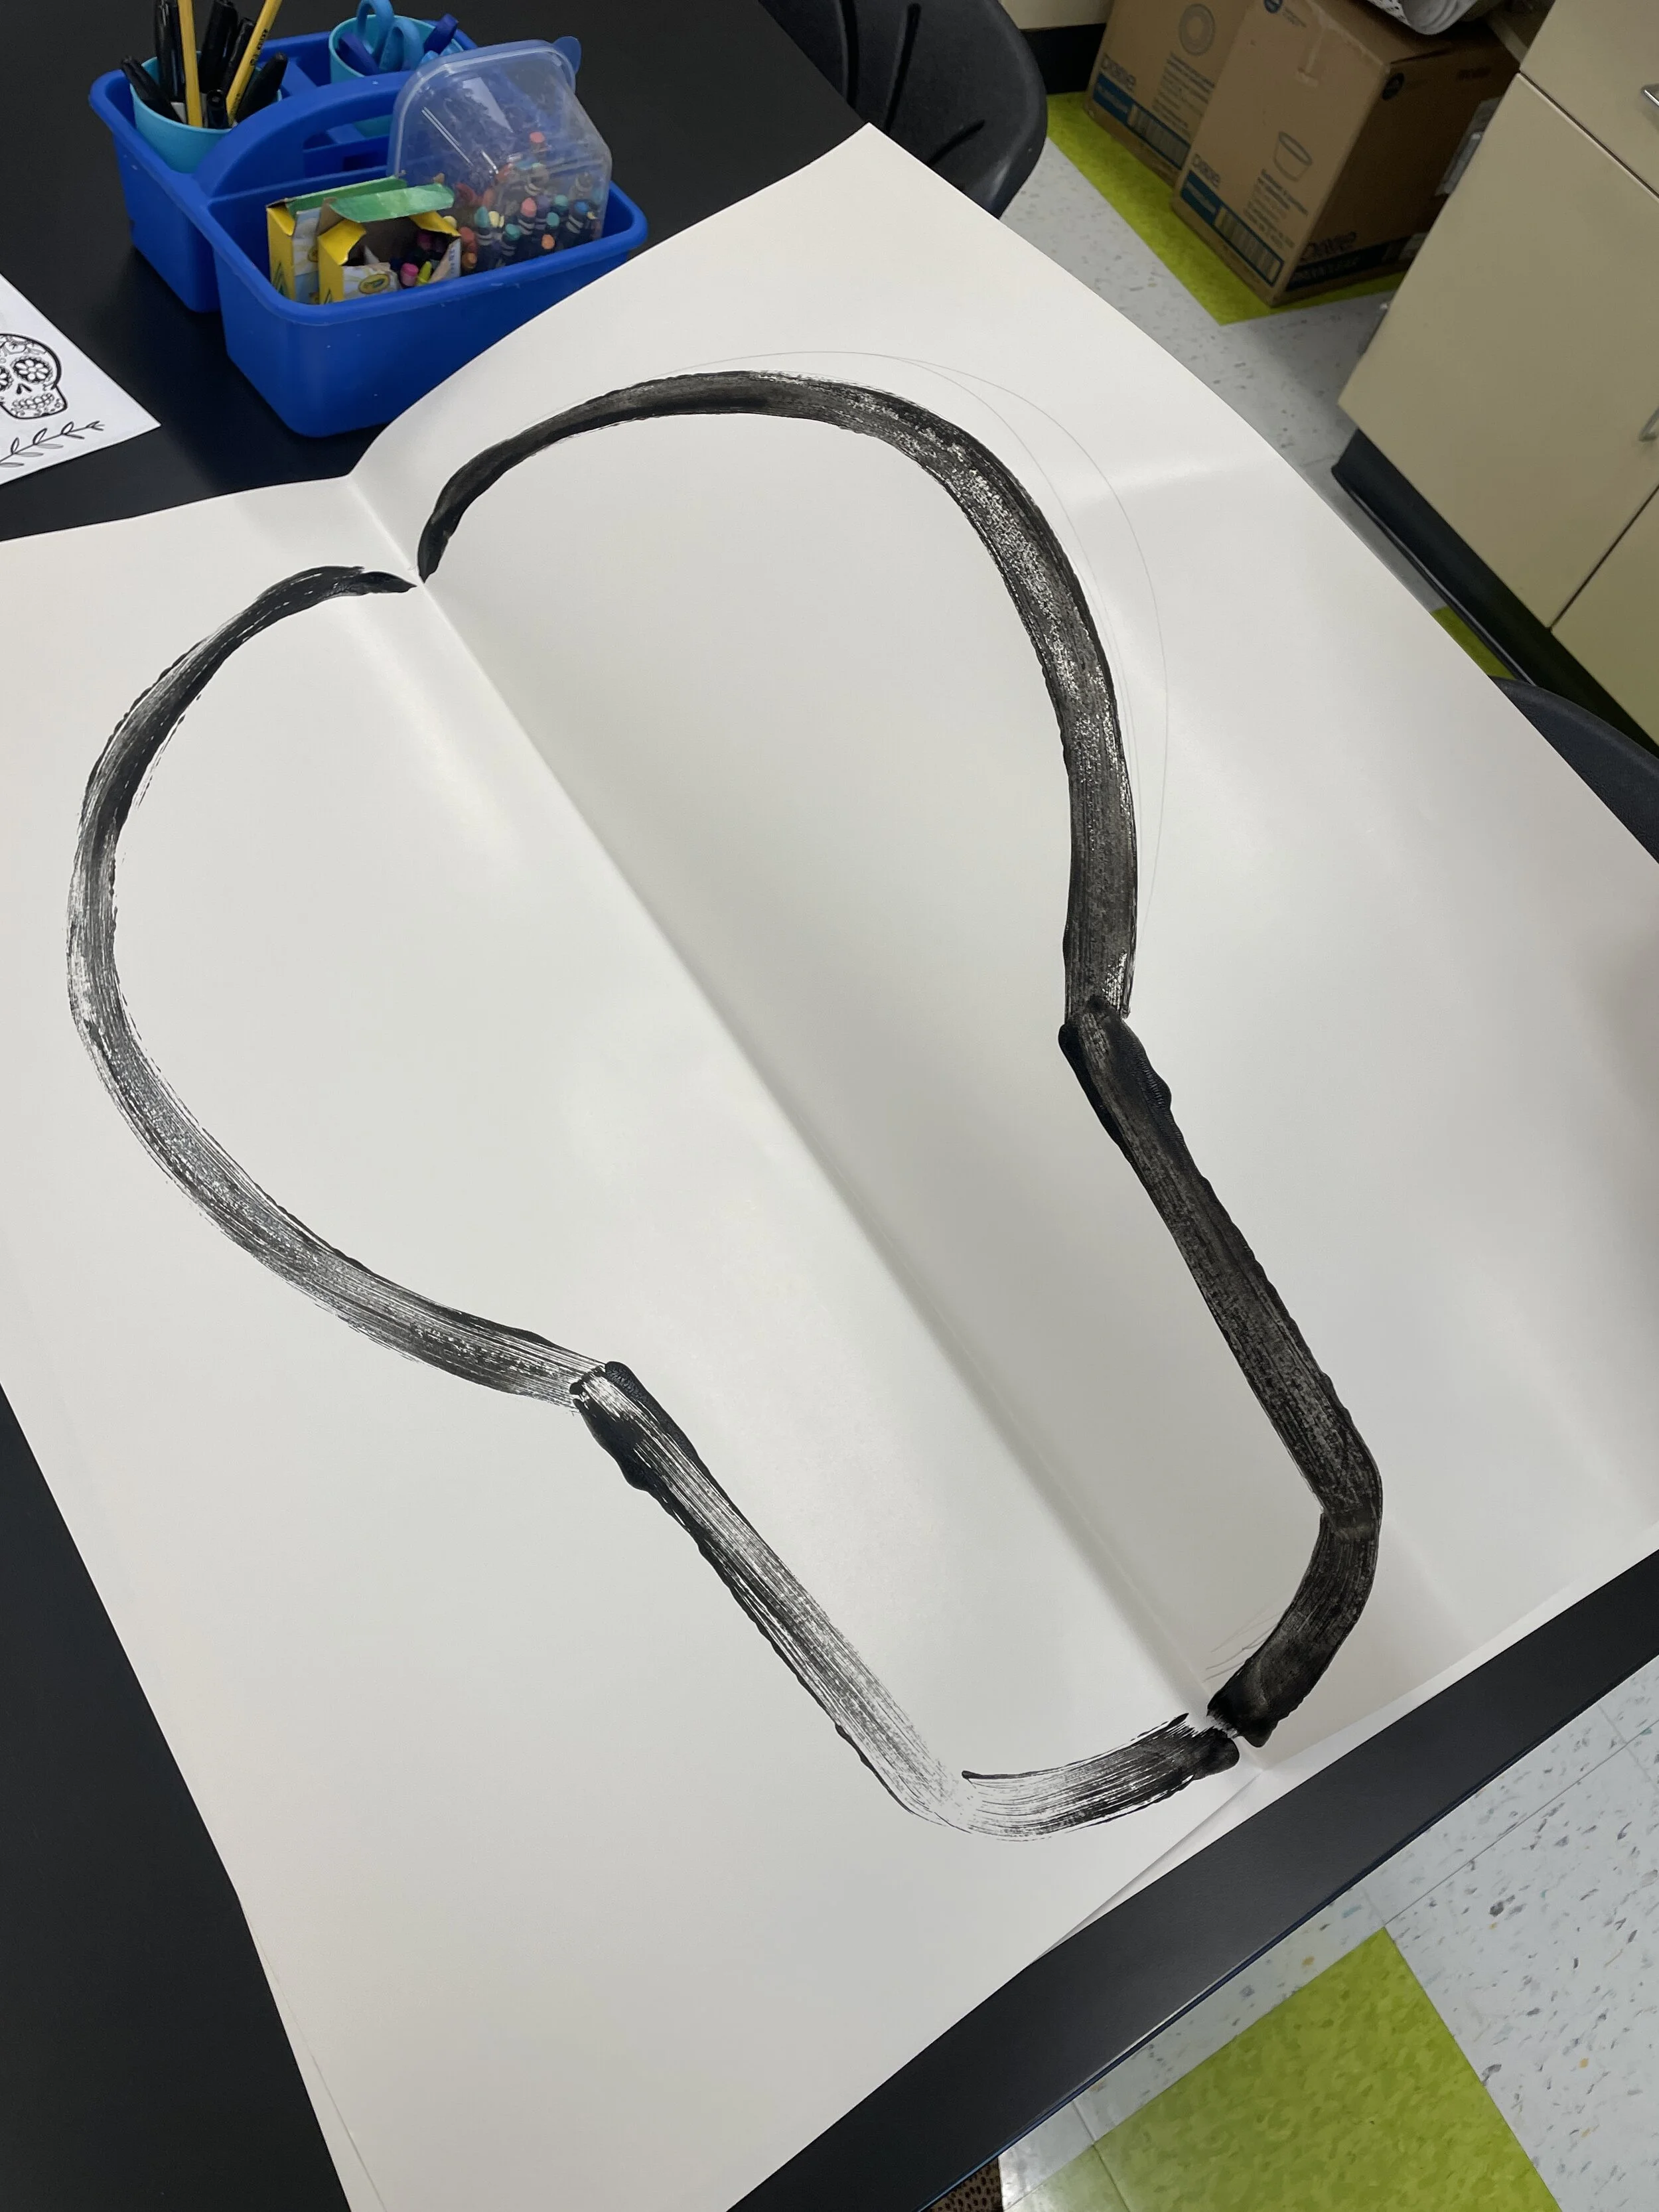
Step 1: Fold paper vertically
Fold your paper vertically. This is important because we will be talking about a line of symmetry, and this fold will act as that.
Step 2: Lightly sketch half of skull
Depending on the age and ability of your students, you may want to help them out with this first step by lightly drawing half of a sugar skull on the right side of the paper. I chose to try this my adapted students and pre-drew this line, but when I did it with my students who were 3rd and up they were able to draw the skull shape themselves.
Step 3: Have student paint on line & fold
Using black tempera paint, have students quickly paint along the skull line and then fold the paper in half and rub. The first line painted will create a print on the other side making a perfectly symmetrical skull shape.

Step 4: Continue painting and folding each feature
Using my free sugar skulls idea sheet (that you can download here) paint an oval for the eye and fold, half of an upside down heart for the nose and fold, etc.

Add decorations around the eyes, cheeks etc. until you are happy with your sugar skull.

Feel free to touch up any areas that did not transfer well with your black paint.

Step 5: Add color (paint or color) to your sugar skull designs and cut out the skull

If you're looking for some great books to pair with this project here are a few of my favorites below!


There are so many ways to embellish and enhance your sugar skulls. Head to part 2 of this lesson where we add fluorescent paint and BLACK LIGHTS!
1 comment
I would love to know the best way to adapted this for students that aren’t going to follow a drawn line? Thanks!